
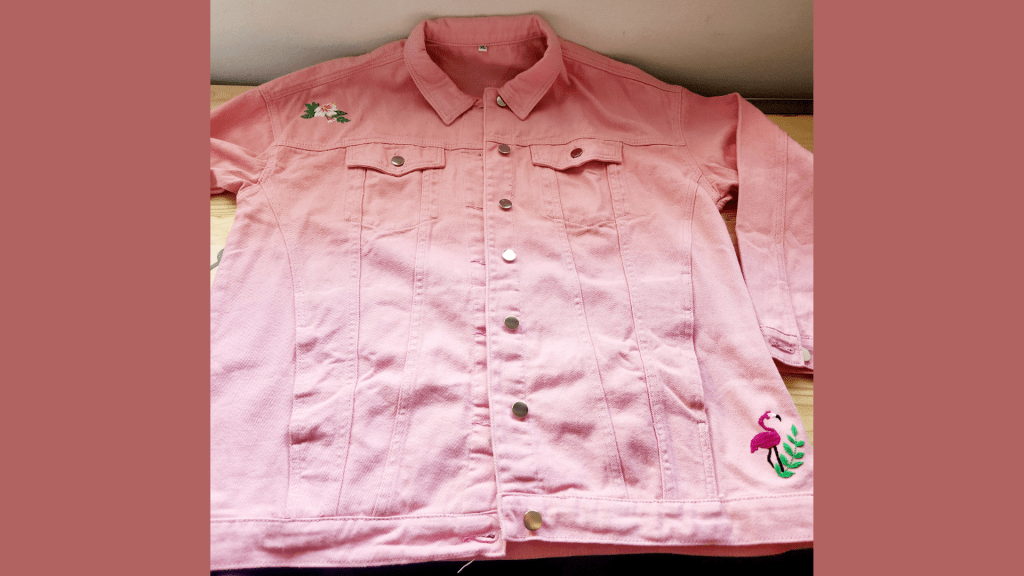
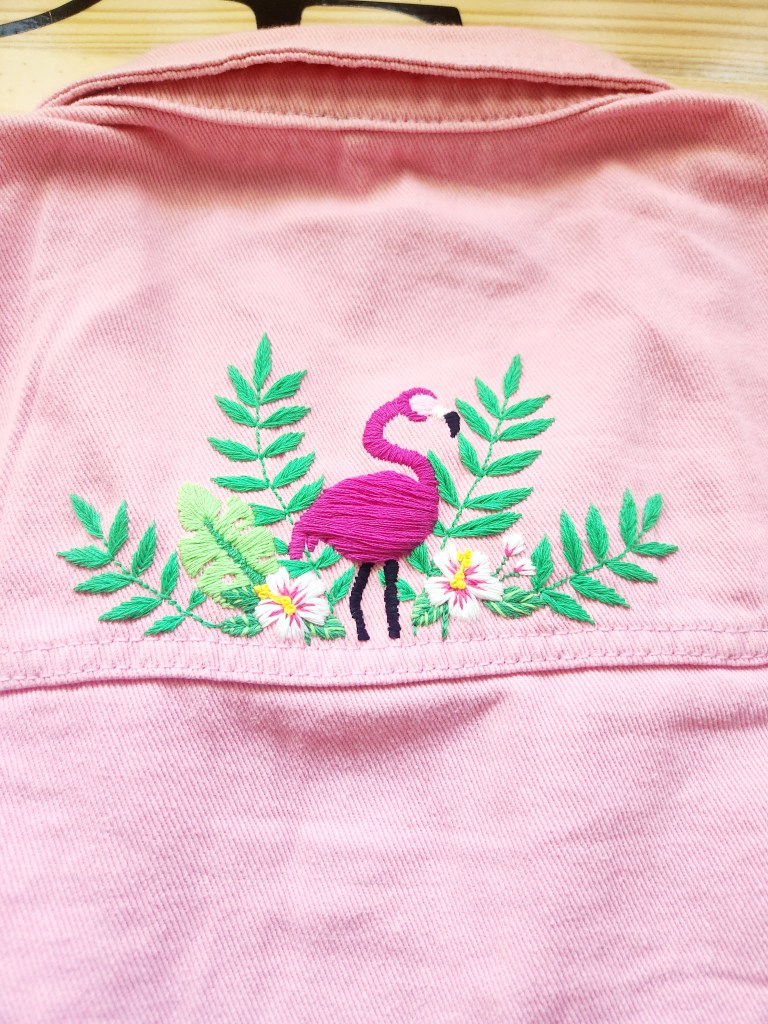
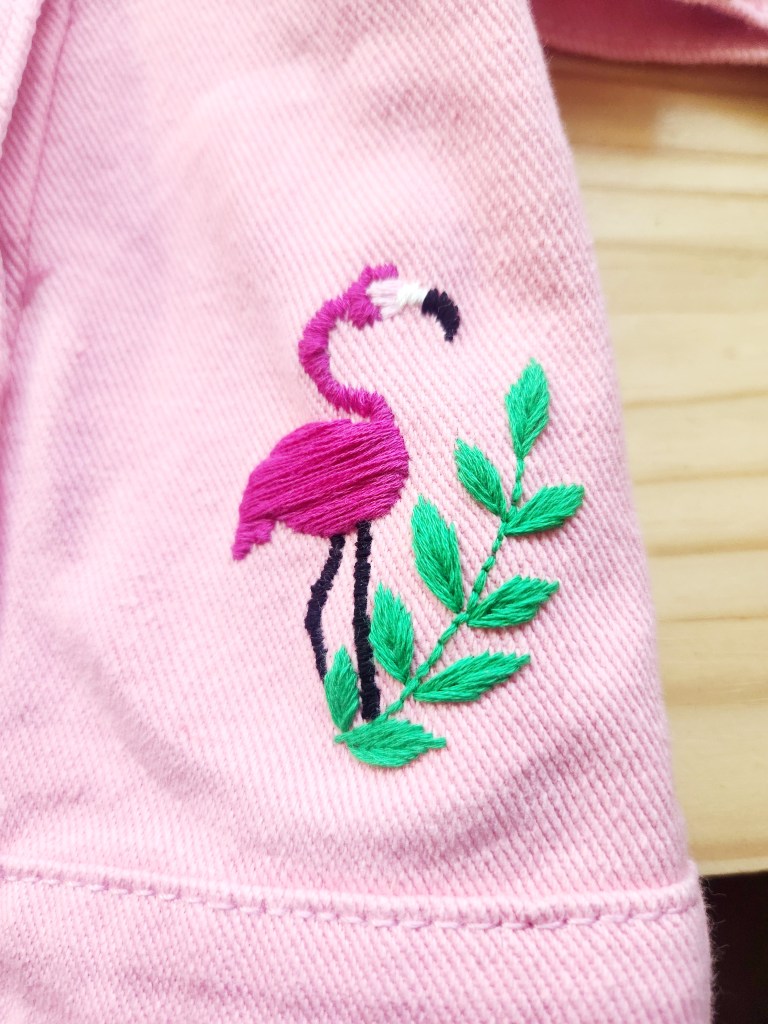
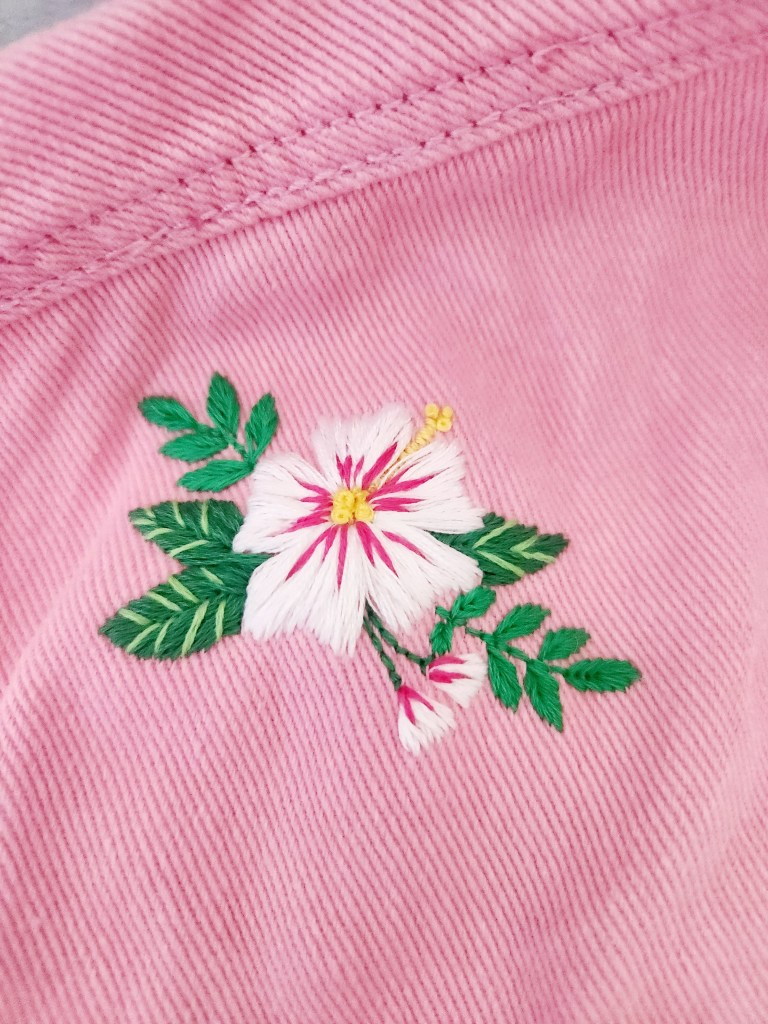
Aloha to all the flamingo lovers out there! This is a hand embroidered denim jacket with tropical accents and flamingo flare. This jacket was made for one of our aunts birthdays. If you couldn’t tell she’s just wild about flamingos! So obviously that’s the theme we chose to run with.
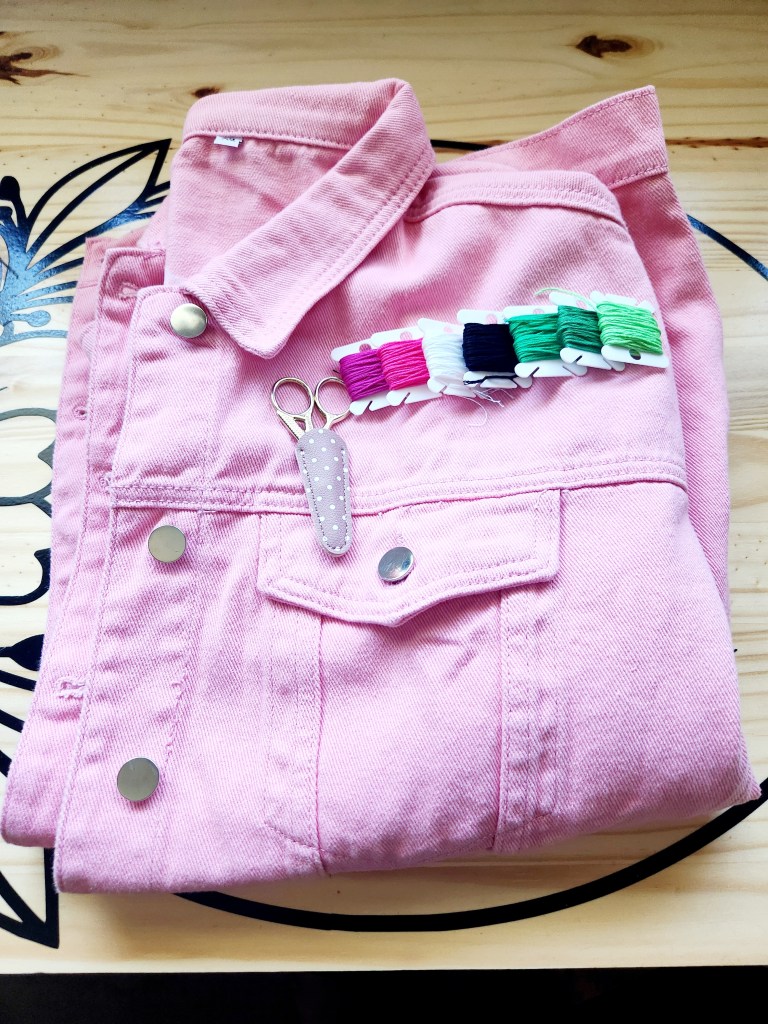
Step 1: Gather your supplies:
-Whatever item of clothing your using ( We purchased ours on Amazon) We went with a pretty pink. We wanted it to be as vibrant as her.
-Embroidery floss
-Embroidery needles
-Embroidery hoops
-Scissors
-Iron
-Iron-on infusible interfacing
-Drawing utensil ( We used heat erase pens… these are so cool! We purchased ours on Amazon)
Step 2: Select your theme. We searched Pinterest for flamingo embroidery design ideas. There is so much inspiration to be found!
Step 3: Using our heat erase pens ( purchased on Amazon) we drew the design on the jacket. This took a few trys to get it perfect ( luckily these pens erase like magic with a heat gun or hair dryer).
Step 4: Next we chose our embroidery floss colors. We knew that we needed to choose colors that would pop on the pink jacket.
Step 5. Put your drawings in an embroidery hoop. They have all different sizes of embroidery hoops. Pick the one that fits your project. Make sure it’s larger than your design so that it’s easier to embroider.
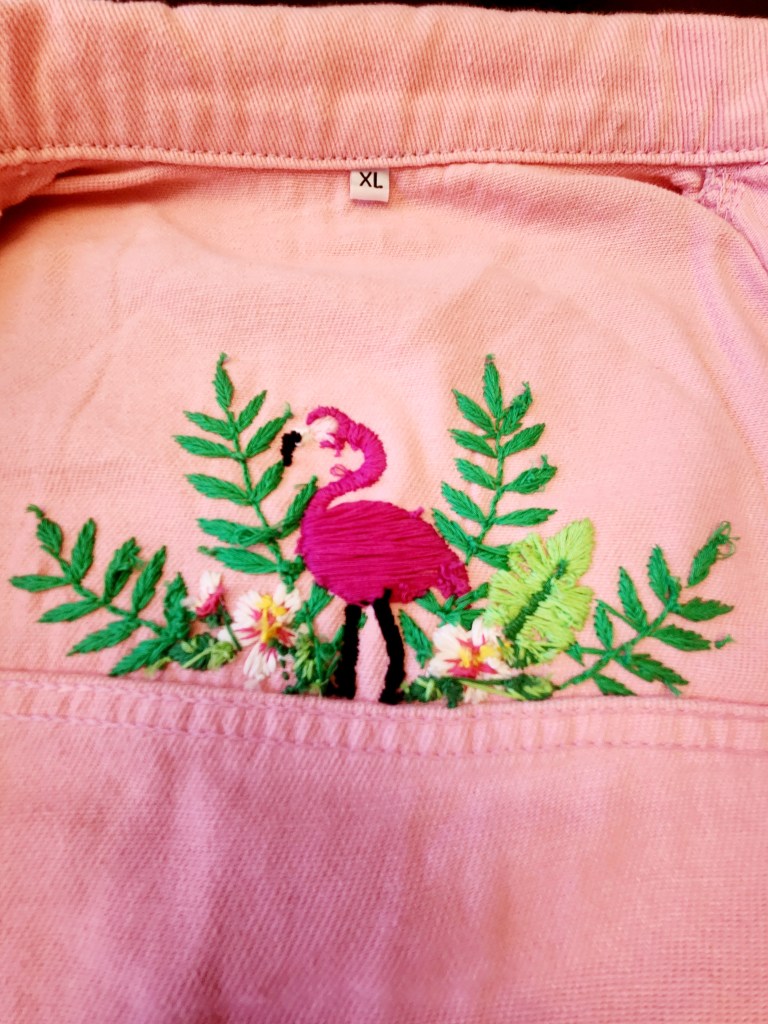
Step 6. Now your ready to get stitching! This will take some time. Put on some background noise ( perhaps some bingable TV or your favorite tunes) and get to embroidering! Take your time and really have fun with it. Personally, we love projects that are easy to do while relaxing on the couch. This is great for that!
Step 7. Once you’ve finished your embroidery it’s time to erase any visible pen. Use a heat gun or hair dryer. We’ve found that the heat gun works a little better for this because it gets hotter than the hair dryer. But, either will work.
(Just a fyi, this is an image of the back. It’s always a bit ugly but the interfacing helps blur the ugly bits.)
Step 8: Now it’s time to protect your work by using the iron-on interfacing. This will ensure that your hard work stays put when it’s washed. Cut your interfacing ( make sure that it’s large enough to cover your embroidery. We used a pen to draw a rough outline around the interfacing). Then you cut it out.
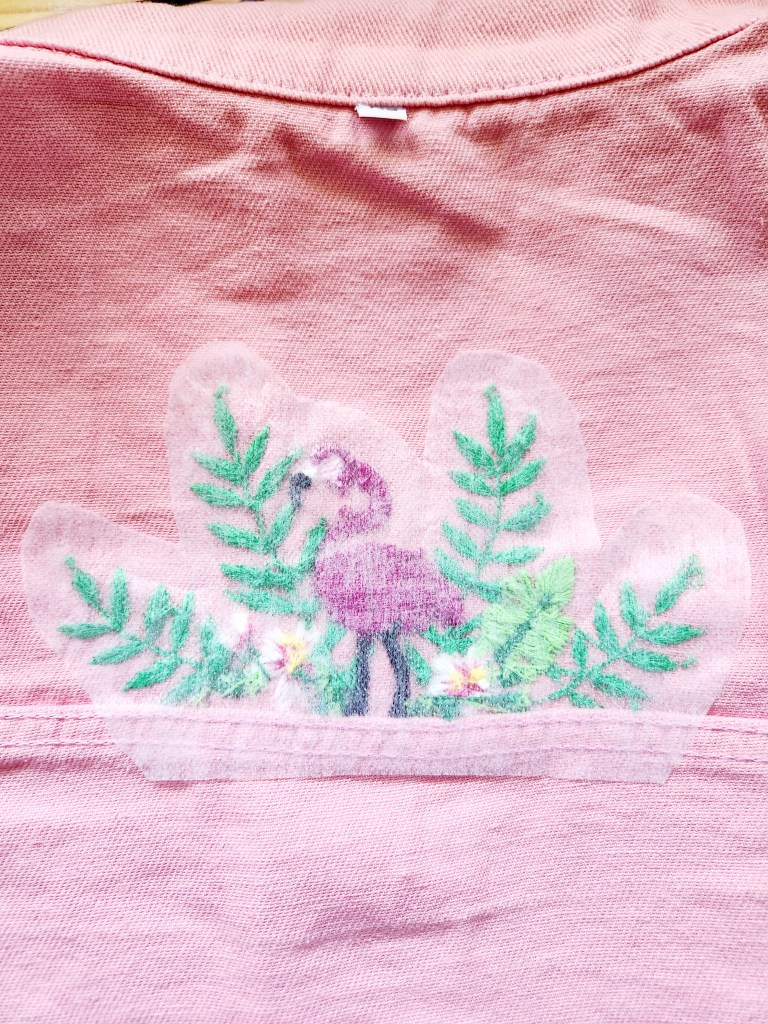
Step 9: Iron on the interfacing (rough side down) just follow the directions on the package. This took some time because we wanted to make sure it wasn’t going anywhere. We made sure to really get the edges adhered down.

Now you have a beautiful hand embroidered jacket that is one of a kind! It will be the perfect gift for a flamazing fun loving aunt!
This project was so satisfying. It took a little extra time but it was well worth it. There are so many possibilities within this project. Embroidered wear-ables is so versatile! You could do hats, jeans, tops or even tennis shoes! Happy embroidering!


Leave a comment