
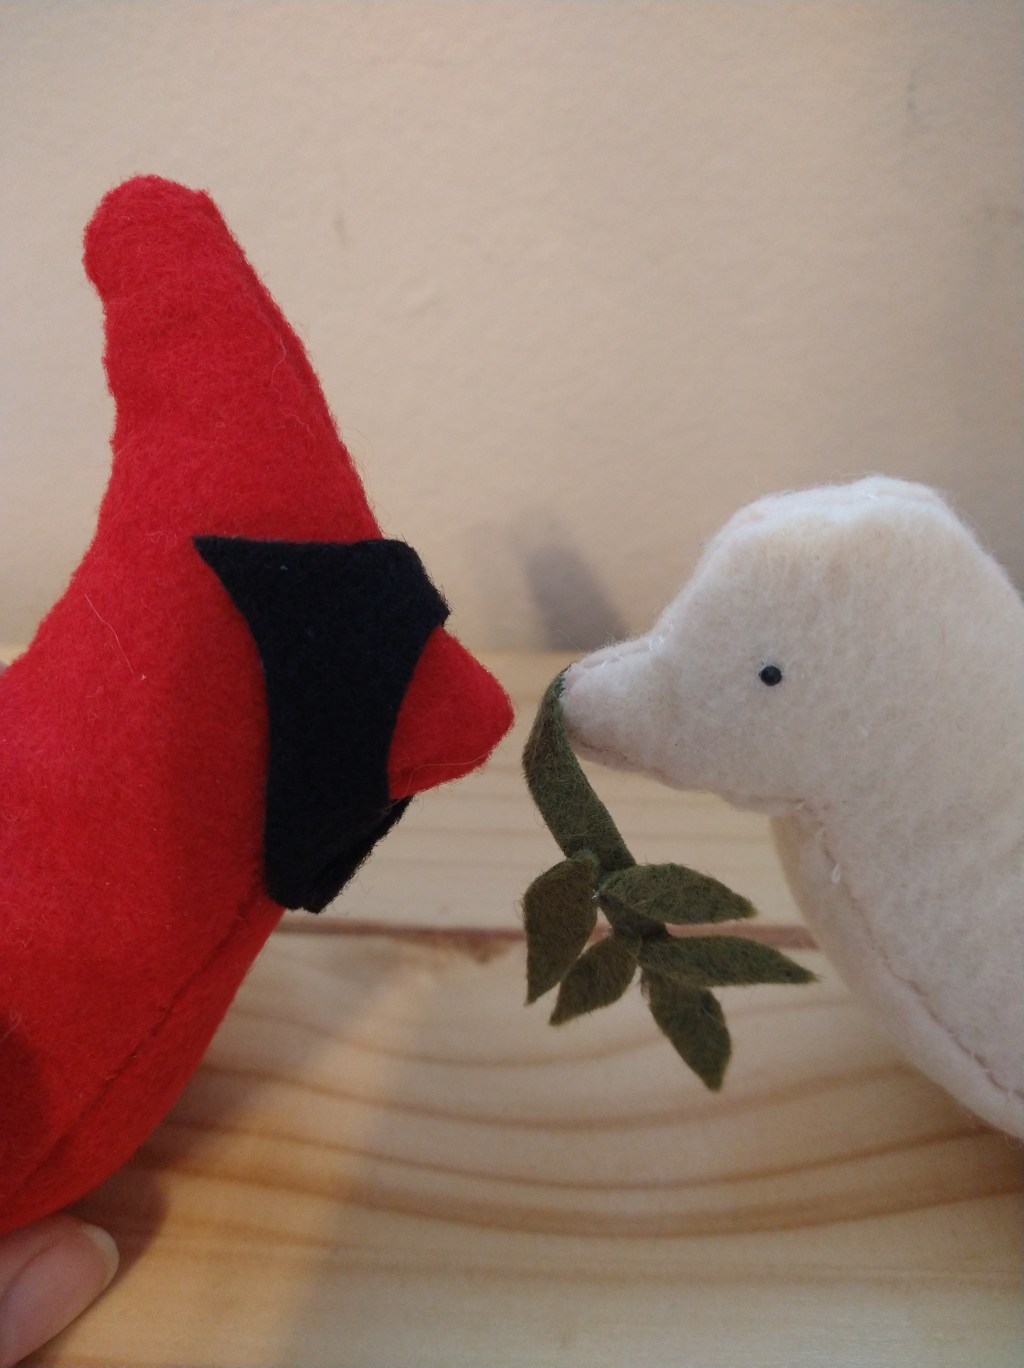
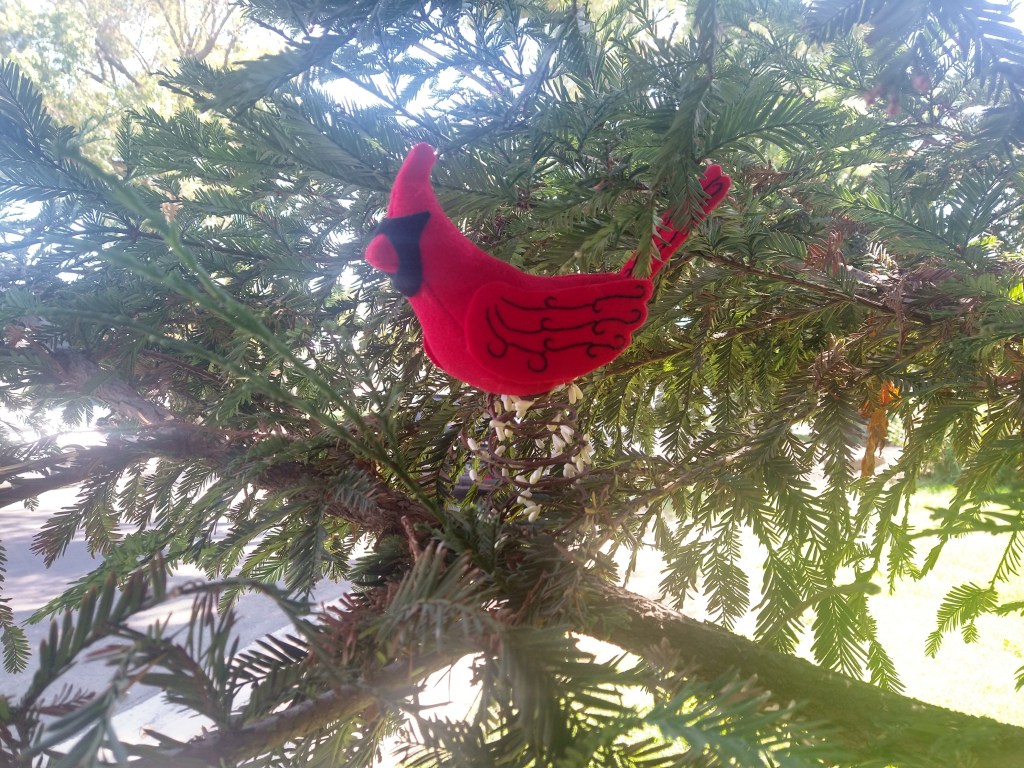
If you’re looking for a sweet, more natural tree topper this holiday season, what better option than a bird? We present you with two absolutely adorable bird tree topper options, a dove and a cardinal. Both of these were made for smaller trees but can easily be scaled up. These sweet little birds are primarily made of felt which makes them easy and affordable. We added some very simple embroidery to take it to the next level but is optional. This happened to be one of those beautiful times where we found all the necessary supplies in our current craft stash (we prefer to think of it as a stash rather than a hoard, just don’t ask the husbands).
Step 1: Gather Supplies
Felt (a few sheets or 1/4 yard in whatever colors you’d like)
Stuffing ( we used polyfil but old pillow stuffing works perfectly.)
Cereal boxes ( you can buy chip board but why not recycle some thin cardboard instead.)
Needle and thread in a matching color
Fabric glue
Hot glue gun
Sturdy wire and branch/vine looking ribbon ( We used an old wire hanger)*
Jewel or bead**
Embroidery thread ( optional)
*Only needed for cardinal.
** Only needed for the dove.
Step 2: Cutting out the felt
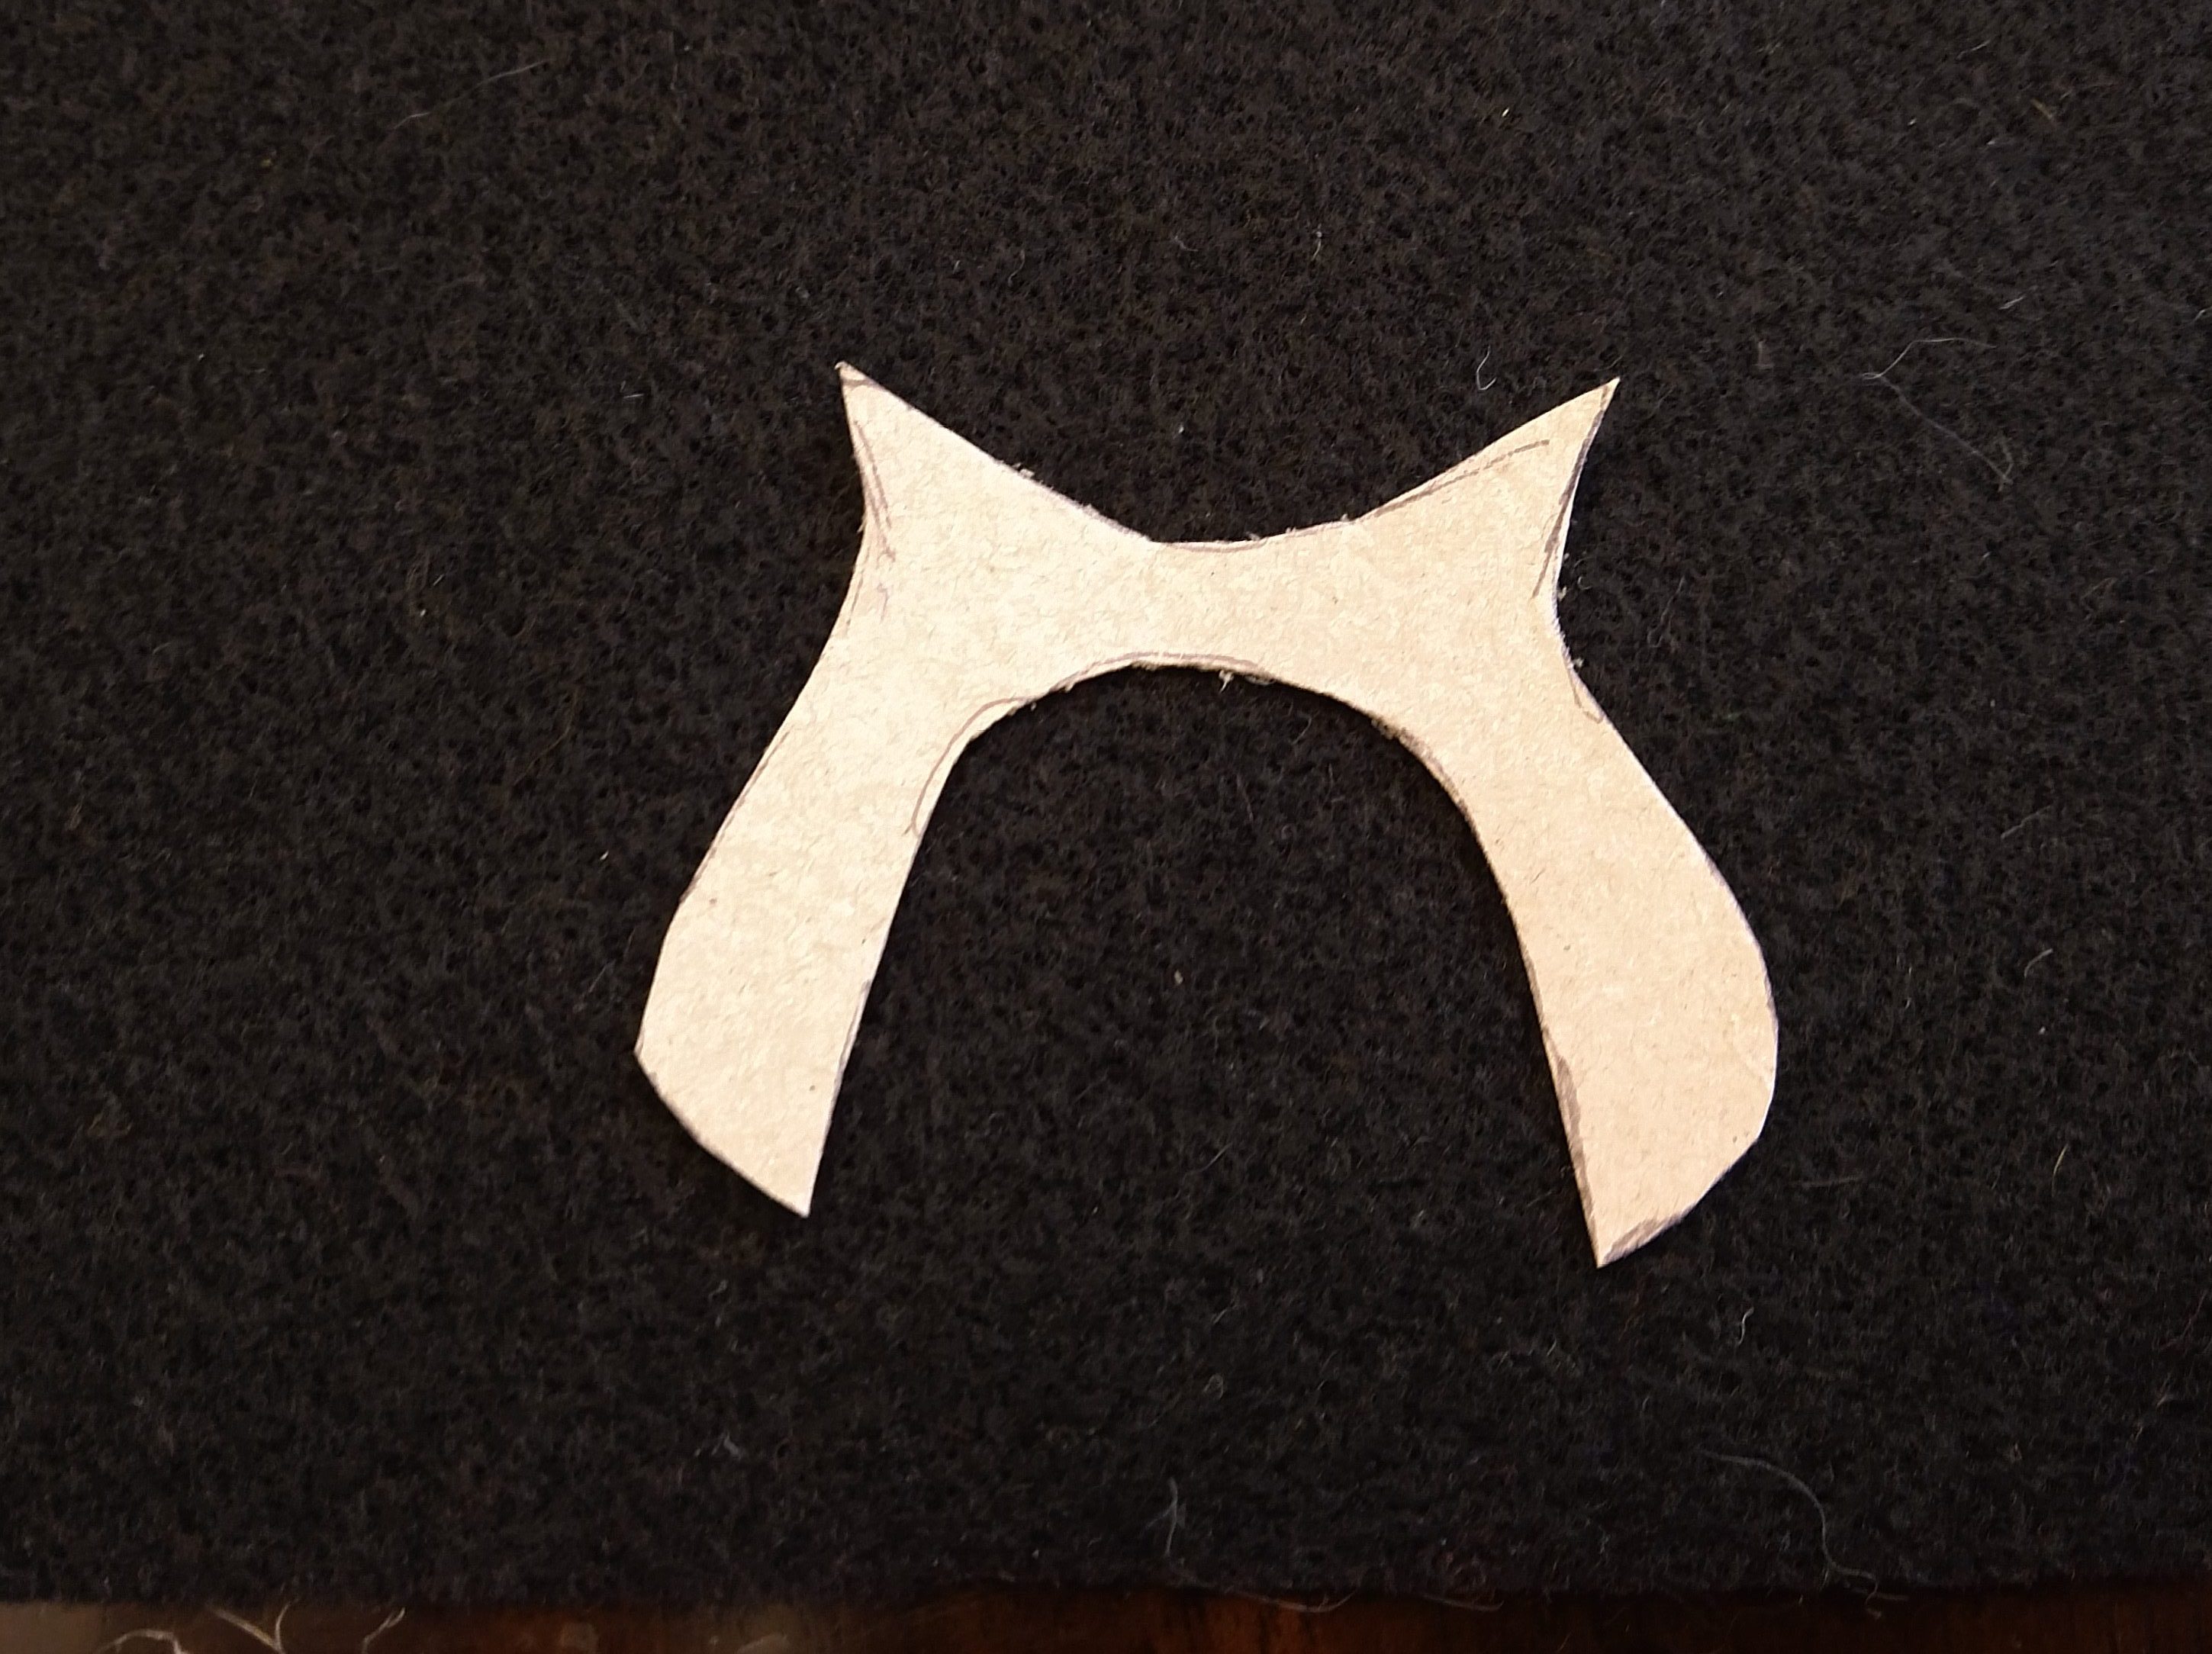
For this step we actually made our own stencils using cereal boxes ( well there may have been cheez it boxes too) to make sure we had consistent cuts and so our sizing would work.
This was surprisingly easy, except for the belly piece. It’s going to be longer then the side piece to accommodate for the curve of the belly. You can take the stencil of the side piece and roll it along to see how long the belly needs to be to go from the tip of the tail to the tip of the beak. Also in doing the wings, if you want them stiff like the doves then you’ll need to accommodate the felt so it will wrap around the cardboard pieces. This same idea was used on the cardinals tail so it will stick out without flopping over.
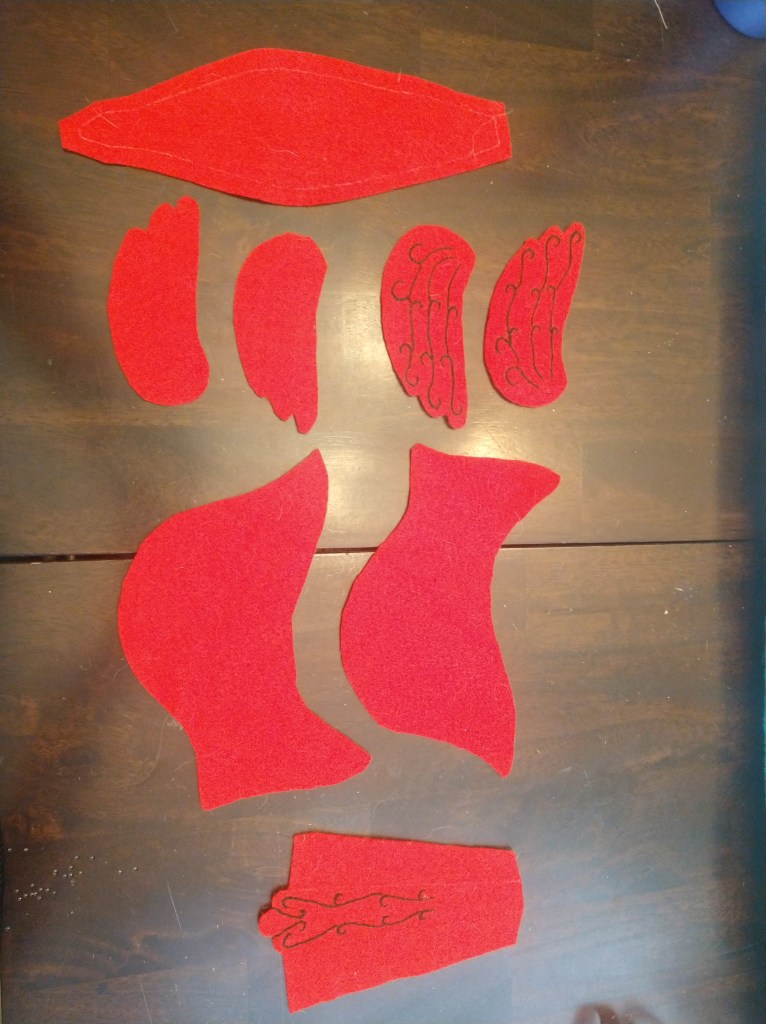
The dove needs 2 sides, 1 belly, 2 wings, cone and small twig and leaves.
The cardinal needs 2 sides, 1 belly, 2 wings, 2 backs of the wings, a tail and his little black face mask.
We also cut out the cardboard to stiffen the doves wings and the cardinals tail. The cardboard should be the size you want the end result to be while the felt should be big enough to cover the cardboard.
Step 3: Embroidery (Optional)
We each took our time to make our birds a little extra special and added some simple embroidery. The dove got its wings done in a cute leaf / vine pattern. The cardinal some festive swirls on the wings and along the tail. This isn’t necessary but just look how cute they came out. Keep in mind that your wings will be opposite directions of each other as they go on opposite sides of the bird. (Don’t ask how many times a wing had to be redone.)
If doing the cardinal wings make sure to cut and extra piece of felt to glue to the back of the wings to cover up the ugly embroidery back.
Step 4: Sewing your bird
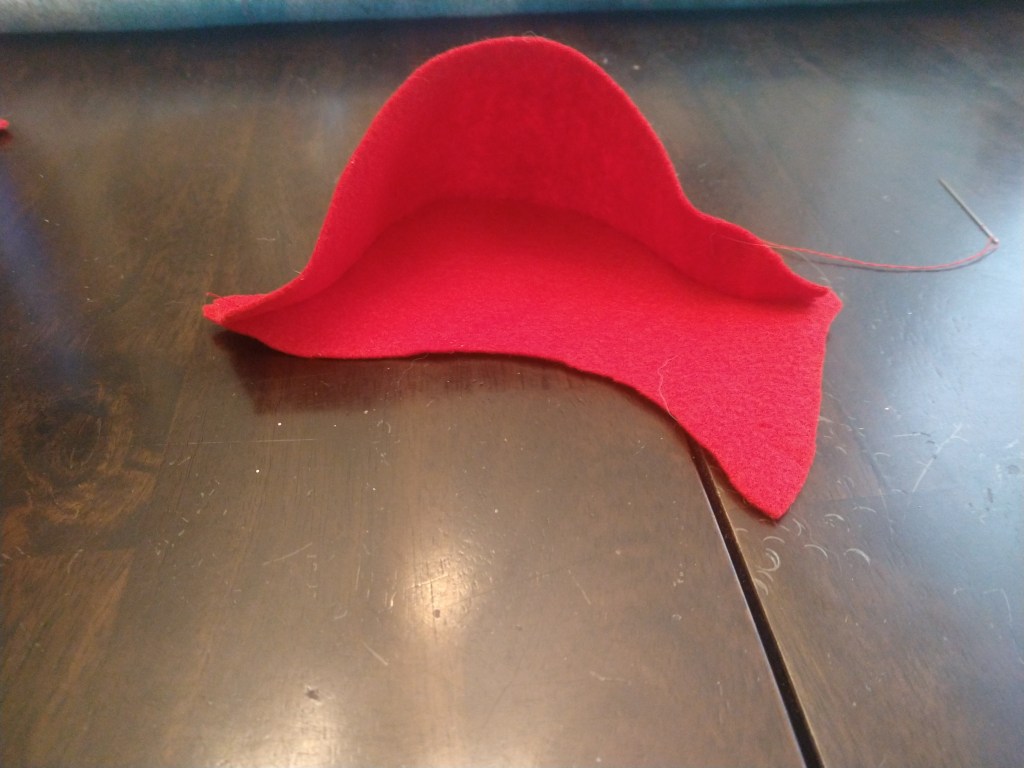
Now we get to sew up our little guys so they start to take shape. This is a bit of the challenging part but once you get going it’ll work out. The best way we found was to start with one side and the bottom. Sew the bottom piece onto the bottom part of the bird side starting at nose or tail with pretty sides together. Keep in mind what shape it will eventually curve into and that will help guide you. Also make sure your stitches are rather short. If they are too long it won’t easily smooth out.
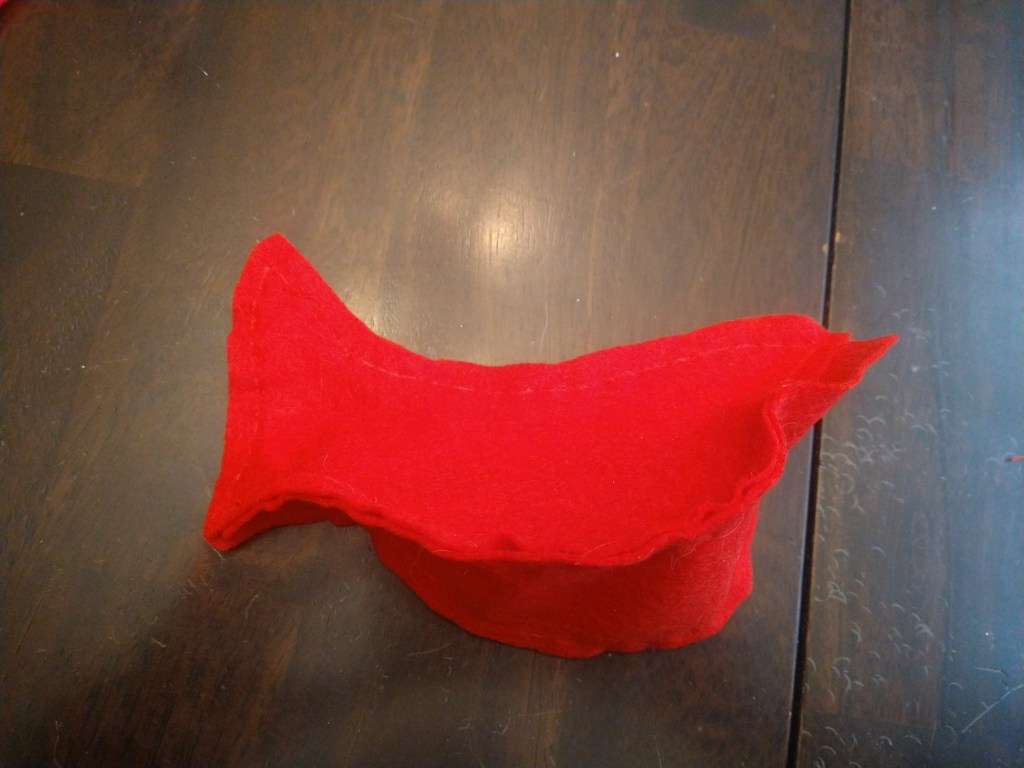
Next attach the two side pieces together along the top of the bird. Finally sew the bottom pieces to the second side leaving a small opening to turn it out.
Step 5 : Get to Stuffing
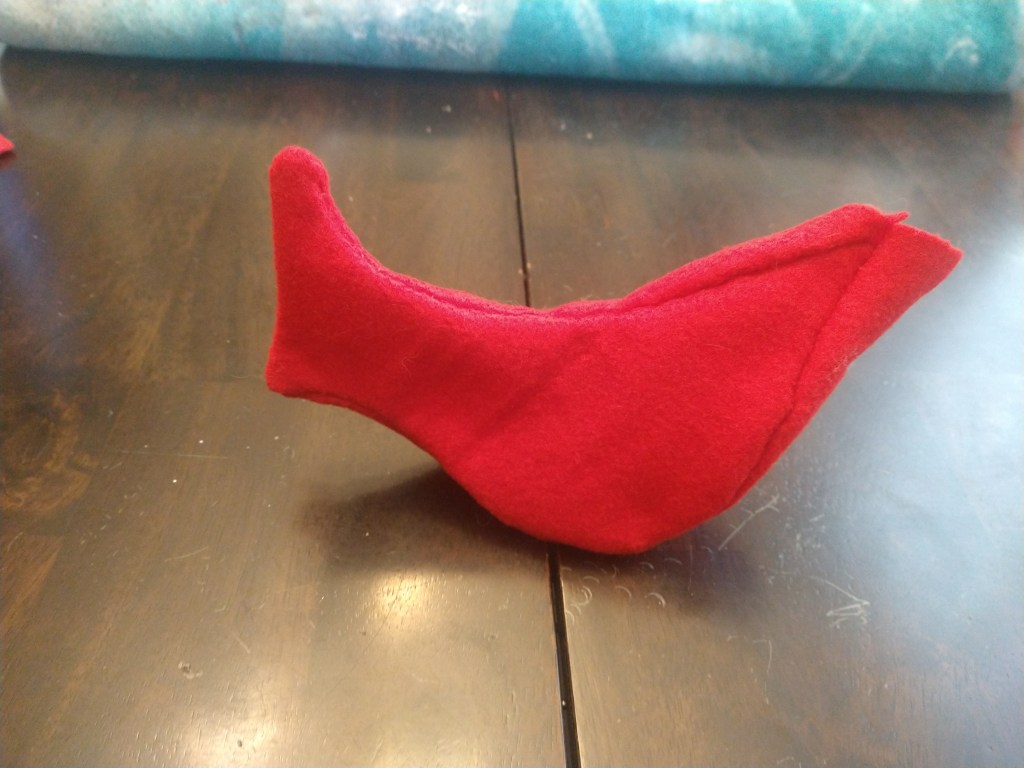
Flip the bird inside out using the small hole in the bottom seam. Use something like the end of a paintbrush or chop stick to push out the nose and tail. Smooth along the seams to make a nice shape.
Stuff that bird. Fill it up starting at the furthest point and use the brush or chopstick to help move around the fluff to where you want it.
Sew up the hole doing your best to hide your stitches. This should leave you with a cute little wingless bird. Ours looked a bit like a duck but trust the process.
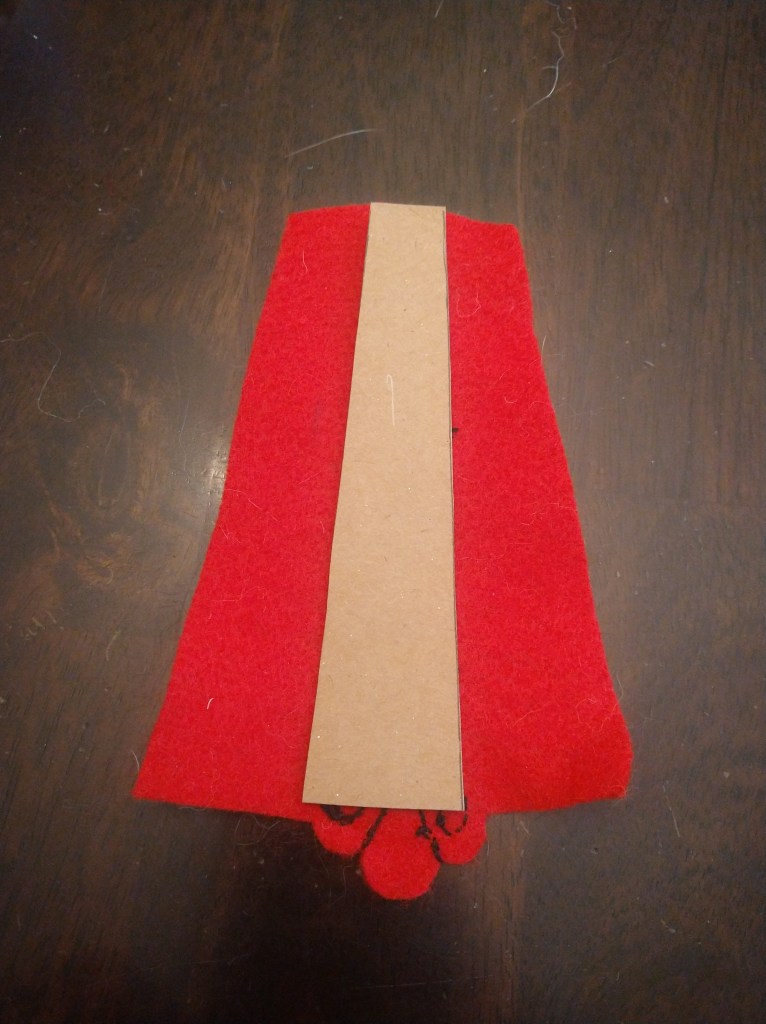
Step 6 : Wings and tail
You’ll need the felt for the wings/ tail, the cardboard, and fabric glue. Simply wrap the felt around the cardboard with the pretty side out and glue them in place. Again I’ll remind you to make sure you have 2 different wings. When in doubt hold them up to the bird before you glue so all your hard work isn’t wasted by gluing the wrong way. Attach the backing to cardinal wings if you chose to embroider.
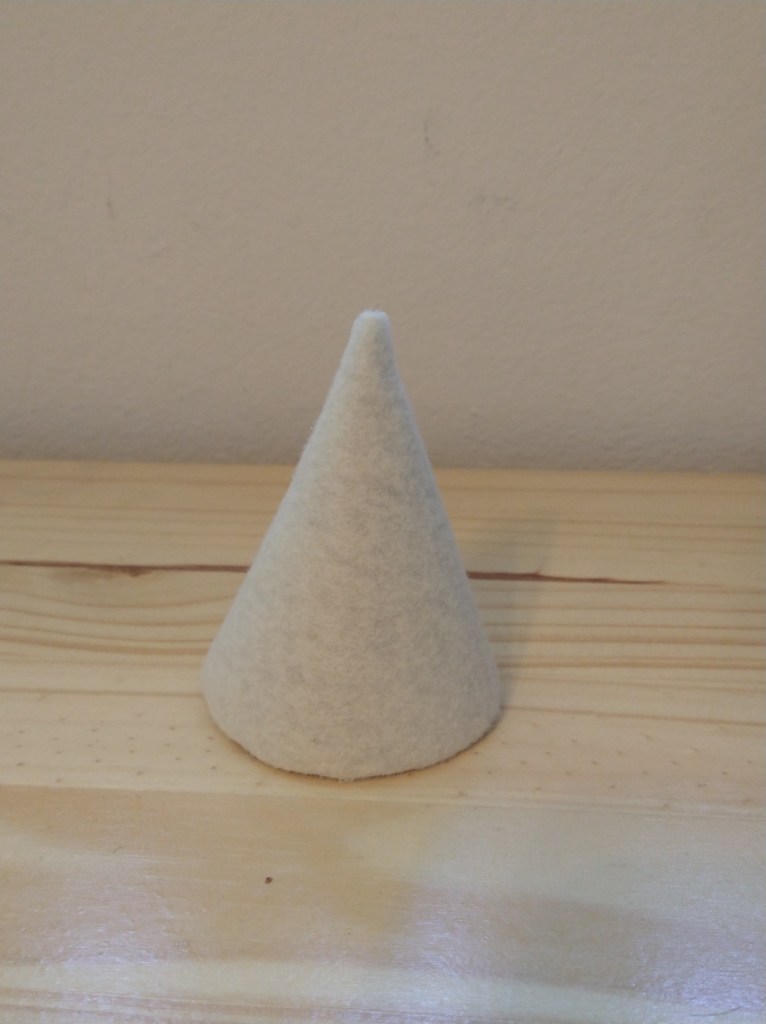
Step 7: Holders
The cone for the dove is done exactly the same way as the wings. Just wrap the felt around and glue it in place. The holder for the cardinal is definitely different.
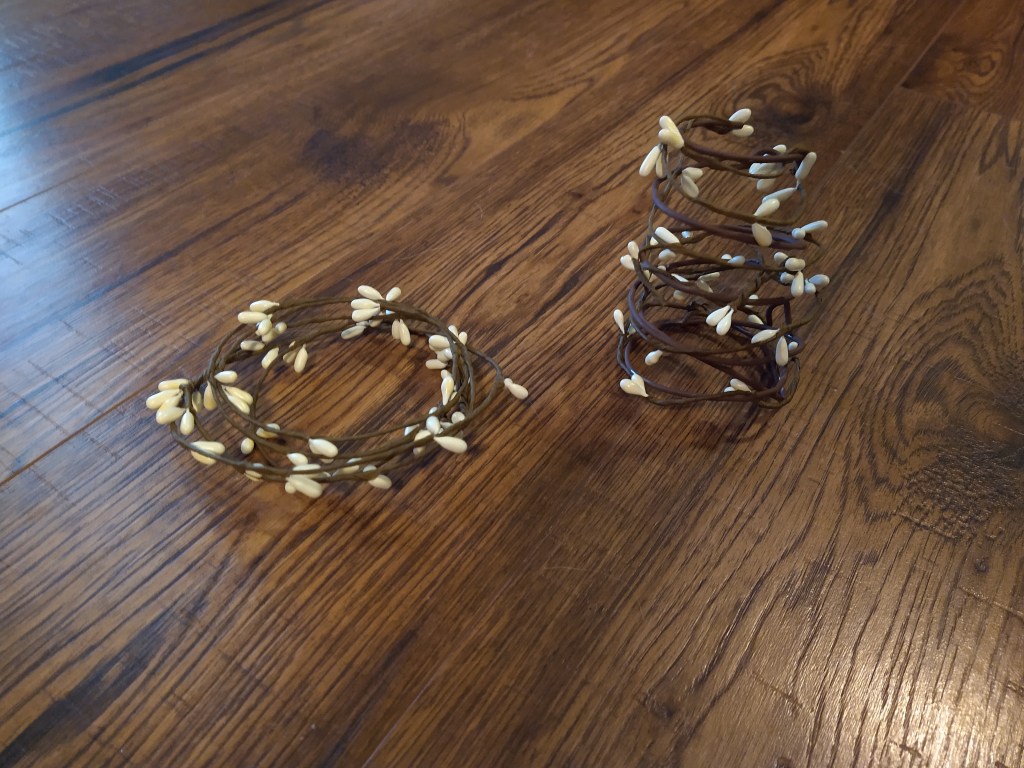
Using your wire ( or flattened out clothes hanger) make a spring shape that is smaller at the top and wider at the bottom. It helps to wrap it around a round object to make it smoother but don’t worry too much about it since its supposed to be natural looking. We then painted it brown using some cheap acrylic paint to match the wire ribbon we had but its not strictly necessary. Once its dry wrap the cute little brown wire ribbon around the spring. Add as much or as little as you like. We found cutting it in sections of a foot or so helped it from tangling in the spring. Use a little hot glue to hold the ribbon in place if its not staying well just by wrapping it.

Step 8: Assemble
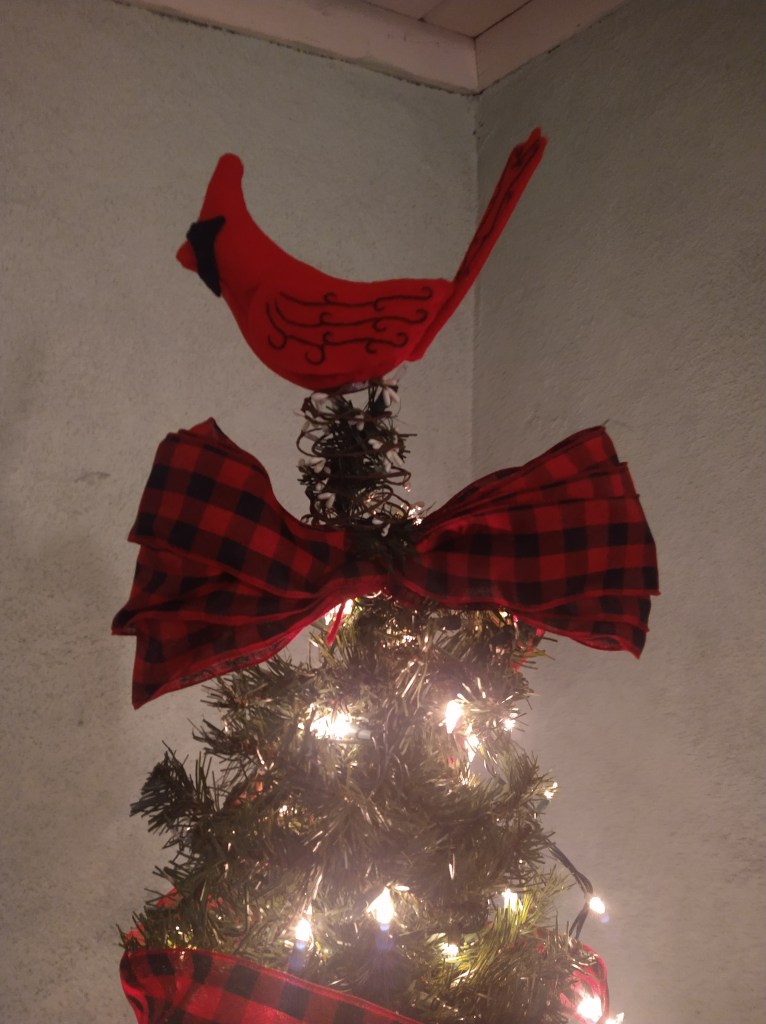
Now you have all your pieces together to assemble your tree topper. For the dove we used fabric glue to attach the wings, eyes, and twig. For the cardinal we used the fabric glue to attach the wings, tail, and little black face mask.
Both bottoms are attached to the birds with hot glue. For the cone make sure to cut a inch or so off the tip of the cone to give it more room for the glue to adhere to the bird. Once all the glue is dried you are left with an adorable bird tree topper.
These didn’t take very long once we got all the supplies together. The tricky part is sewing the body together if you’ve never sewn a 3D shape. Don’t shy away for that reason though. Give it a try! These are truly a cheap easy tree topper to enhance your natural holiday decor. Make sure to show us your creation!


Leave a comment