
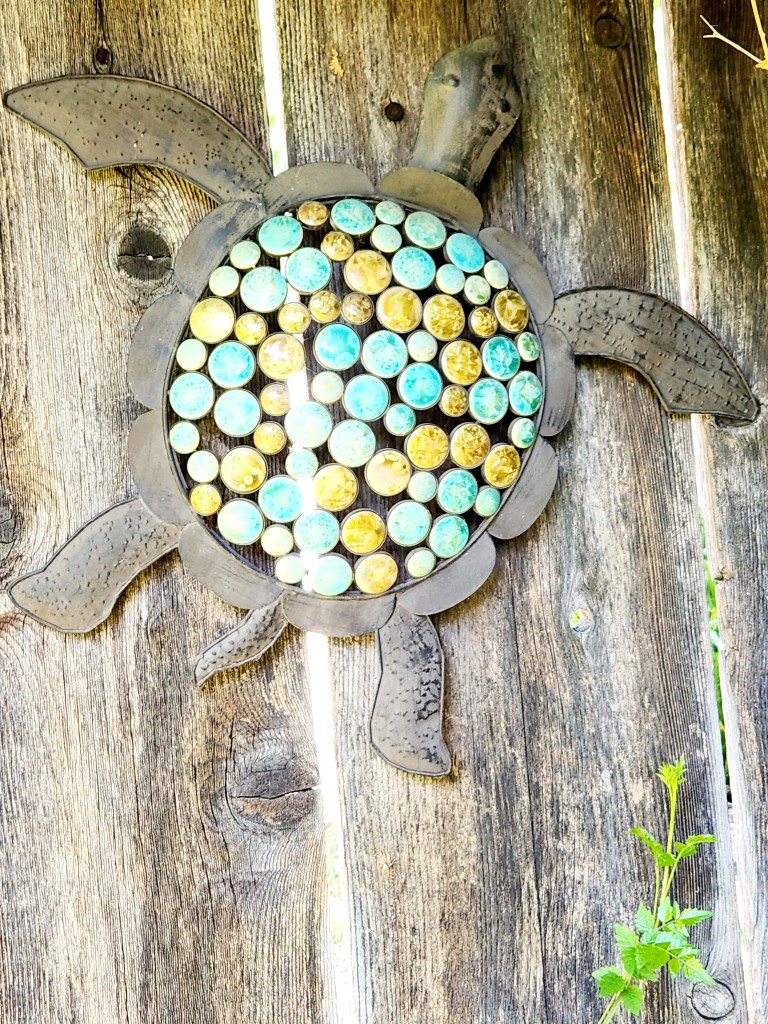
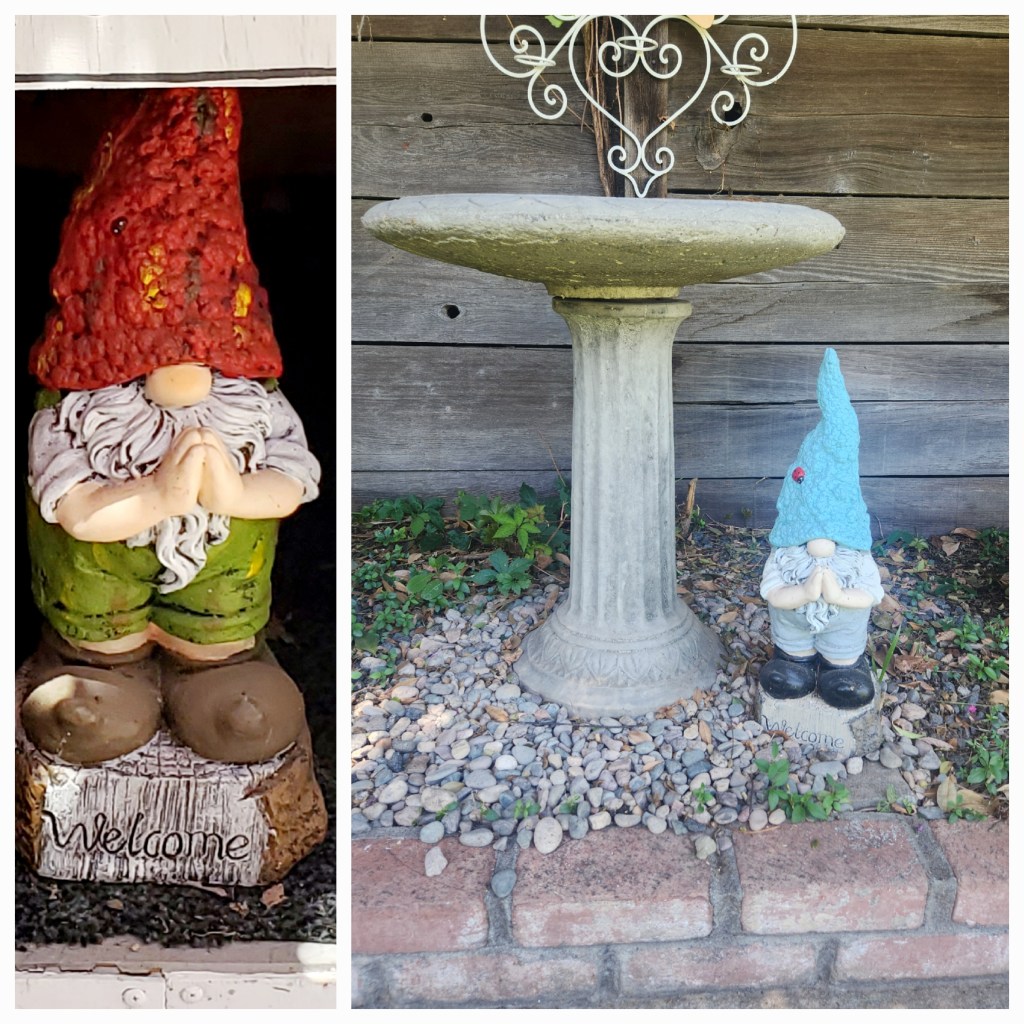
Do you ever look at the random things hanging on the wall or fence of your backyard and think, “well, that could use an upgrade?” We sure did! We were happening to be hosting a spring backyard party and noticed that the yard set to be the venue needed some love. We picked some things we knew that with some fresh paint could really be beautified! This is such a great way to take things that you already own and probably loved at one point and make them look new again.
Step 1: Gather your supplies:
-Whatever your giving a makeover
-Acrylic paints and brushes
-Mod podge or clear spray paint ( we’ve tried both)
-Painters tape if you feel you need it
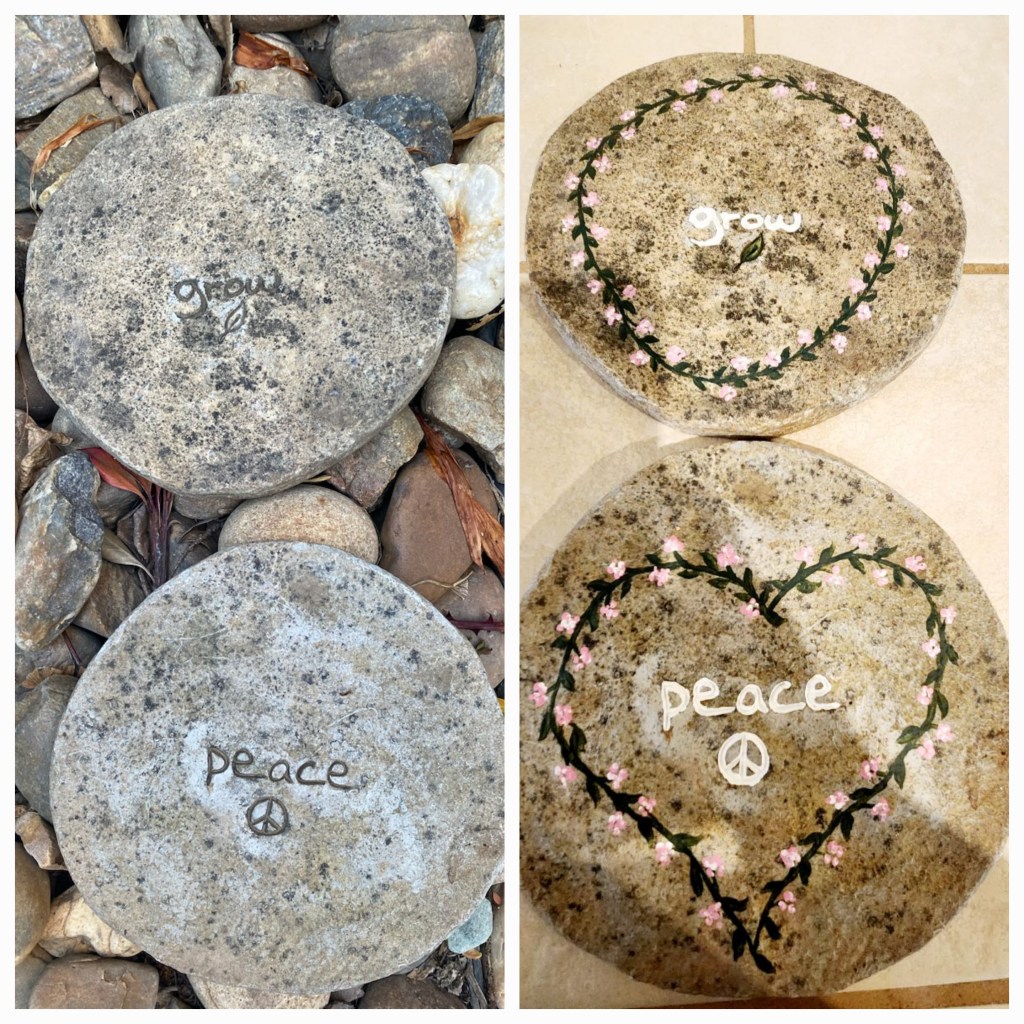
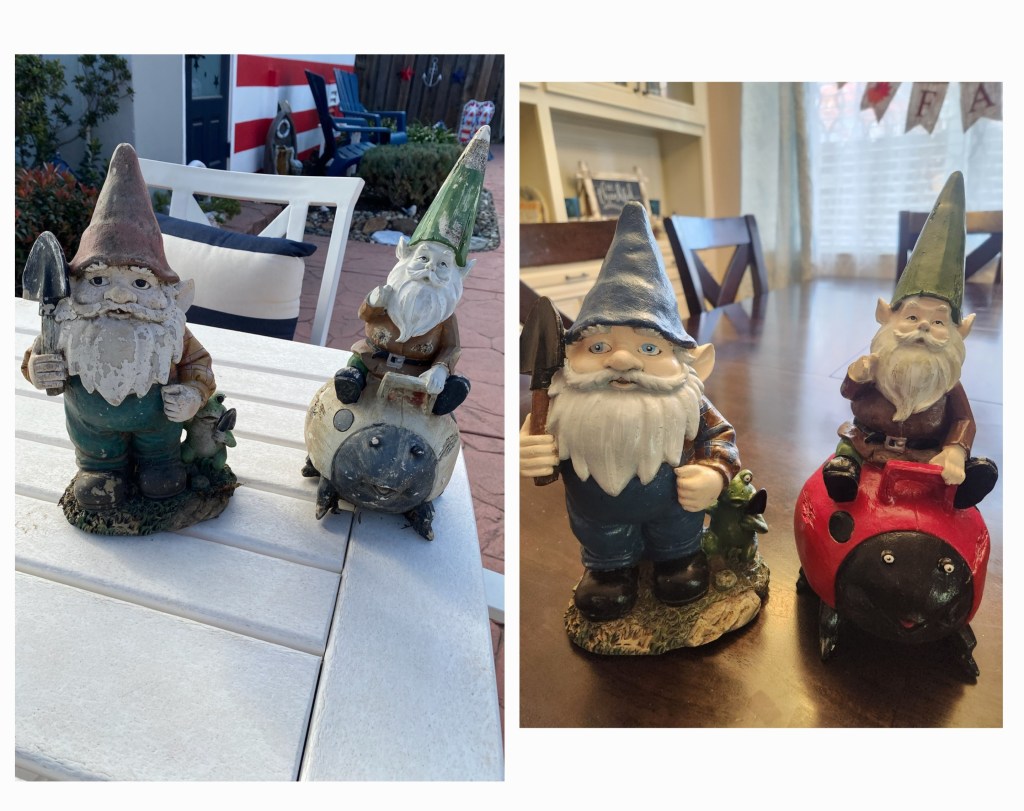
Step 2: Give your item a good cleaning. This particular turtle had been hanging up there for many years and was pretty dirty. We just laid it down on the grass and hosed it off. Depending on how fragile your item is you could just use a wet rag and a little elbow grease too.
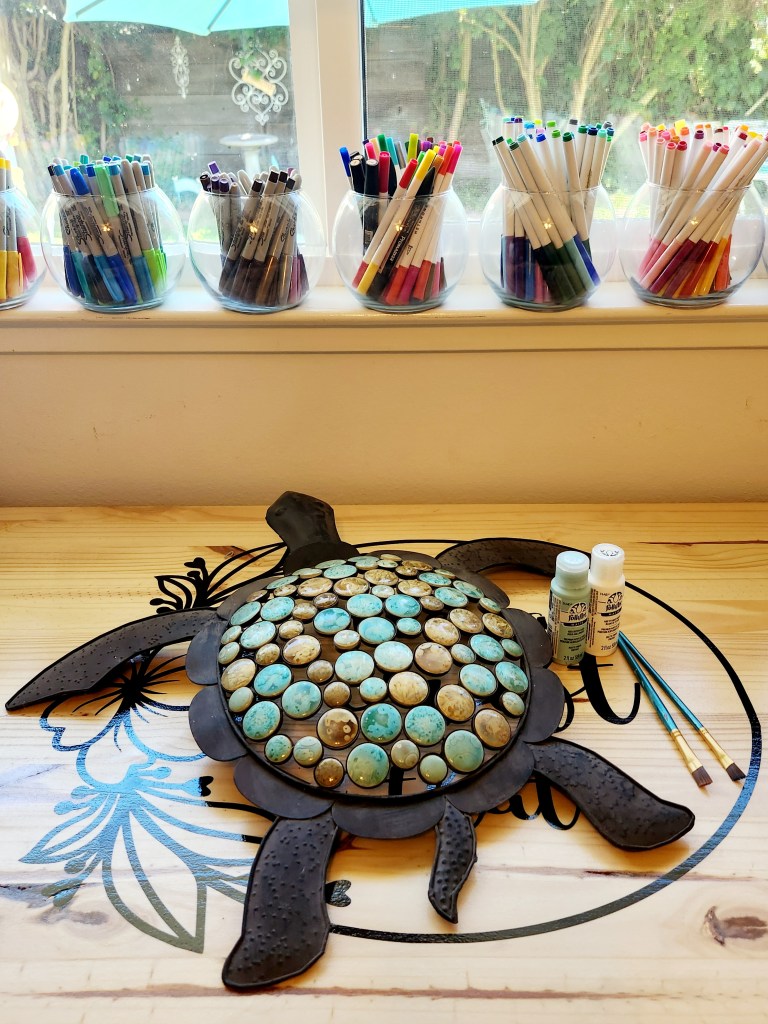
Step 3: Once your item is dry ( it’s summer here so it didn’t take long at all) it’s time to get to painting. Now, with this turtle we probably should have took the time to tape off the parts that we didn’t want painted… but, of course we didn’t. We got excited and chose to do it the slightly harder way and just start painting. So, depending on what your doing you might choose to tape off the areas that you don’t want painted. But, this is optional.
Step 4: This will most likely take multiple coats to get a vivid color. Ours took three coats of each color because we were going from a rusty brown to a coastal white and aqua. But, this will vary from project to project. Just make sure to allow each coat to dry completely between coats.
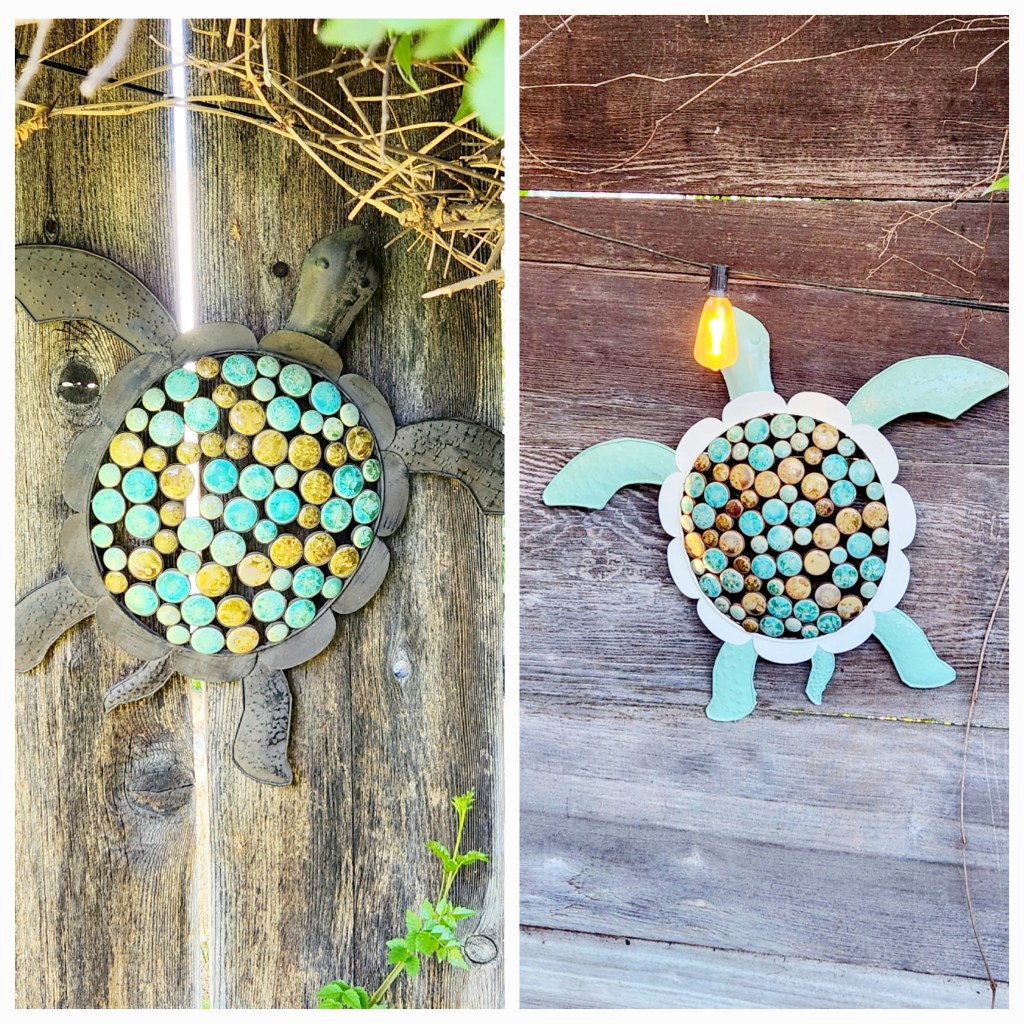
Step 5: Once your happy with the way the colors look it’s time to add something to ensure your paint will look like new for a little while. We’ve tried clear spray paint and mod podge. We’ve found that the mod podge holds up a little better in our climate but use what you’d like. The spray paint is an easier choice. We usually go back after a few years and add a little more if needed.
See, good as new! Not only is this project simple but it also is so satisfying. Your taking things around your yard that might have been destined for the garbage and giving them new life! You could even do this with things in your home as well. Once you start you’ll want to redo everything!


Leave a comment