
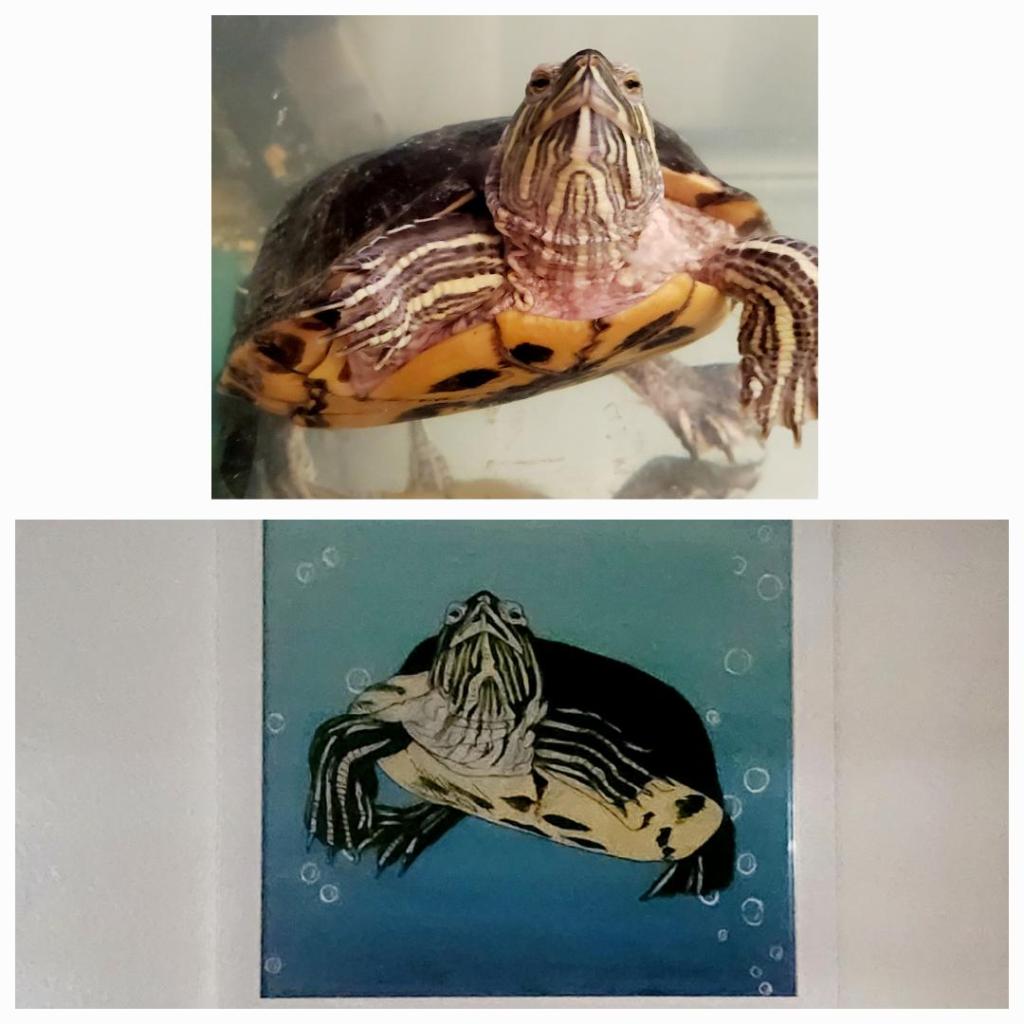
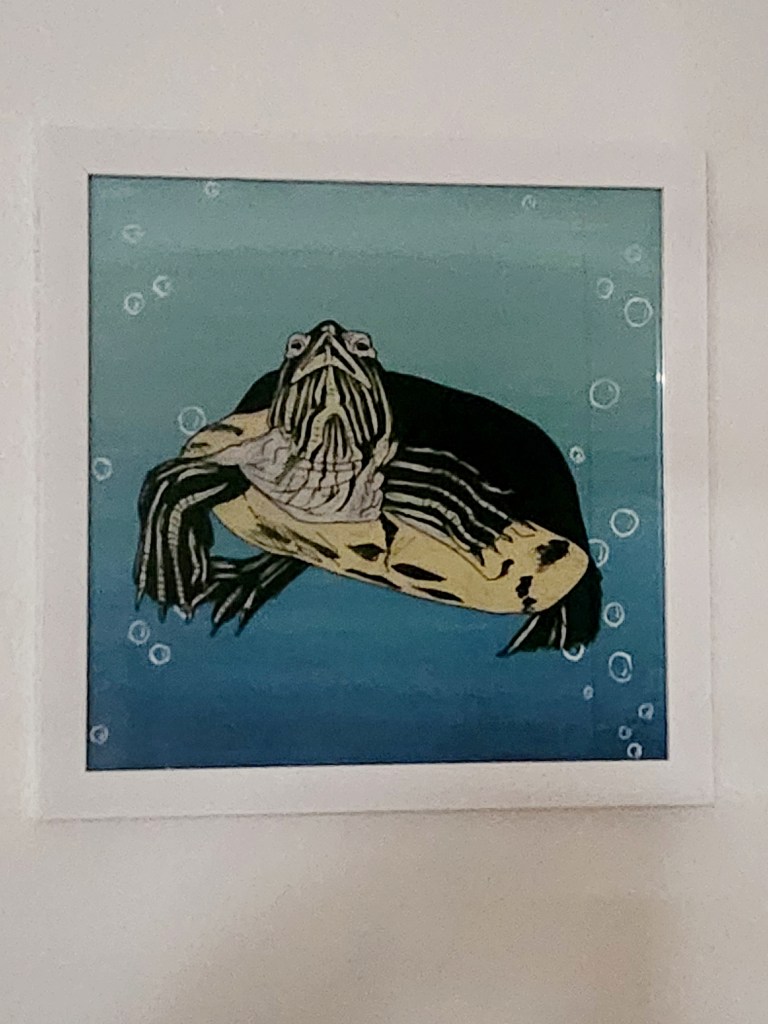
Hello to all the pet parents out there! Have you ever wanted to create a portrait of your lovable fur baby? It’s quite a challenge capturing a pets likeness, trust us! We’ve tried and failed many times. It’s truly a skill. It doesn’t have to just be dogs and cats either, this one happens to be of a sassy turtle named Touche. This is an easier way to do it and in our opinion it comes out pretty darn adorable!
Step 1: Gather your supplies:
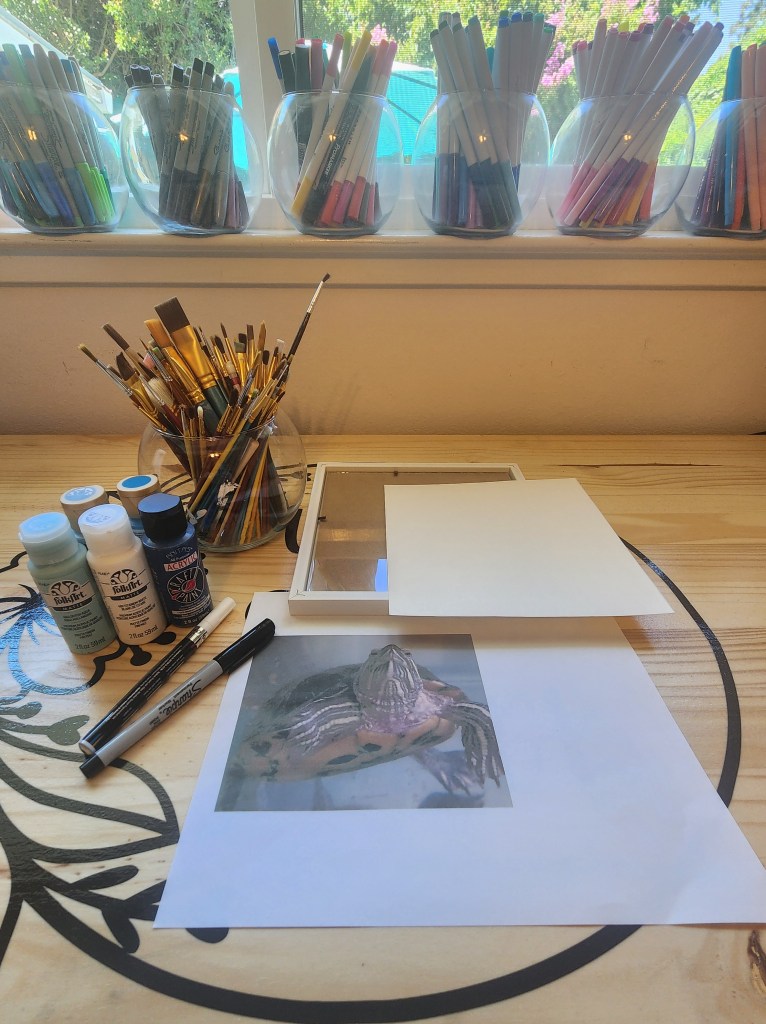
- A picture frame with glass ( any size will work) we chose an 8” x 8”
- A printed photo of the pet ( this does not have to be a quality print) your just using it to trace the general outline.
- A fine tipped black marker ( we used a sharpie)
- A white fine tipped paint pen
- Acrylic paints and brushes
- Scrapbook paper ( or poster board) the size of your frame. You can use white like we did or choose a color if it works better for you.
Step 2: Print your photo. We used our home printer for this. Like we mentioned before, the quality doesn’t have to be great.
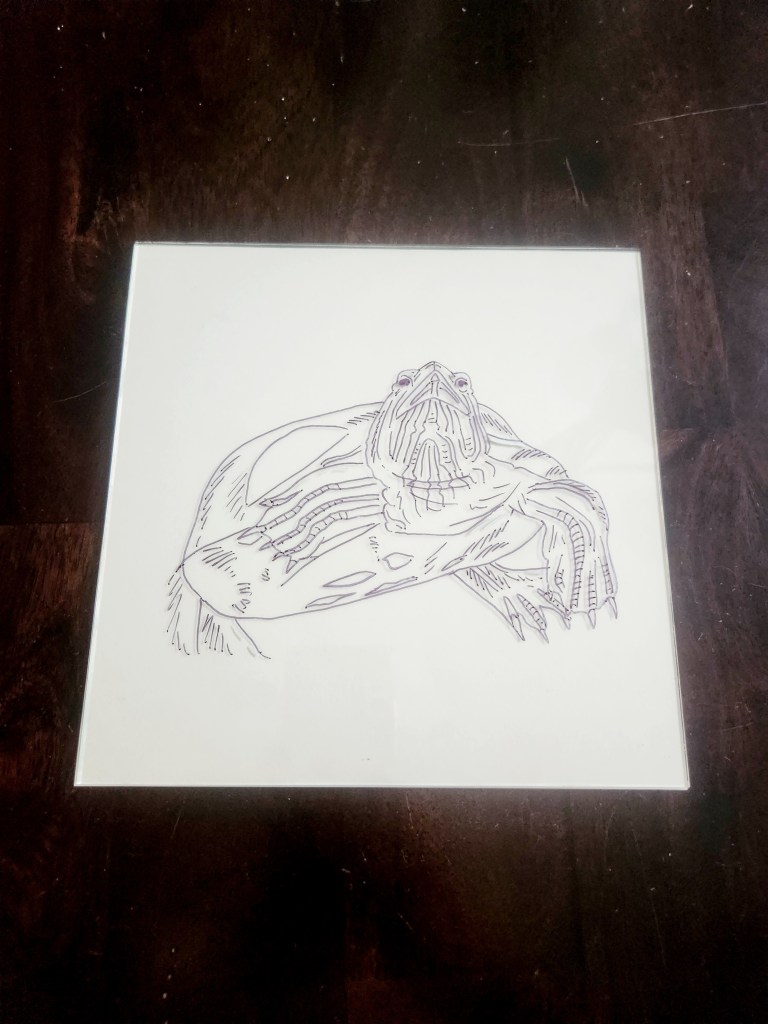
Step 3: Remove the glass from your frame and place it over the printed photo. You will be drawing directly on the back of the glass with your pens.
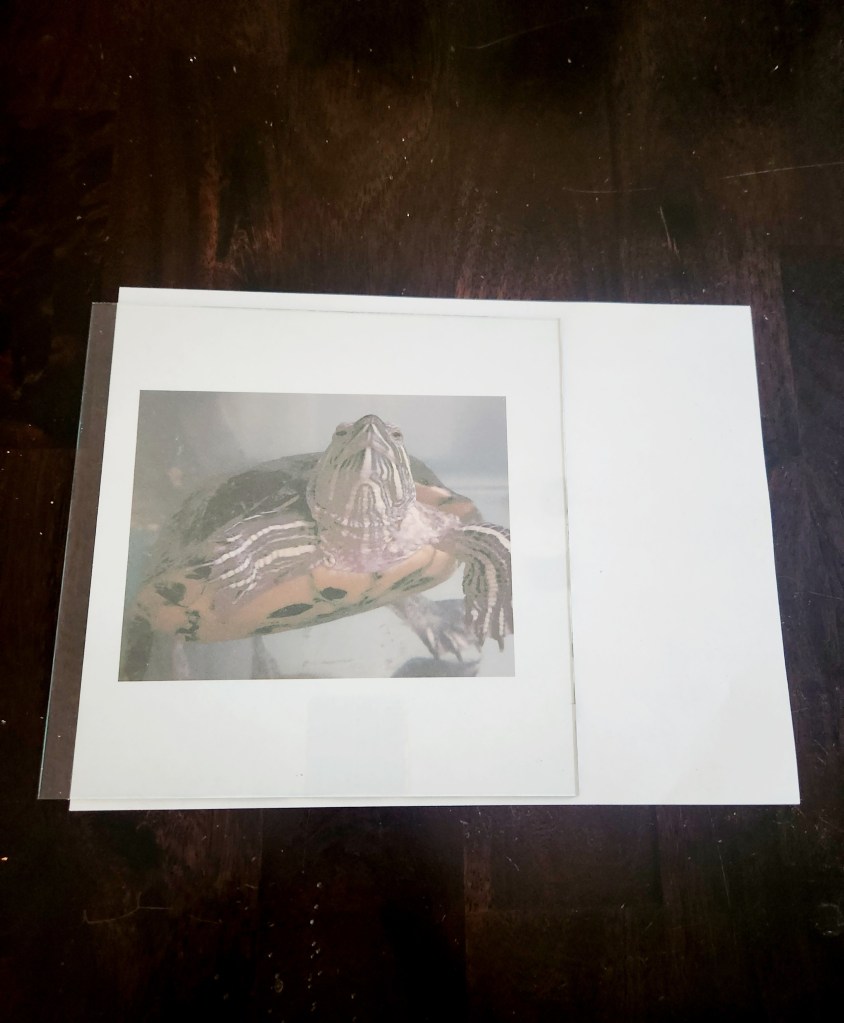
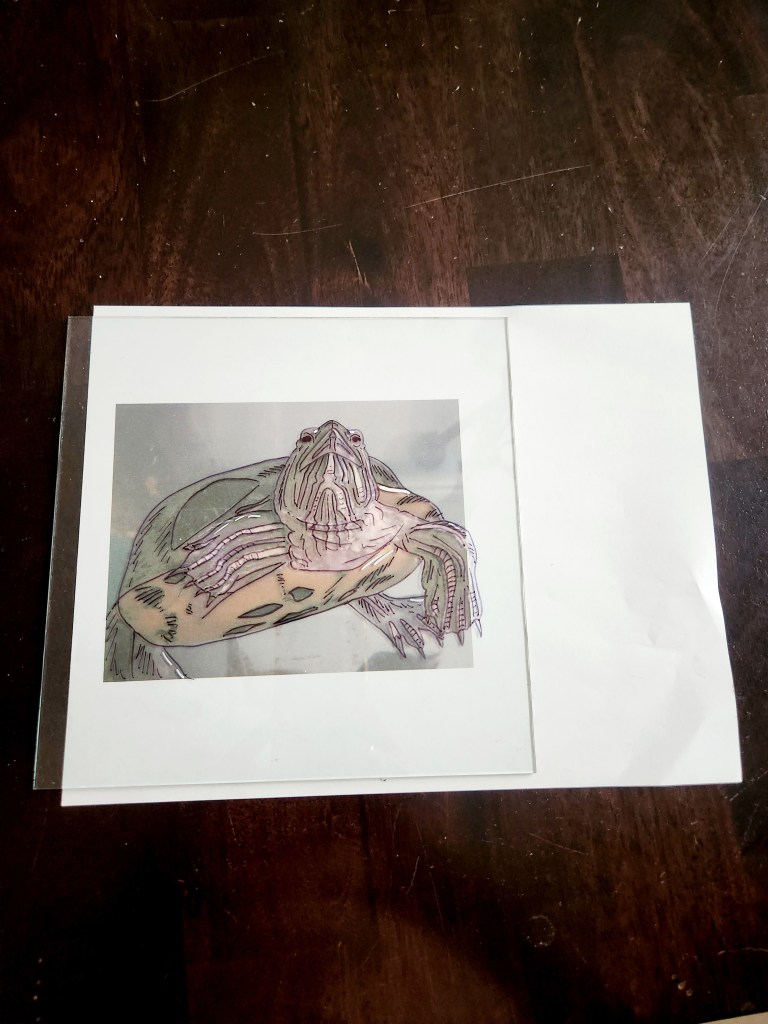
Step 4: Use your thin tipped black marker and trace your image. This is where you are going to be using your imagination. You will want to trace the general outline of your image and any other characteristics you want to highlight ( such as eyes, nose, paws, ears, etc.) We also added a bit of texture by adding some stippling and lines with our white paint pen. This is completely optional. It’s up to you how detailed you want to get. There isn’t a wrong way to do this. Keep in mind everything you draw with pen in this step will be on the front of your portrait. So, if you want to add any fur lines, whiskers or freckles ( obviously this doesn’t apply to this sweet turtle) you will want to add it here before you paint over top of it.
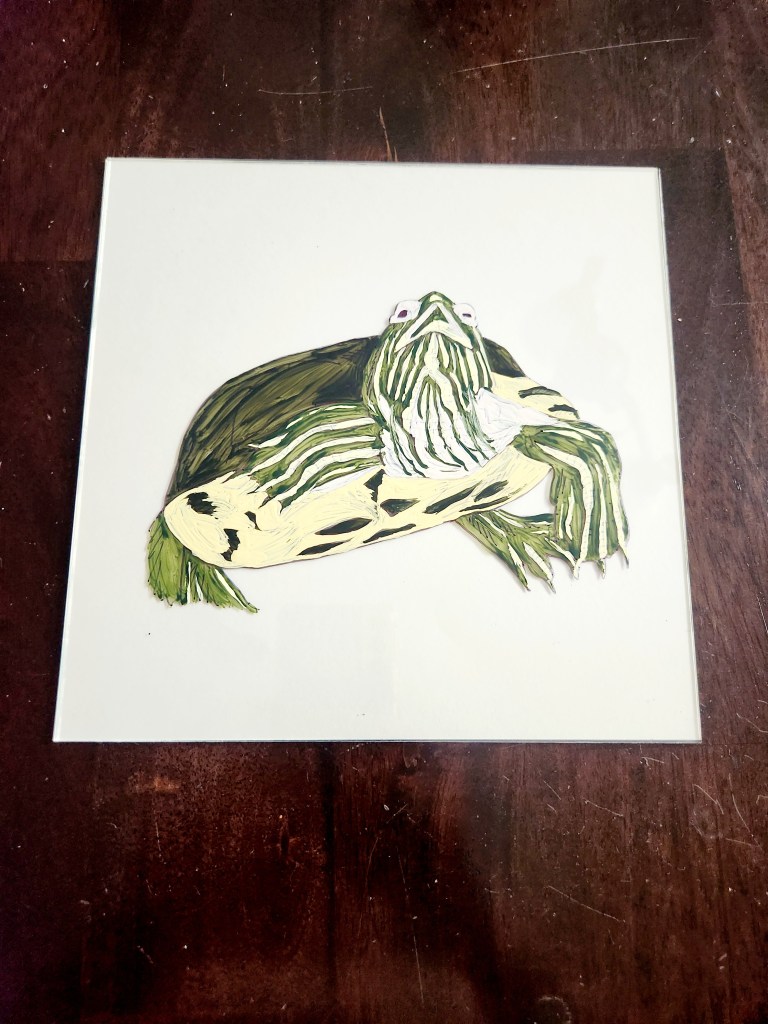
Step 5: Add your first coat of paint. You can either stick to the true colors of your pet or go for something completely different. I’m sure a collage of bright colors would look so cute! The first coat of paint will look streaky… trust the process. It gets better with each coat.
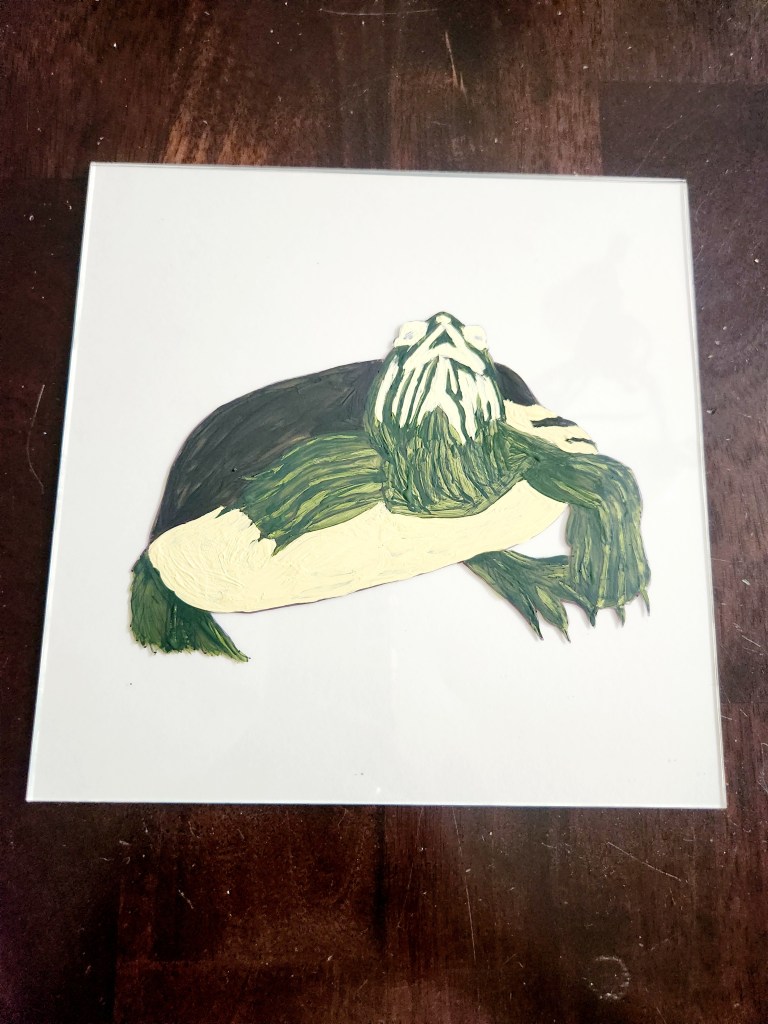
Step 6: Add another coat of paint. Make sure you allow the first coat to dry all the way before adding more paint. The second coat doesn’t have to be as detailed as the first. Remember this image will be reversed so everything on the first coat will be what you see. The second coat is just to make the image look less streaky and more solid. Add a third coat if needed ( we did on this particular one).
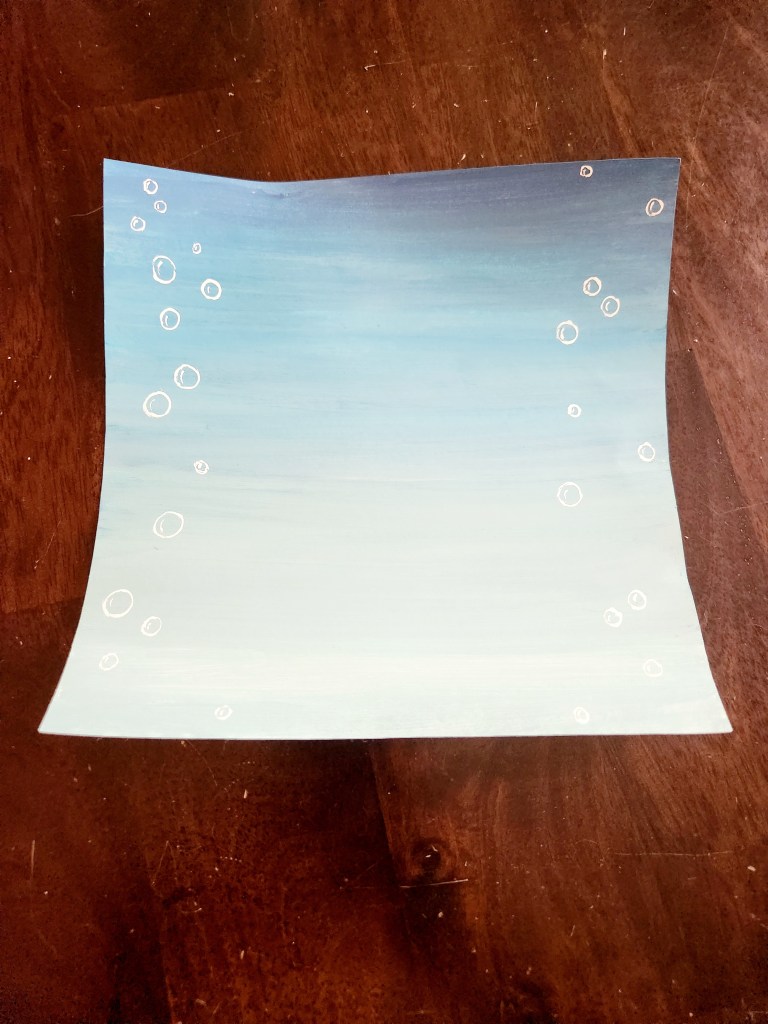
Step 7: Create a background. You will be using the scrapbook paper or poster board for this. You can leave it white so your pet will be the center of attention ( as they should be) or paint something on it ( like we did) or you could even draw something with markers. Whatever you do will be adorable! If you choose to paint on it the paper has a tendency to curl up. But, don’t worry the glass is heavy enough to weigh it down so it will sit flat.
Step 8: Assemble your portrait. Layer your portrait by putting the background paper down first. Now you want to put your portrait over top of the background paper ( flipping the glass over so the image is reversed).
Now you have a customized portrait of your delightful pet! If you want to you could take it up a notch and add a name to your painting, you could add some paw print stickers to your frame or you could even make a collage of multiple pets together. There are so many options! These make the perfect gift for any pet lover!
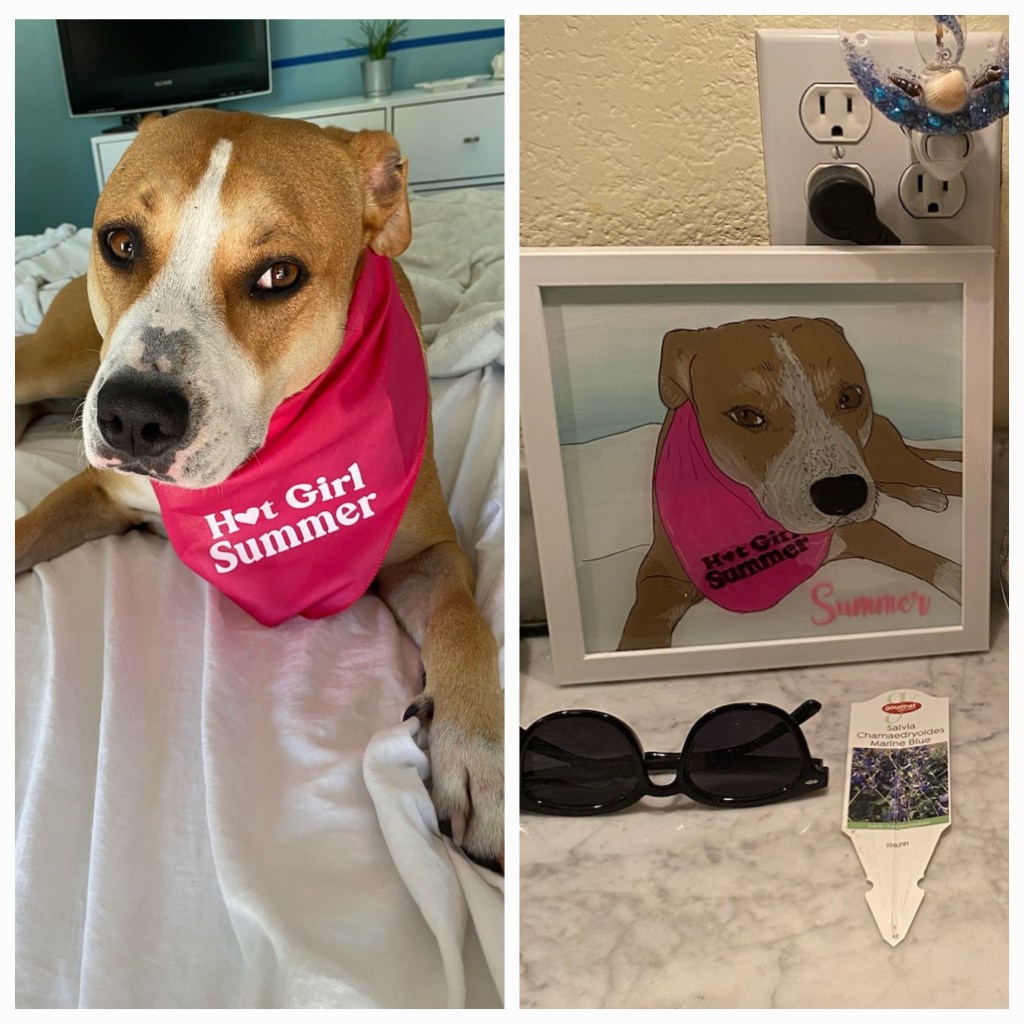
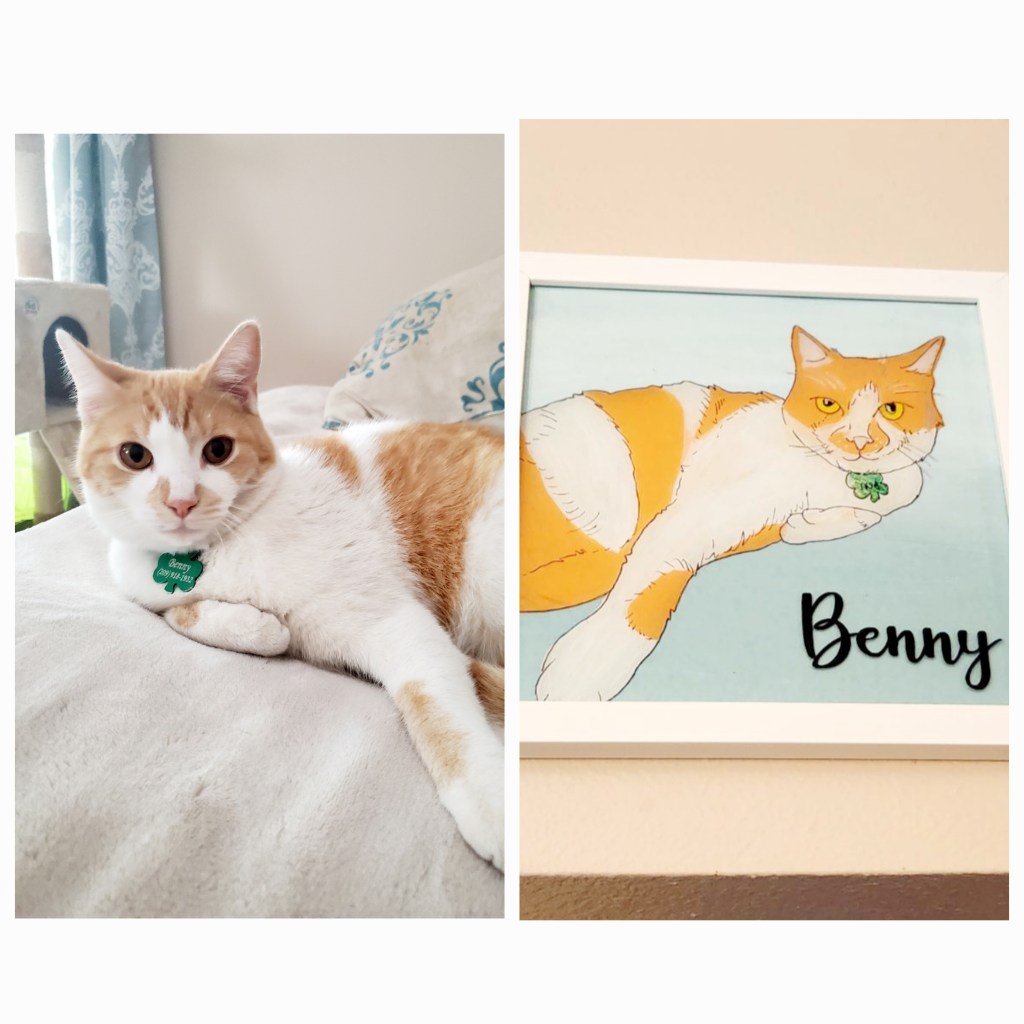
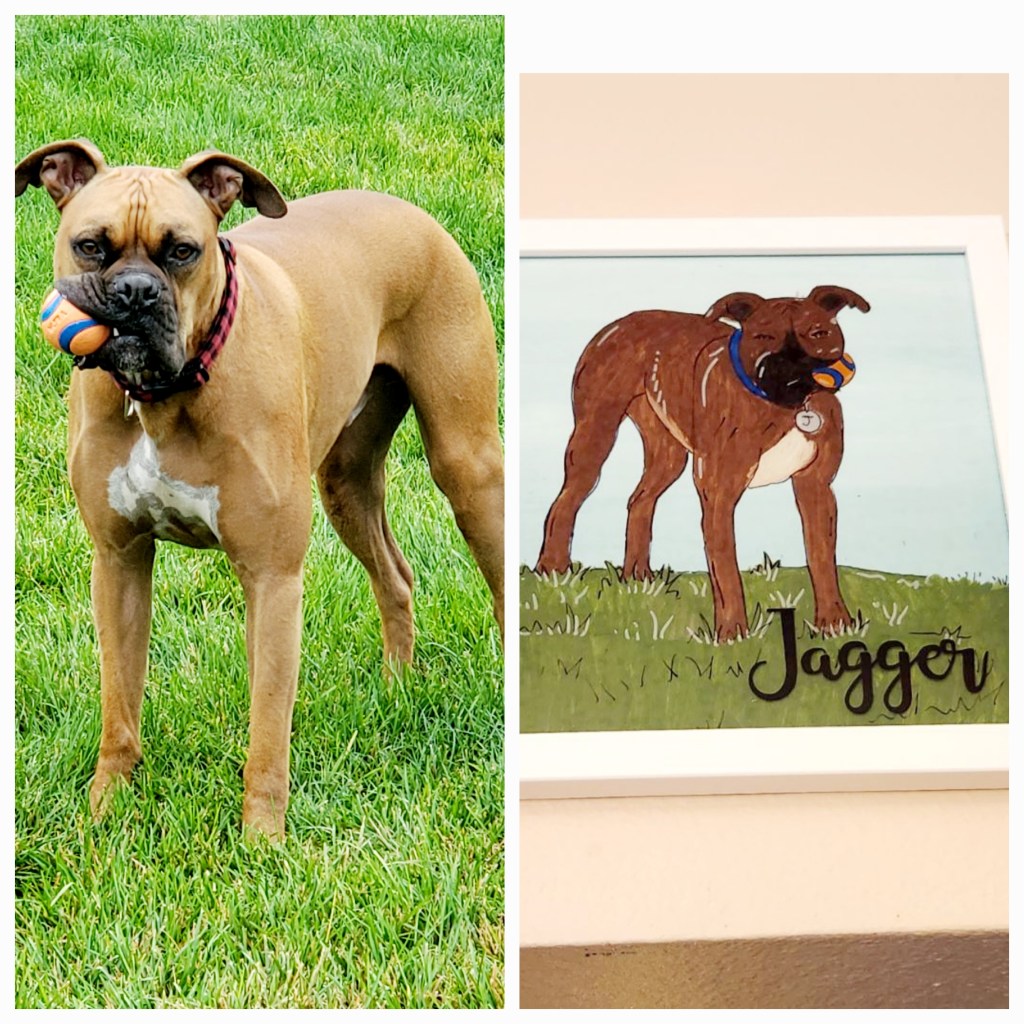
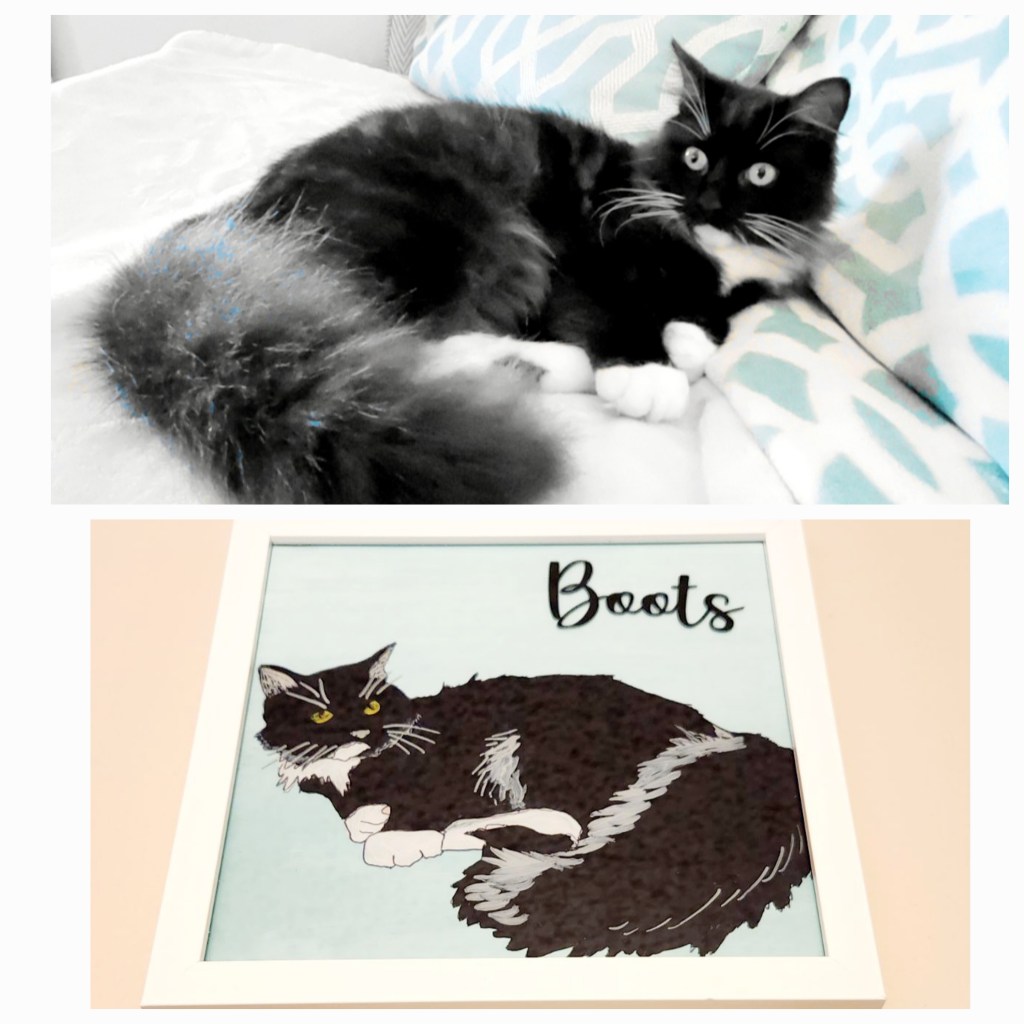
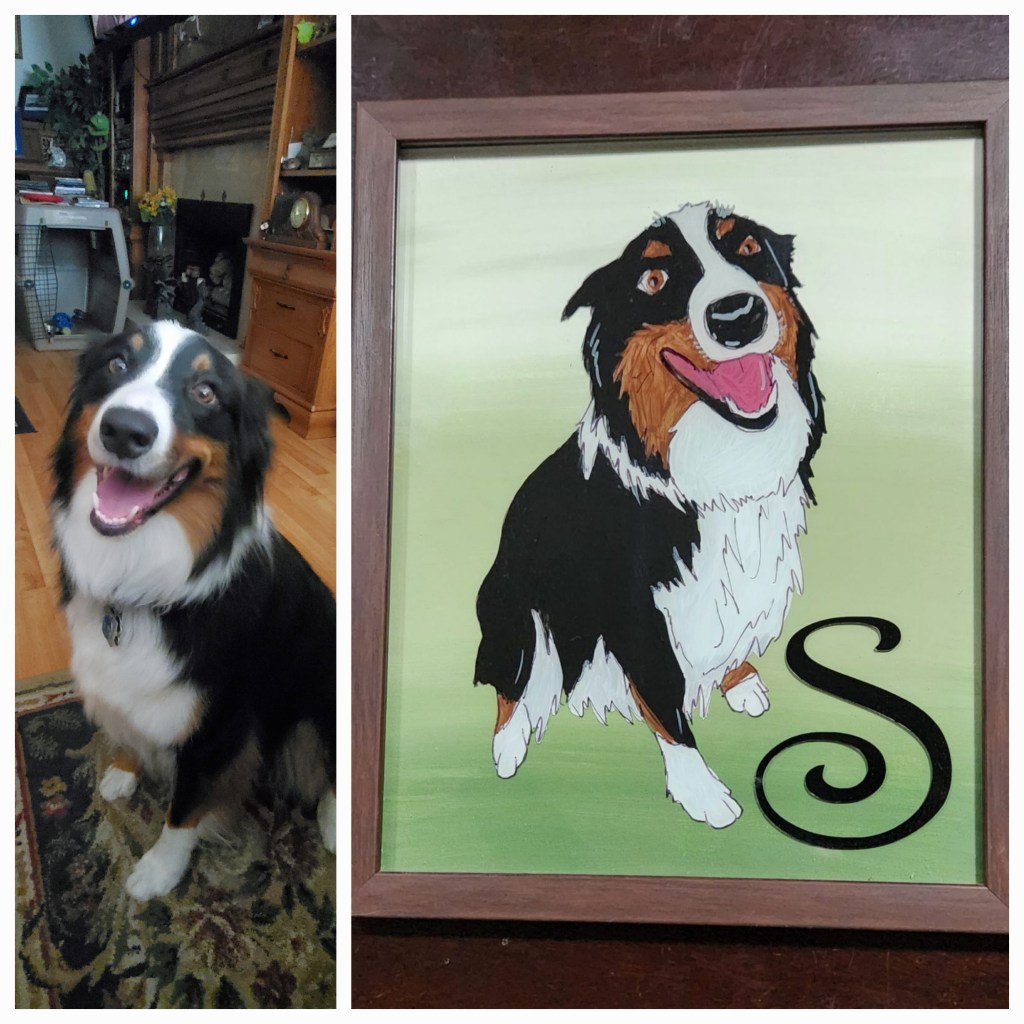
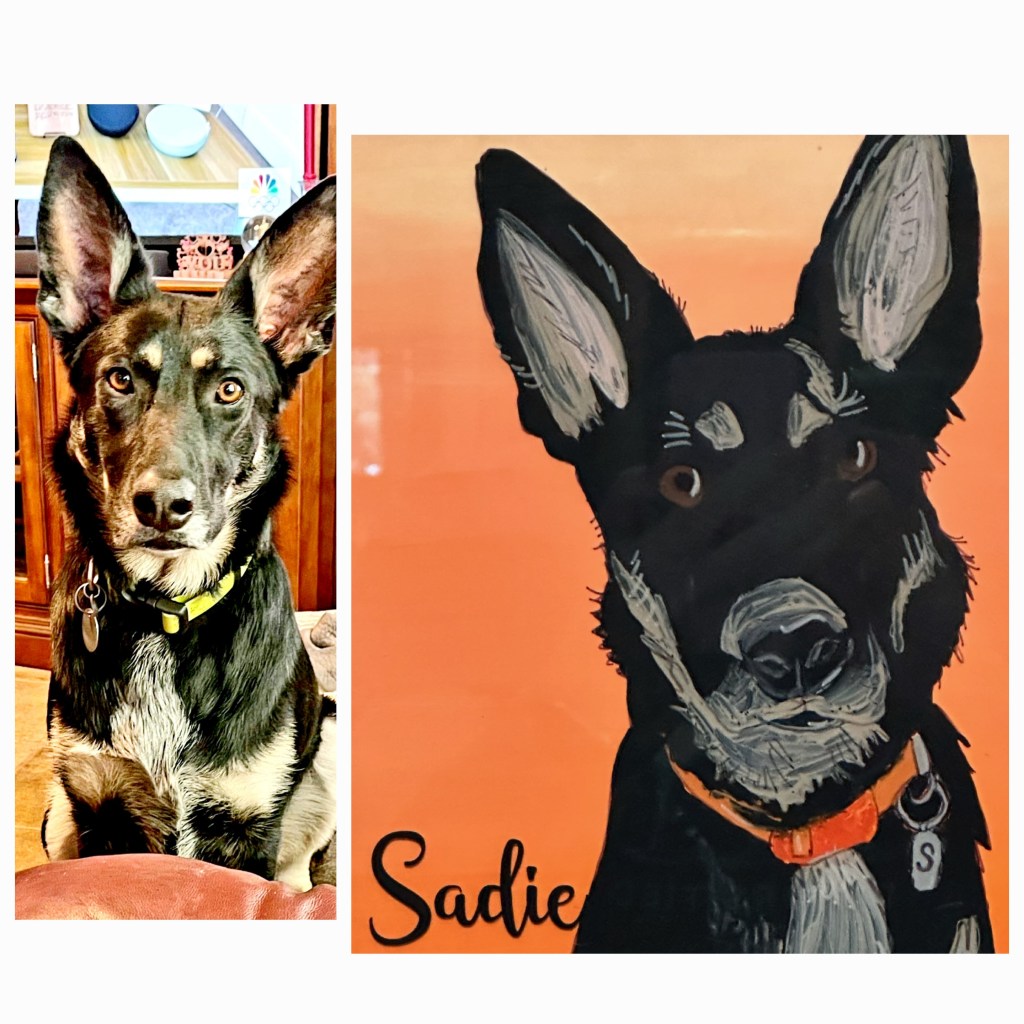
Here is a look at a few other portraits with their inspiration.
Please let us see what you come up with.


Leave a comment