
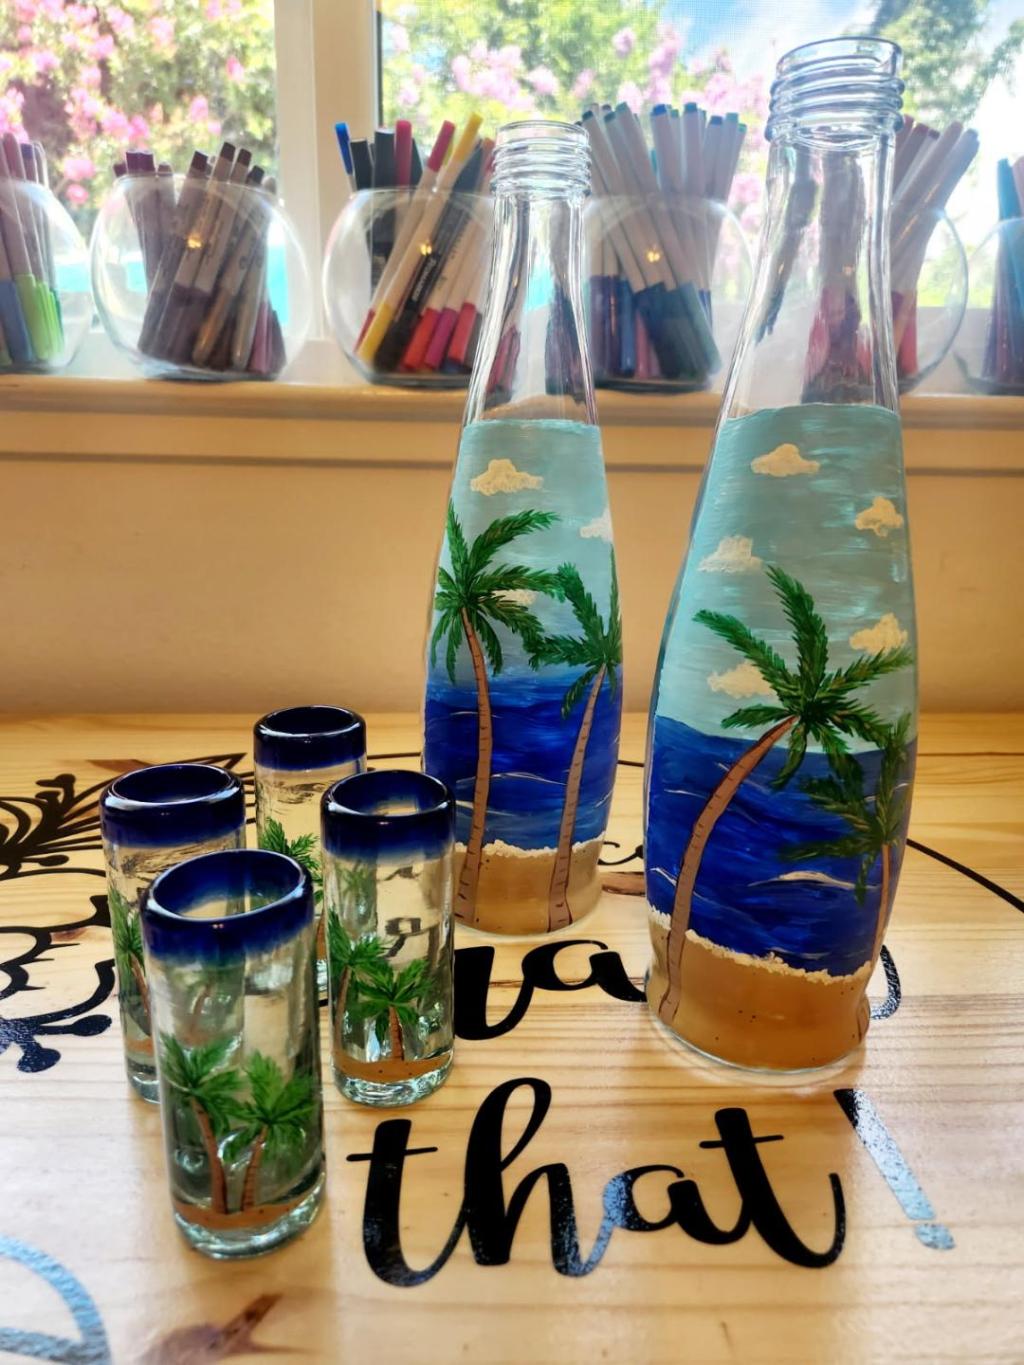
Anybody down for a spicy margarita? We aren’t huge drinkers ourselves but we happen to have several people in our lives that love a good cocktail. We found a few infused tequila recipes on Pinterest that we’ve been wanting to try as a gift, and because we are extra we thought, “we can’t just leave the tequila bottles and matching shot glasses naked can we?” of course not! So we gave painting them a shot! (pun intended).
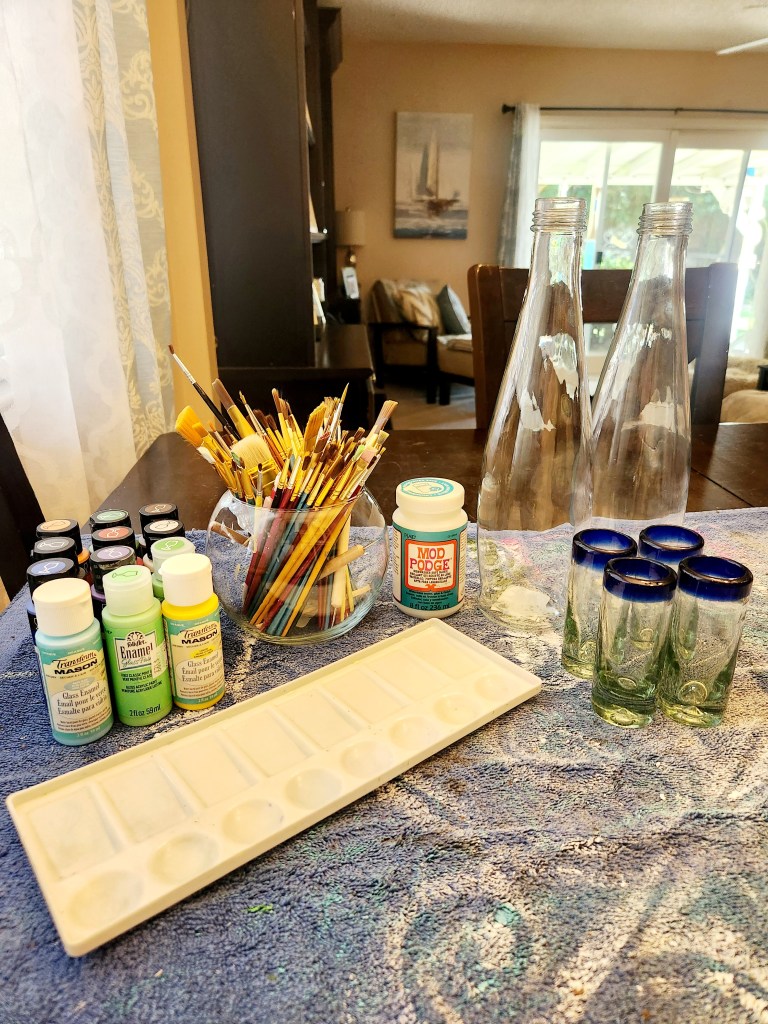
Step 1: Gather your supplies:
-Glass bottles or mason jars
-Shot glasses ( these are completely optional )
-Glass paint and brushed
-Dishwasher safe mod podge ( optional )
-Tequila or liquor of your choice
-Produce ( we used jalapenos, Serrano peppers, limes and lemons)
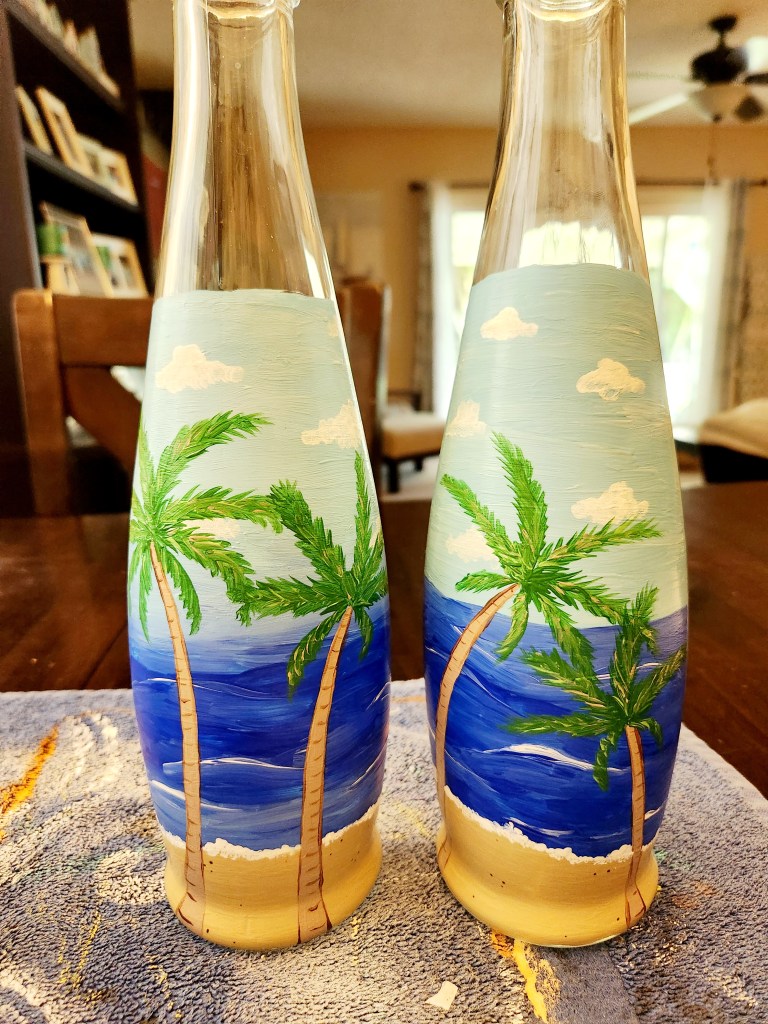
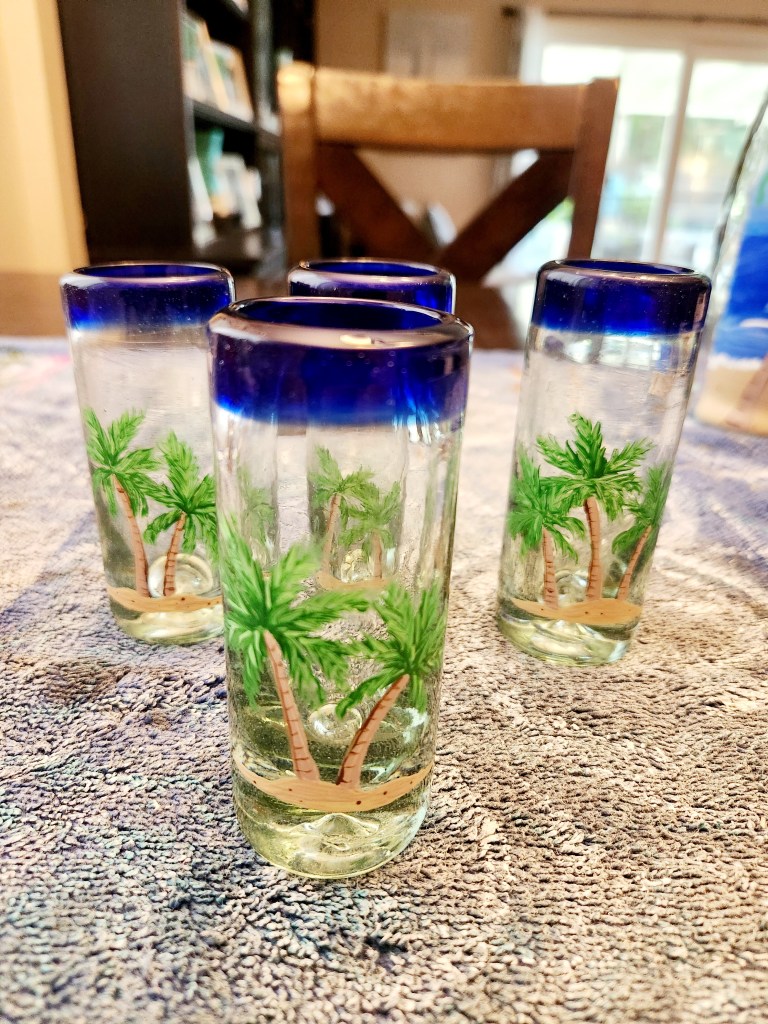
Step 2; Pick out your designs. We went with a tropical beach design because we thought, “where would you be most likely to enjoy a scrumptious spicy margarita? A beach somewhere!”
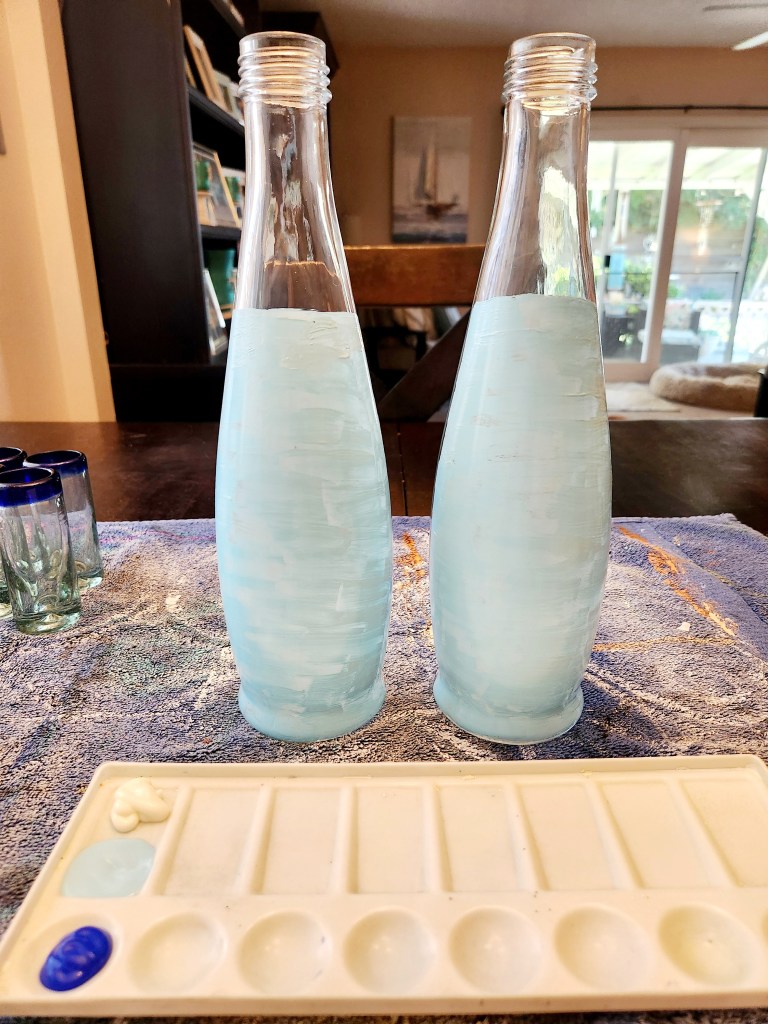
Step 3: Paint your first coat of your background. Glass paint is a bit tricky. It’s very streaky and a little bit of a pain in the butt but it’s worth it if you have the patience. Allow each coat to dry completed before adding any more paint.

Step 4: The second coat is where we started to add some detail like variations in the sky color and and ripples in the sea. Then we used a Q-tip to stipple on some clouds and the break at the shoreline.
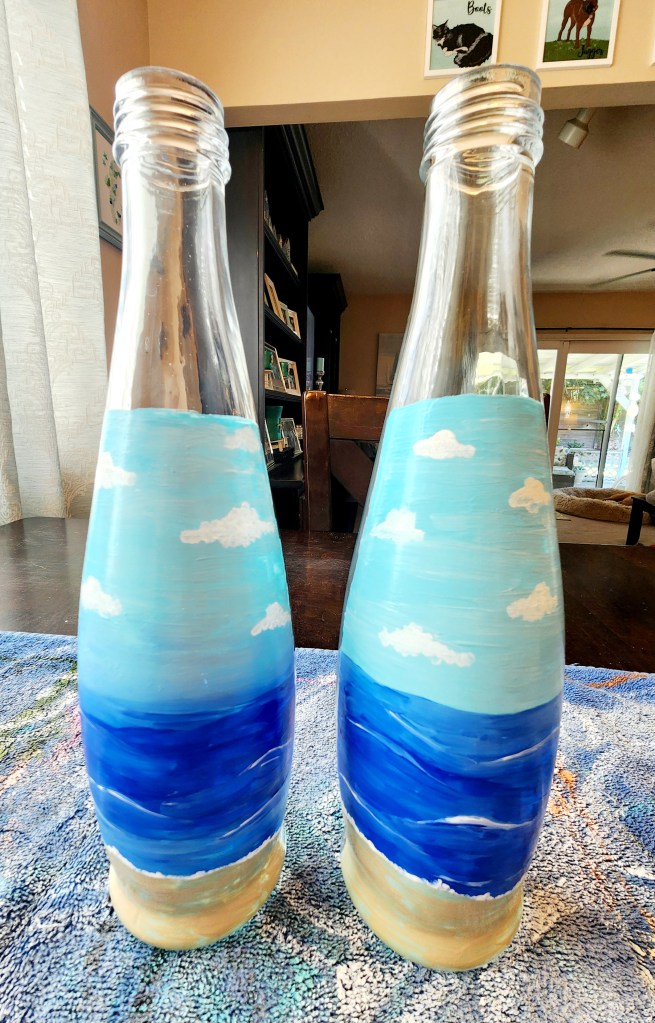
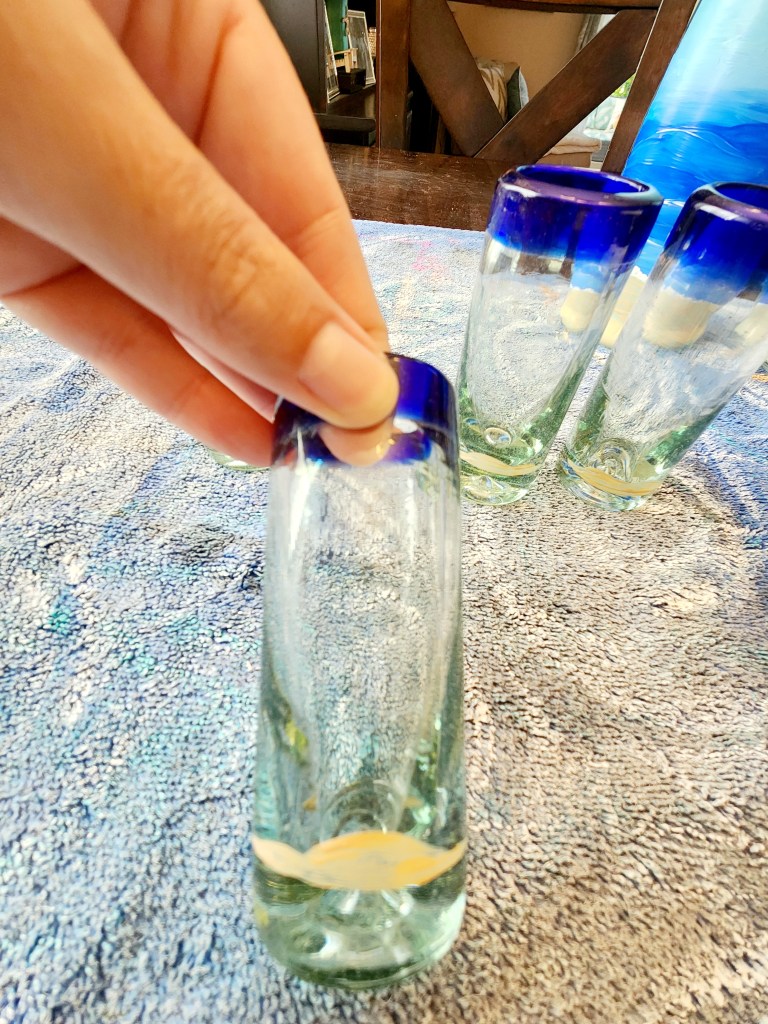
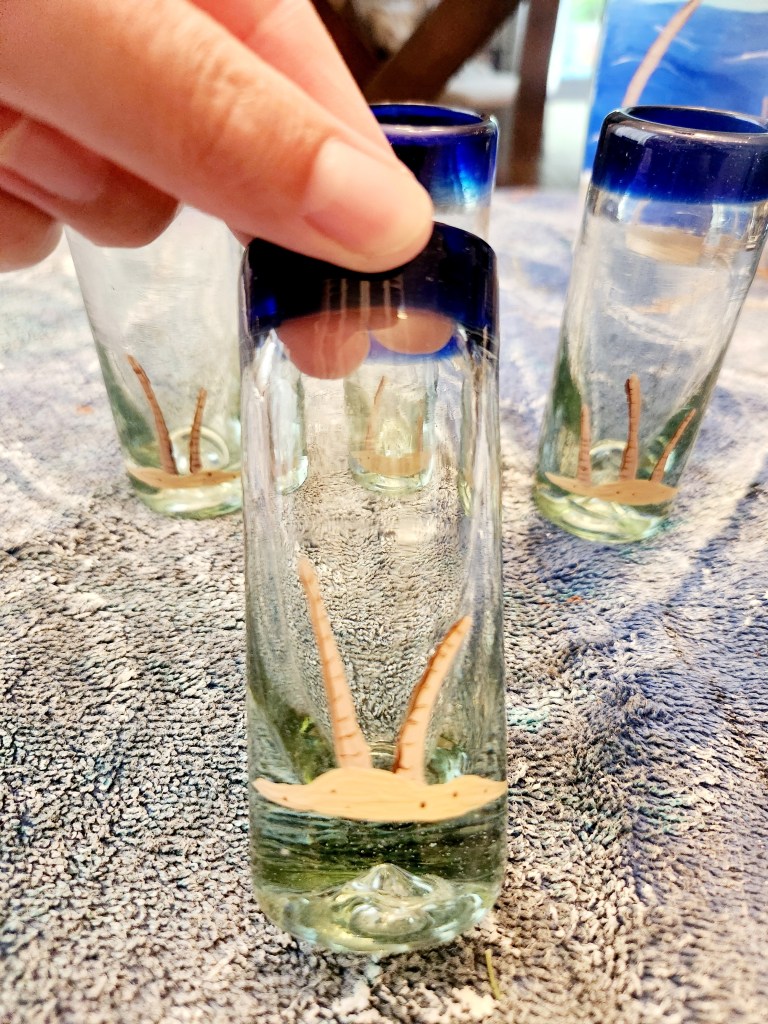
Step 5: Add the sand. This took us three coats ( on top of the first layer) to get a solid color that we were happy with. We also turned our attention to our shot glasses and did the sand dunes on those at the same time. We find it easier to do everything that’s the same color at the same time so you can use the same paint brush without washing it in between.

Step 6: Add some dots to your sand to make it more “realistic”. We like to do this just to add some more detail to the sand. We used our dot tool ( purchased off amazon) for this but you could also use a toothpick. We did this to the tequila bottles and the shot glasses.
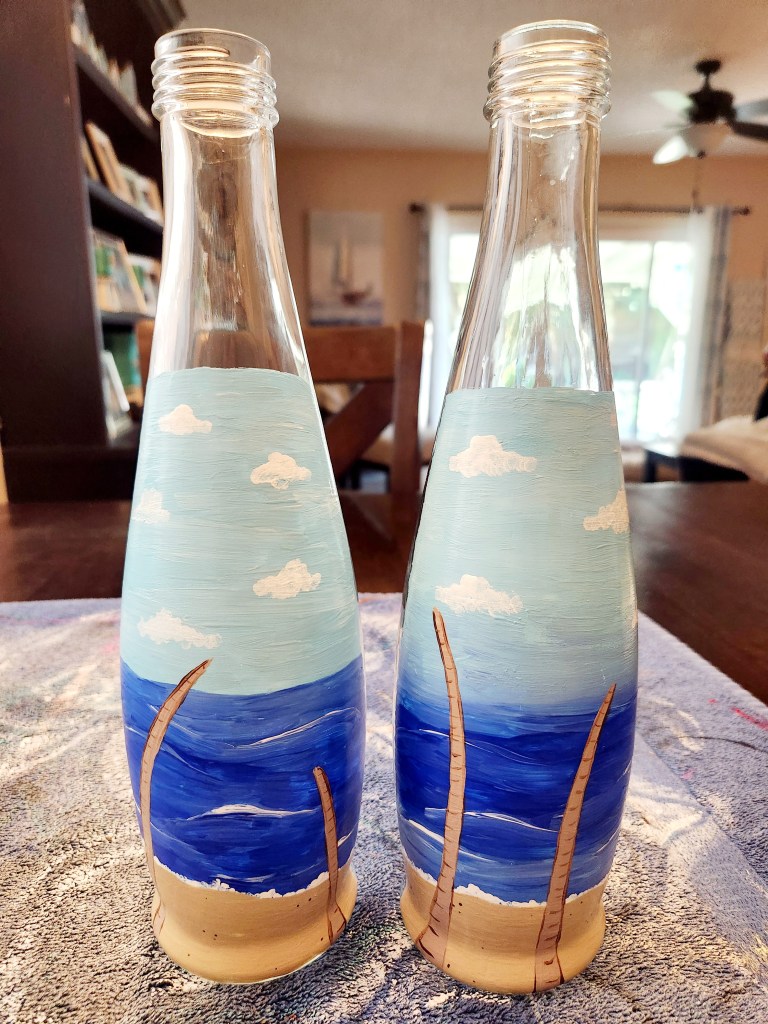
Step 7: Paint your palm trunks. It took us two coats to get the color we wanted. Then we painted some detail lines on them to give them some dimension.
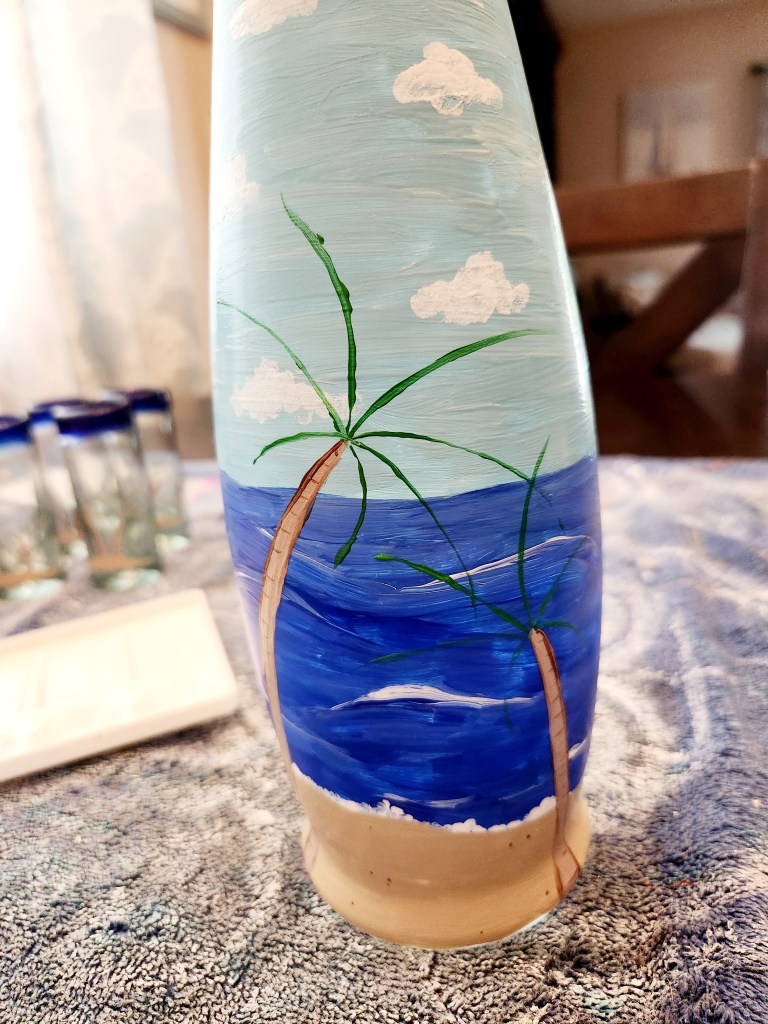
Step 8: Next up it’s the palm fronds. We are pretty much pros at painting palm trees at this point because we’ve done them so many times. They just signify relaxation and vacation! We start by painting some green lines where we want each individual limb to be. Then we paint wispy brush strokes to make the fronds. We used a combination of dark green, light green and beige to give them texture. We did the same thing to the shot glasses.
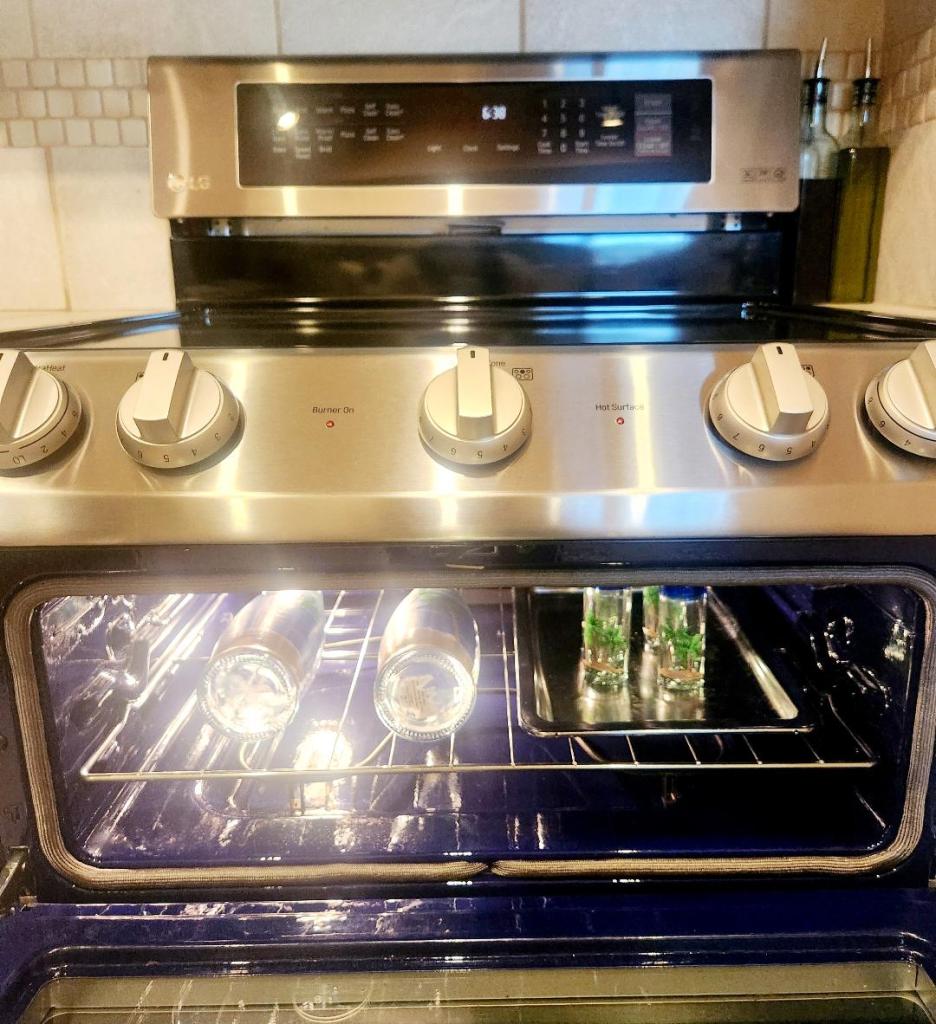
Step 9: Cure your paint. Once everything is good and dry you need to cure your painting. Follow the directions on your paint bottle. Ours says to bake at 350 degrees for 30 minutes. Place everything in a cool oven and heat to 350 degrees. Allow everything to cool in the oven and then remove. You could be done here or you could add some dishwasher safe mod podge over top of your paintings. This takes 28 days to fully cure before it’s top rack dishwasher safe.


Leave a comment