
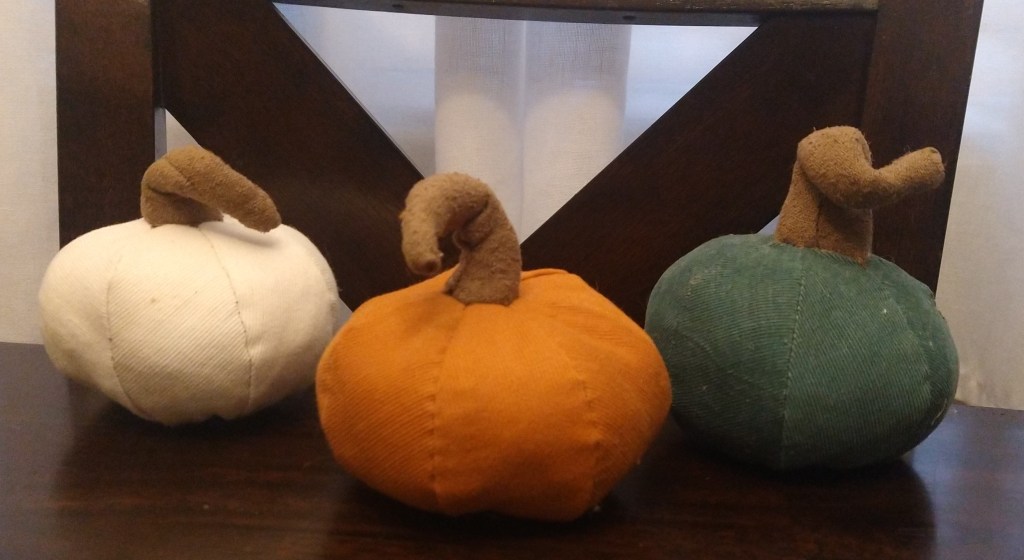
Happy Fall to All! This is definitely one of our favorite times of year. So of course we can’t help but decorate. Each year we tend to make a new pumpkin version. This year is no exception. Inspired by this fantastic corduroy type fabric we made this adorable trio of soft pumpkins with an adjustable stem. Bonus we have a variation on this to make the ridges deeper and the pumpkins pumpkinier.
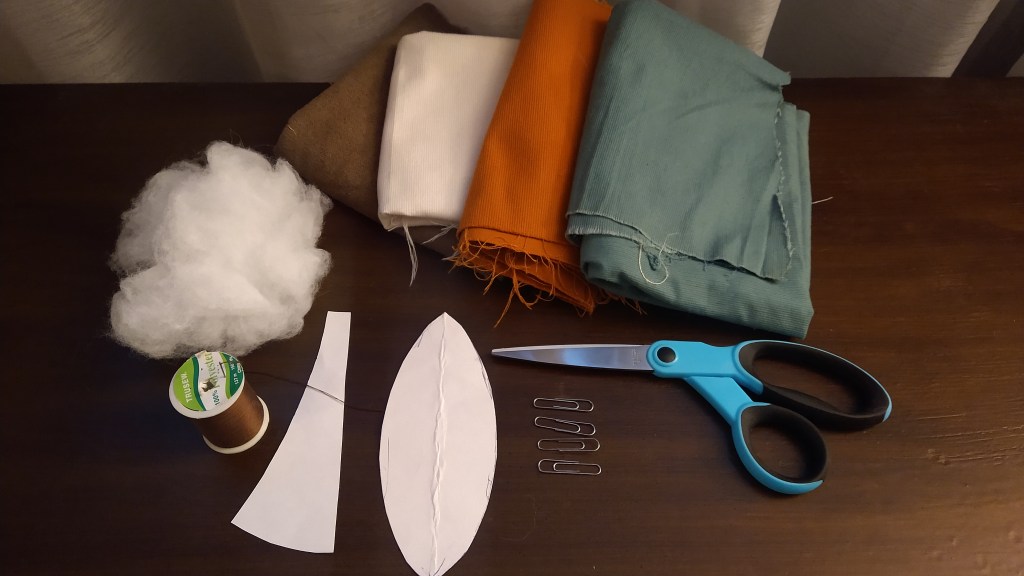
Step 1: Gather Supplies
- Fabric! Pretty much any fabric will work and you don’t need much.
- Stuffing. This could be anything from new polyfill to old pillow stuffing or old pieces of fabric/cloth cut up into small pieces.
- Paperclips
- Needle and thread
- Rigid paper like poster board or cereal box for stencils.
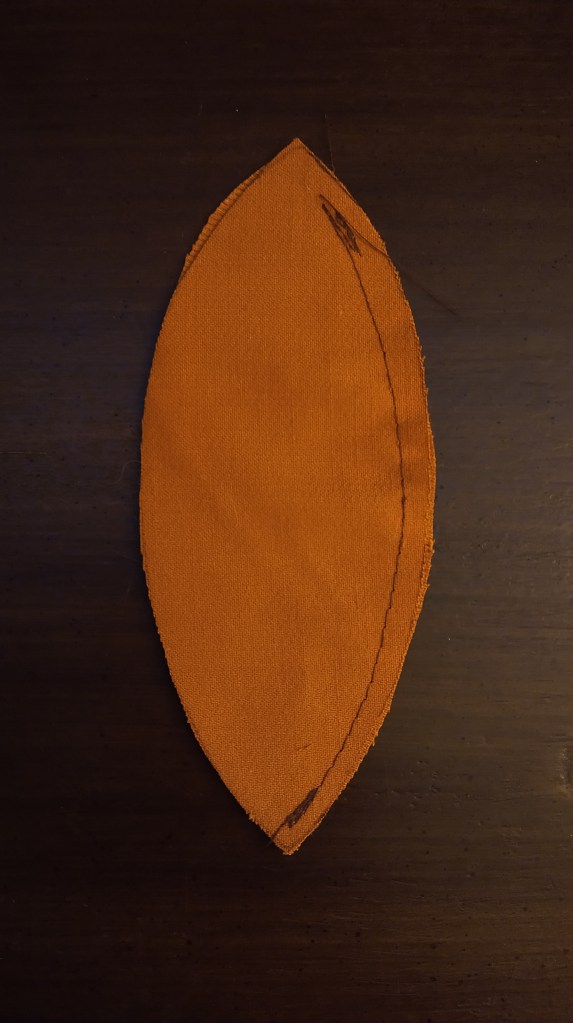
Step 2: Lets begin by making our stencils. We want a skinny football shape for the pumpkin pieces and and the stem is just a guide since we wanted each one to be a tad different. The stencils we used are approximately 6 x 2.5 inches for the pumpkin pieces and 5.5 x 2 inches cut on a fold for the stems.
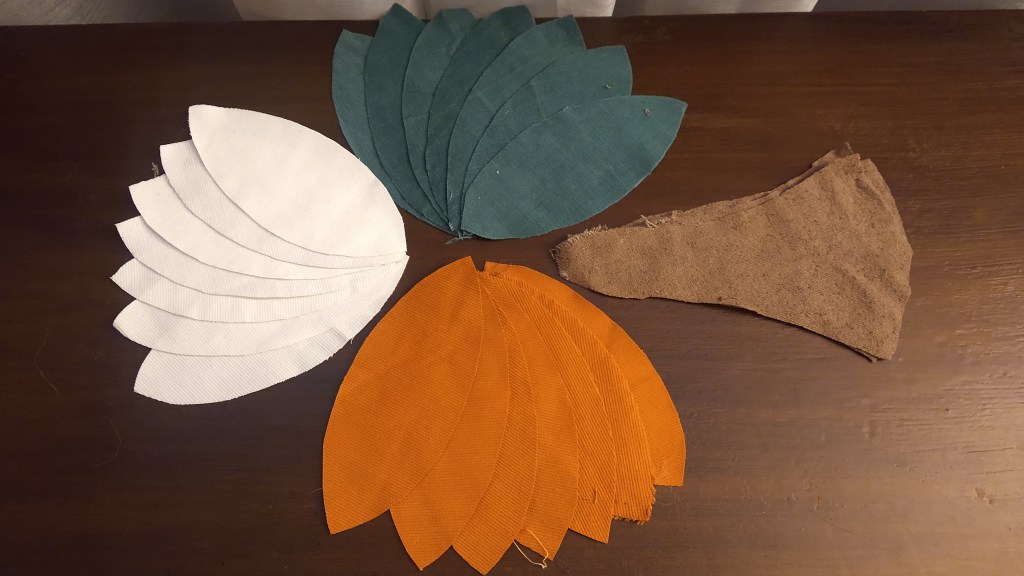
Step 3: Use your stencil to trace you pieces and cut out then out. You will need 7 pumpkin pieces and one stem per pumpkin. We didn’t need to pay attention to direction of fabric since ours had no stretch. If your fabric has stretch make sure that its perpendicular to the stencil. You want the stretch to go across the fat part to give a more dramatic pumpkin. When cutting out the stem don’t be afraid to make it way longer than your stencil to make them more dramatic.
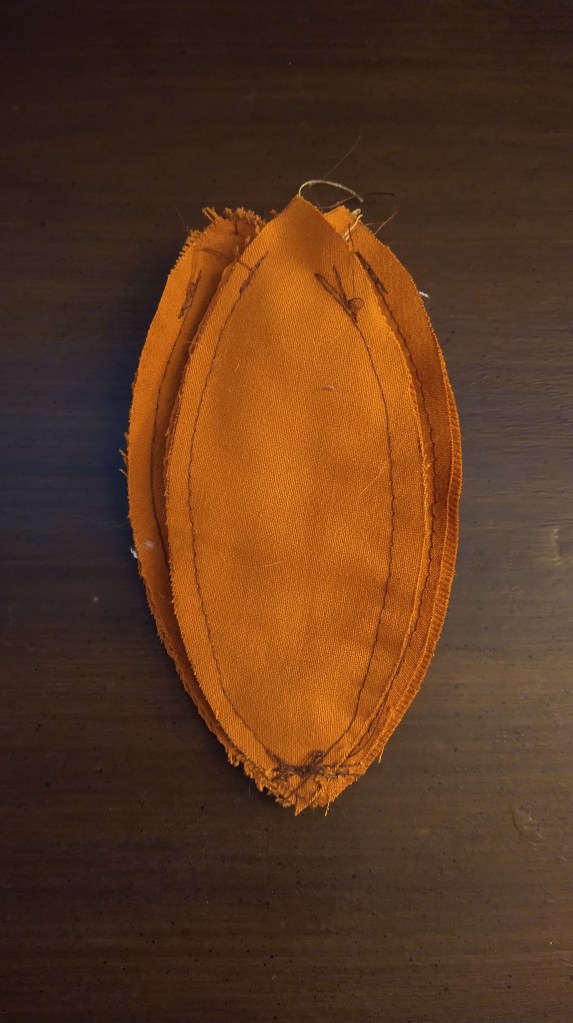
Step 4: Now we get to sew it all together. The pumpkin can seem tricky but don’t be fooled. We start with sewing two sections together at a time; with pretty sides together. When sewing them together, one end should have your stitches stop about a ¼ from the tip. Then sew the pieces together again with pretty sides together until you get all the way around making sure that all the ends with the with the slightly open ends are pointed the same direction. To make life easier moving forward make sure to REALLY secure the ends of your stitches. You don’t want them popping when you’re stuffing the pumpkins.
Step 5 : With the pumpkin still inside out, flatten it a little by tucking in the sections. Then sew a line across the bottom. We went a little a little wild and just back stitched back and forth a few times.
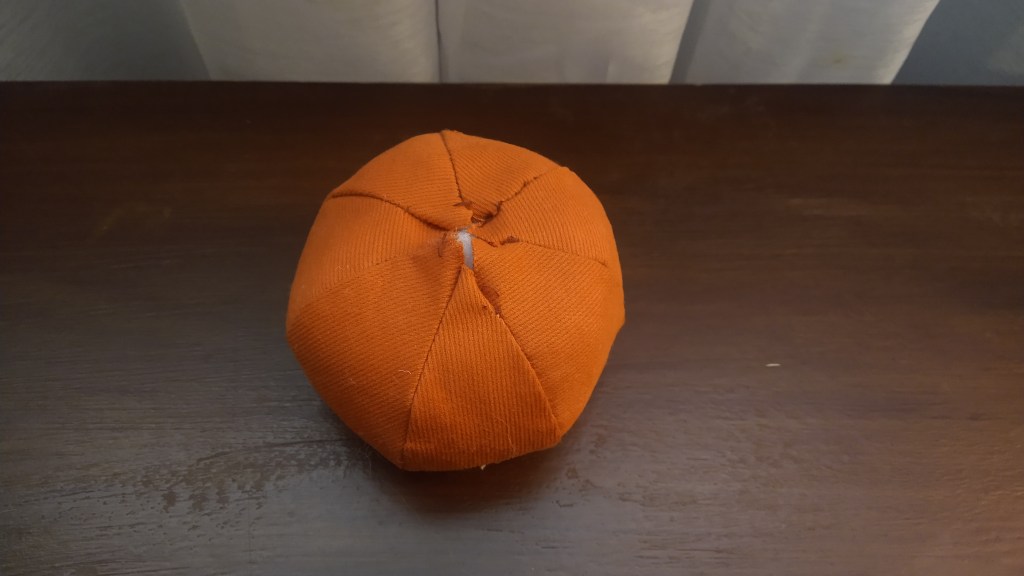
Step 6: Flip it inside out and get to stuffing with whatever you want to use. The firmer you stuff these the more they develop in shape.
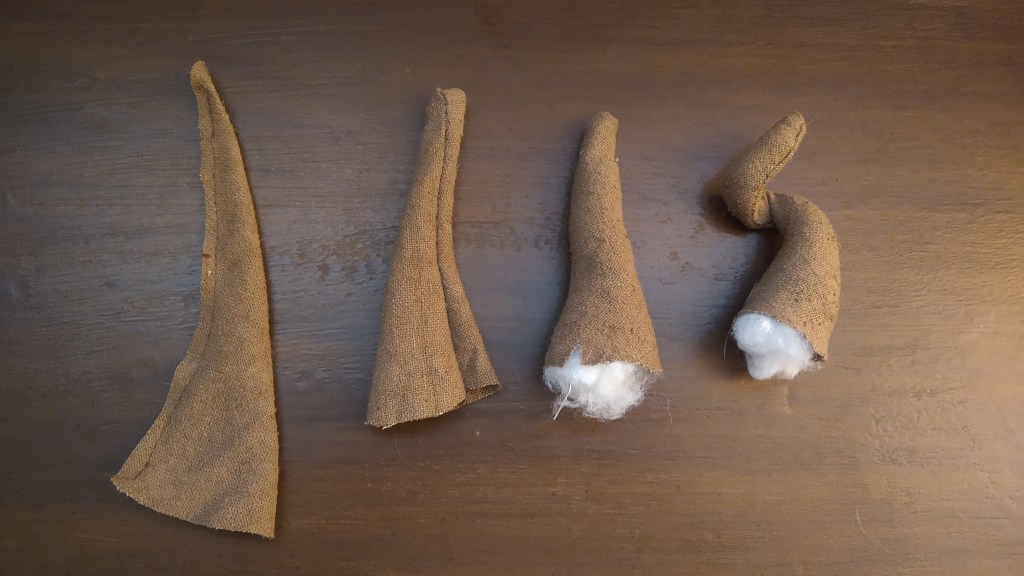
Step 7: Lets get the stems together. Simply sew it in half with pretty sides together and flip it right side out. Its totally normal to have a little bulge in the tip. Then we straighten out our paperclip and put it in the stem. Fill around the paperclip until you have the right look for your stem.
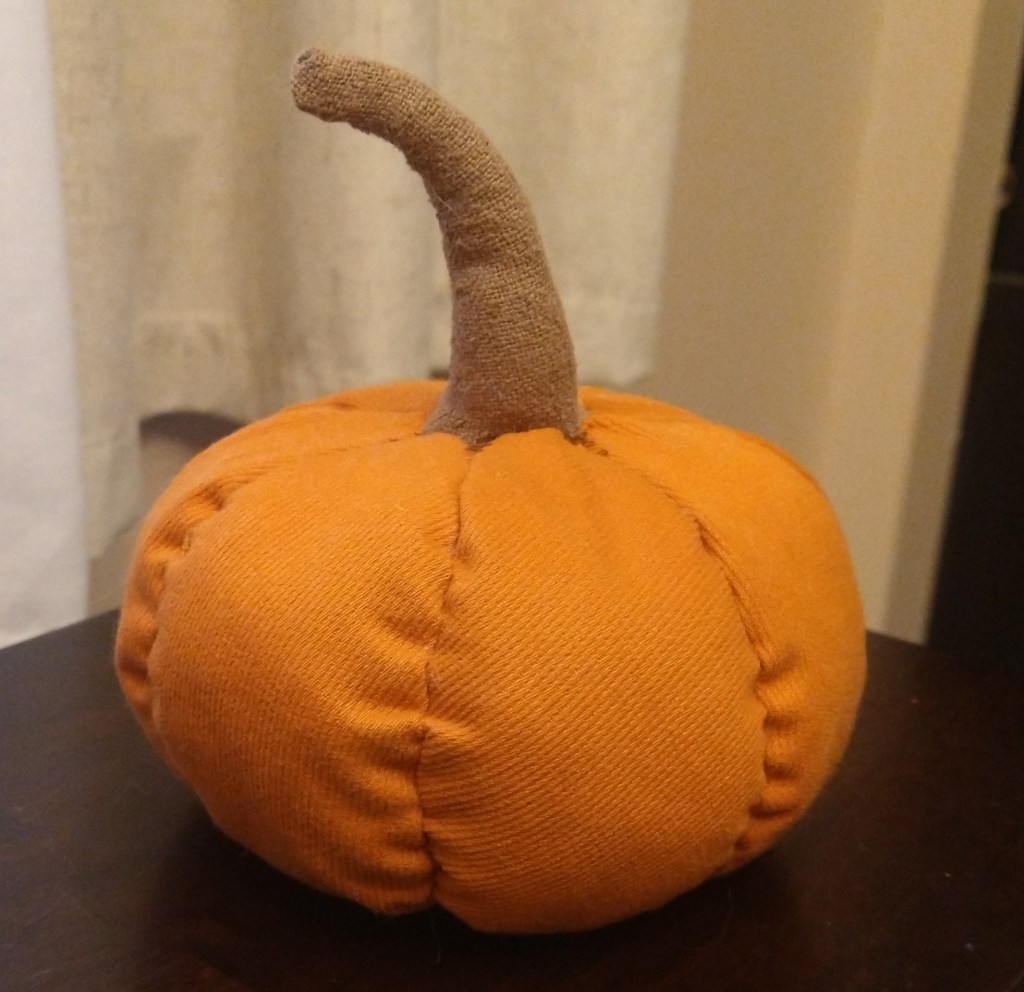
Step 8: Finally put the stem in the hole we left on the top of the pumpkin, making sure its in there enough to attach it properly with out anything extra fabric or stuffing sticking out. We can attach it with just some fabric glue and a steady hand. Or what we choose to do was simple hand sew some simple stitches to attach the stem into the groves of the pumpkin. If you use a thread similar to color of the stem it’ll blend right in.
*BONUS*
If you want to have deeper grooves where the pumpkin pieces meet there is a simple solution. When sewing your pieces together with the machine or by hand use a longer/ looser stitch. Secure one end very well and don’t backstitch or knot the other end that leaves a gap. Instead leave a long bit of thread. Once you flipped out your pumpkin you can gentle pull the strings and make the groves as deep or gentle as you want. It can help by filling it a little to see how dramatic they look. When you have then how you want it just secure the ends or the thread by hand a continue like regular. This is definitely more persnickety but also pretty fabulous!
There you have your happy and festive little pumpkins. In our case pumpkin trio. This is definitely one of our favorite pumpkin creations to date. It was pretty quick and use very little material. Everything ( except thread and paperclips ) was scraps from something else which made it even better and a practically free project. Hope you guys love them and happy fall our crafty friends.


Leave a comment