
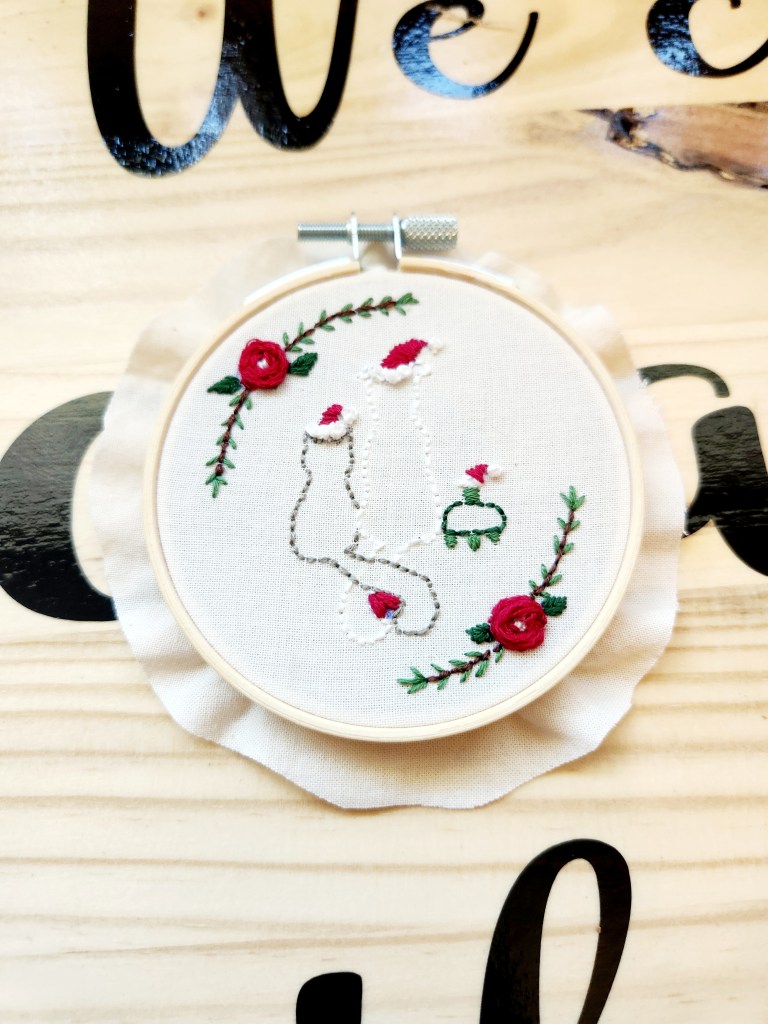
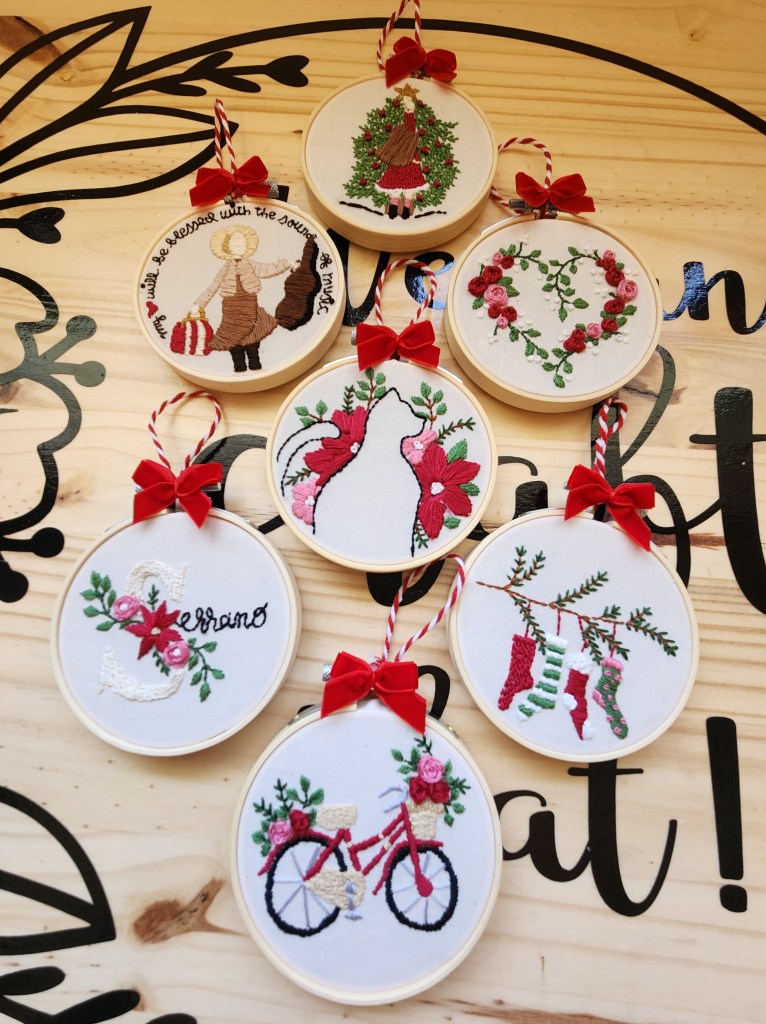
Christmas has always been our absolute favorite holiday. We start brainstorming and making homemade gifts for our friends and family basically right after Christmas is over. This year has been the year of learning to embroider! So, these adorably festive and completely customizable embroidered Christmas ornaments were a natural fit.
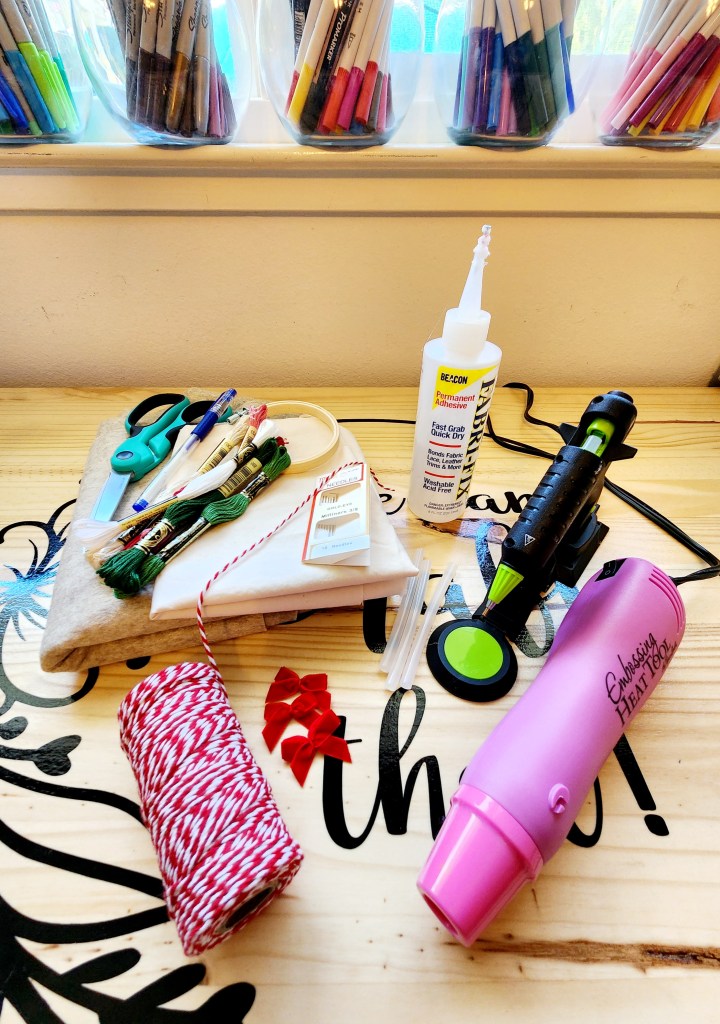
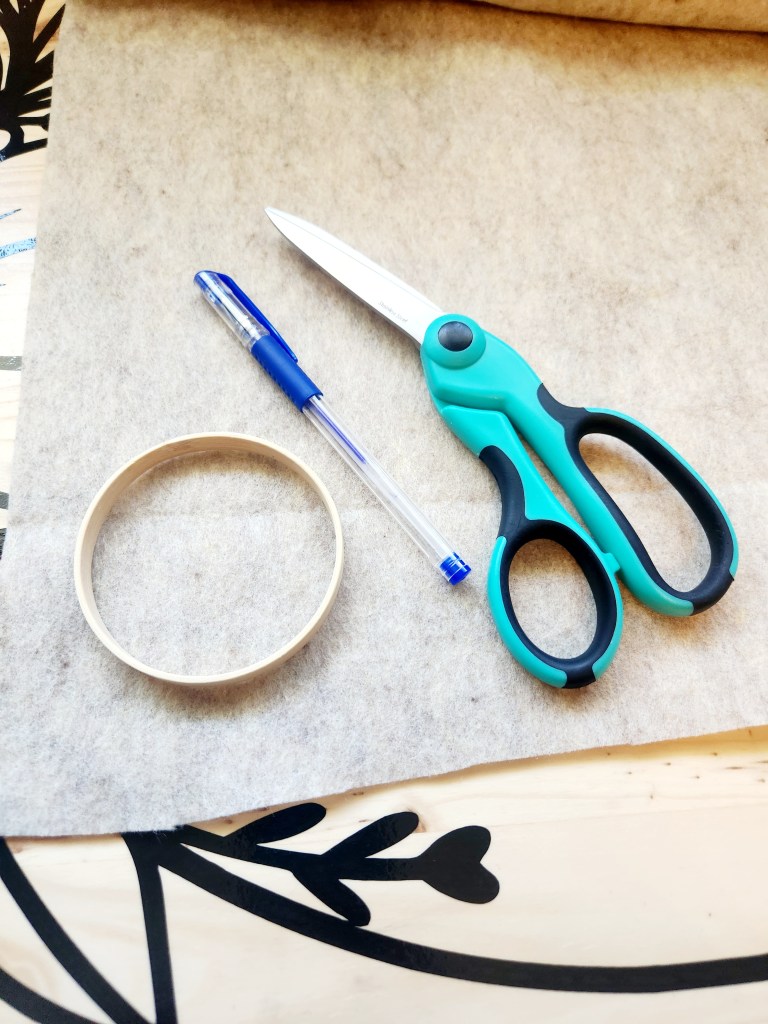
Step 1: Gather your supplies:
-Fabric of your choice. You can really go with any color you’d like. We went with a cream cotton fabric so that the embroidery would be the star of the show.
-Felt of your choice. We went with a color that matched our fabric for a cleaner look but you could do a contrasting color for a nice pop. A green or red red would be an adorable choice.
-Embroidery hoops. We chose a 3” hoop because these are going on smaller Christmas trees. But, you could use whatever size you’d like.
-Embroidery floss and needles
-Hot glue gun
-Fabric glue
-Heat erase pens ( ours came from Amazon)
-String or twine
-Fabric shears or scissors ( trust us fabric shears will change your life!)
-Decorative bows ( ours came from Amazon) these are optional
-Heat gun or hair dryer
Step 2: Cut your fabric to size. You want to make sure your fabric square is big enough to cover your embroidery hoop with some excess on all sides. We cut ours to 5” x 6” for a 3” embroidery hoop.
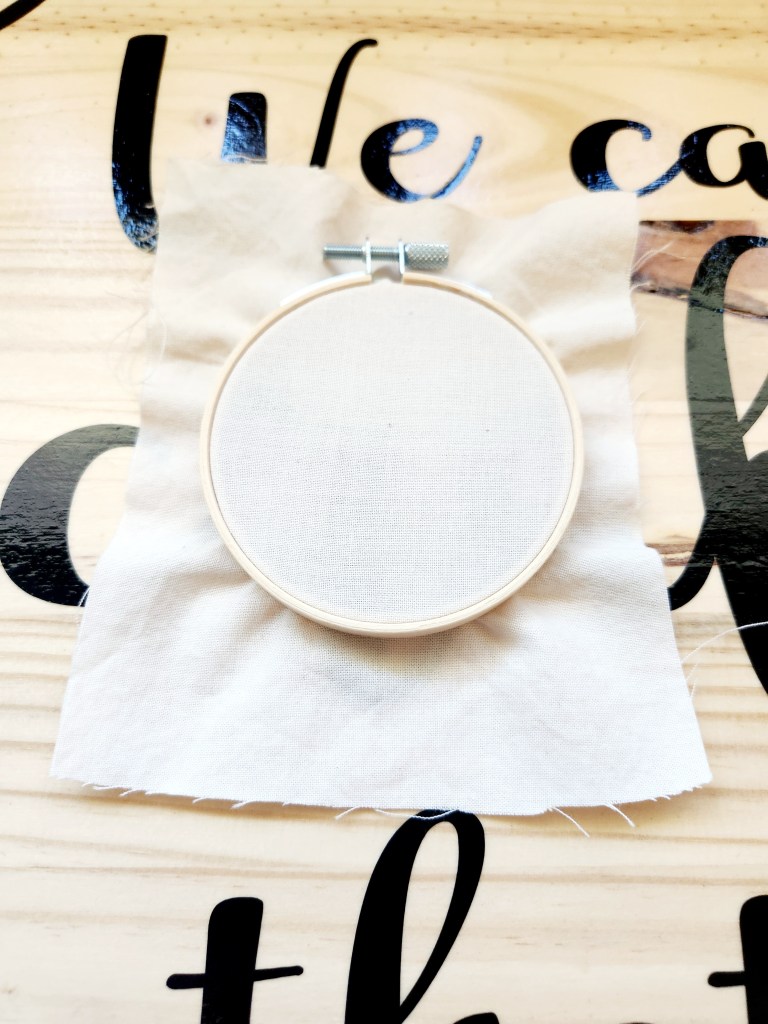
Step 3: Put your hoop on your fabric square. Tighten it down until your fabric is tight in the hoop. Use the sides of your fabric to gently pull until it’s the desired tightness.
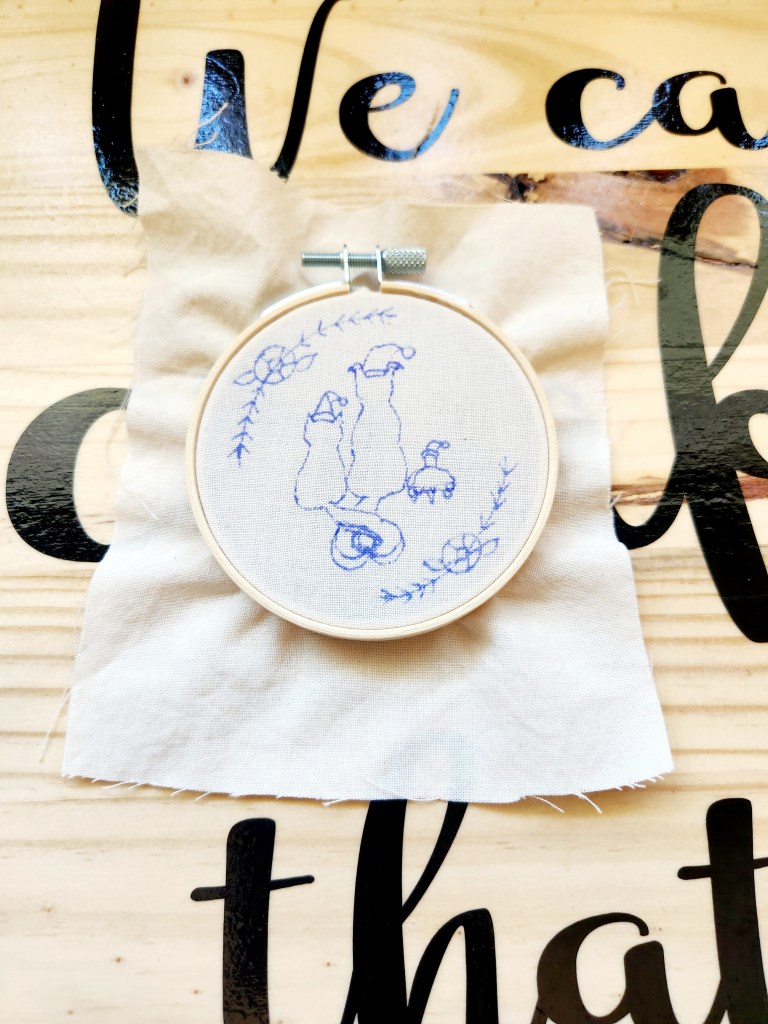
Step 4: Use your heat erase pens to draw your design ( you could certainly use a regular pen for this but these heat erase pens ensure that you won’t see any pen marks once your finished.)
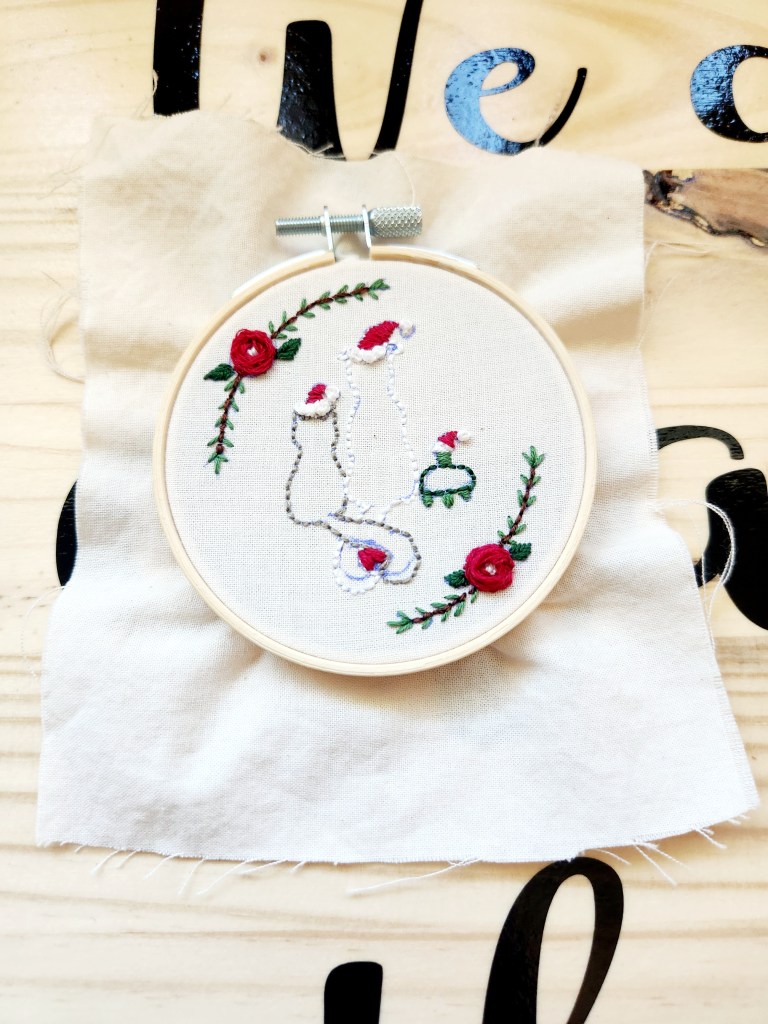
Step 5: Get your embroidery on! We aren’t experts at this by any stretch of the imagination but we enjoy it and that’s what matters right? We watched many online tutorials ( there are so many fabulous resources out there ) and practiced a bunch until we were confident enough in our skills that at least our ornaments would come out cute!
Step 6: Erase the pen. You can either use a hair dryer or a heat gun. We prefer a heat gun because it’s quicker. We appreciate any little short cut.
Step 7: Trim the extra fabric. Make sure you leave about an inch of fabric around the hoop so you can glue it to finish off the back.
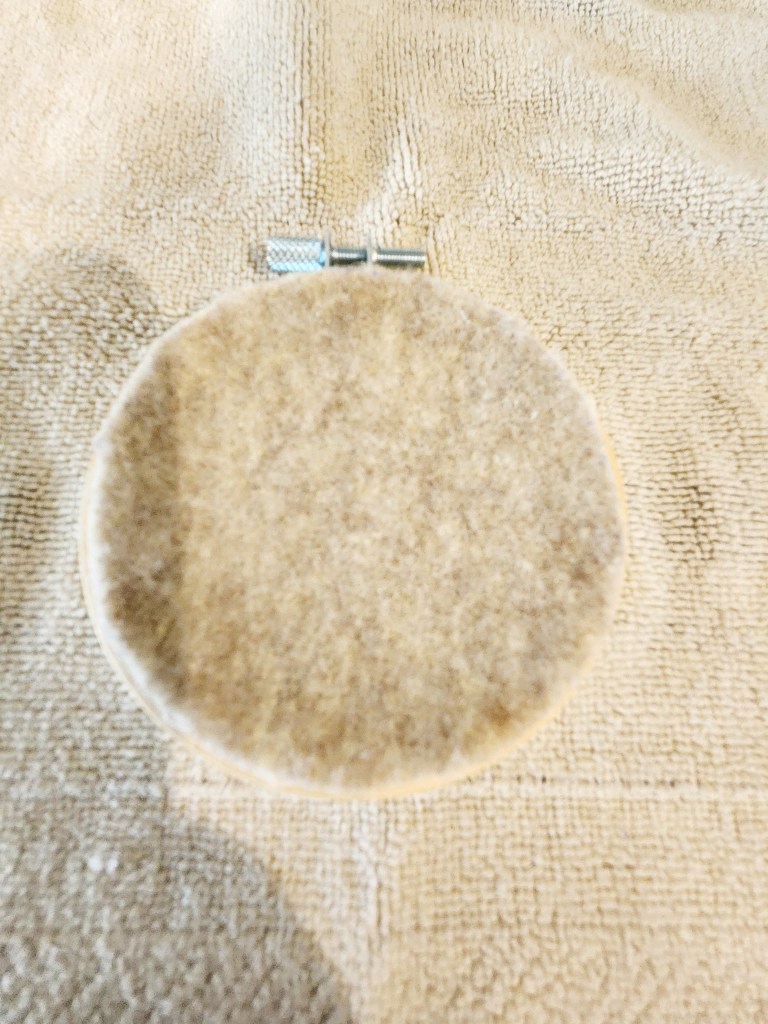
Step 8: Cut out a round piece of felt to cover the back of your embroidery design. Use the inside hoop of your embroidery hoop to trace to get the correct size to fit your ornament ( it helps to have more than one embroidery hoop but you could just remove it and then put it back on after you’ve traced everything). You will also need a second round of felt to finish it off. We used the inside of the outer part of the embroidery hoop to trace.
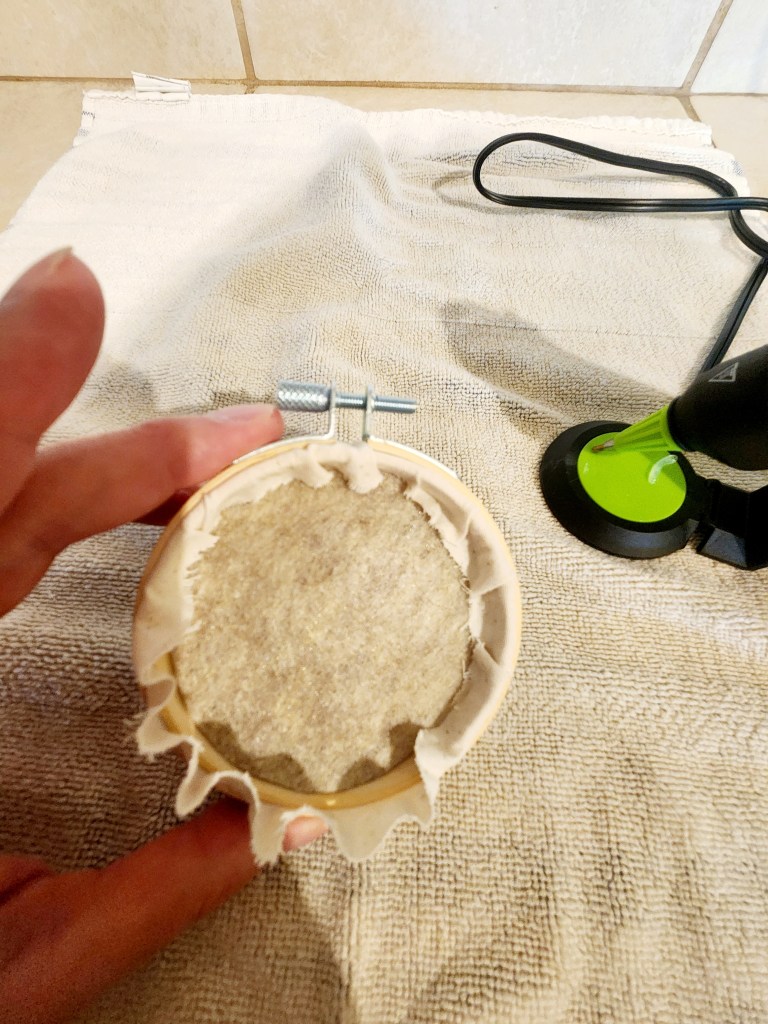
Step 9: Lay the smaller of the two felt circles inside the back of your embroidery hoop to cover your embroidery design. There’s no need to glue it down, it will be completely covered once your through. Go around the edges of your fabric and carefully glue it to the rim of your embroidery hoop using a small amount of hot glue.
Step 10: Using the larger felt circle cover the back of the ornament. We used fabric glue for this step because your going fabric to felt but hot glue would work too.
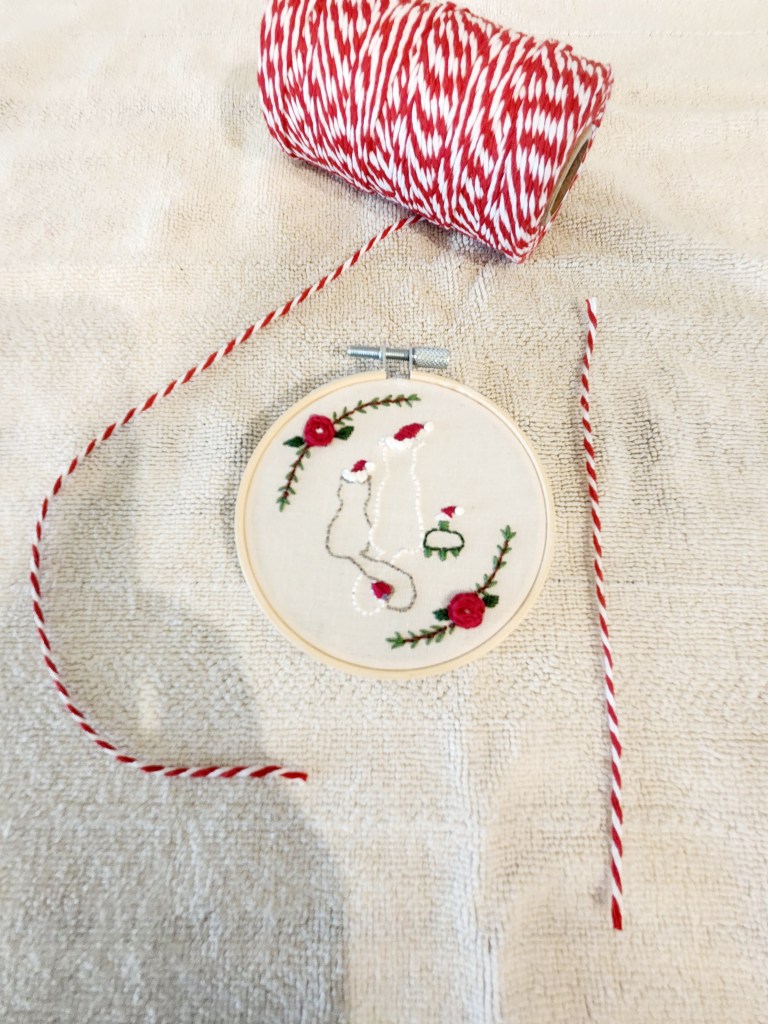
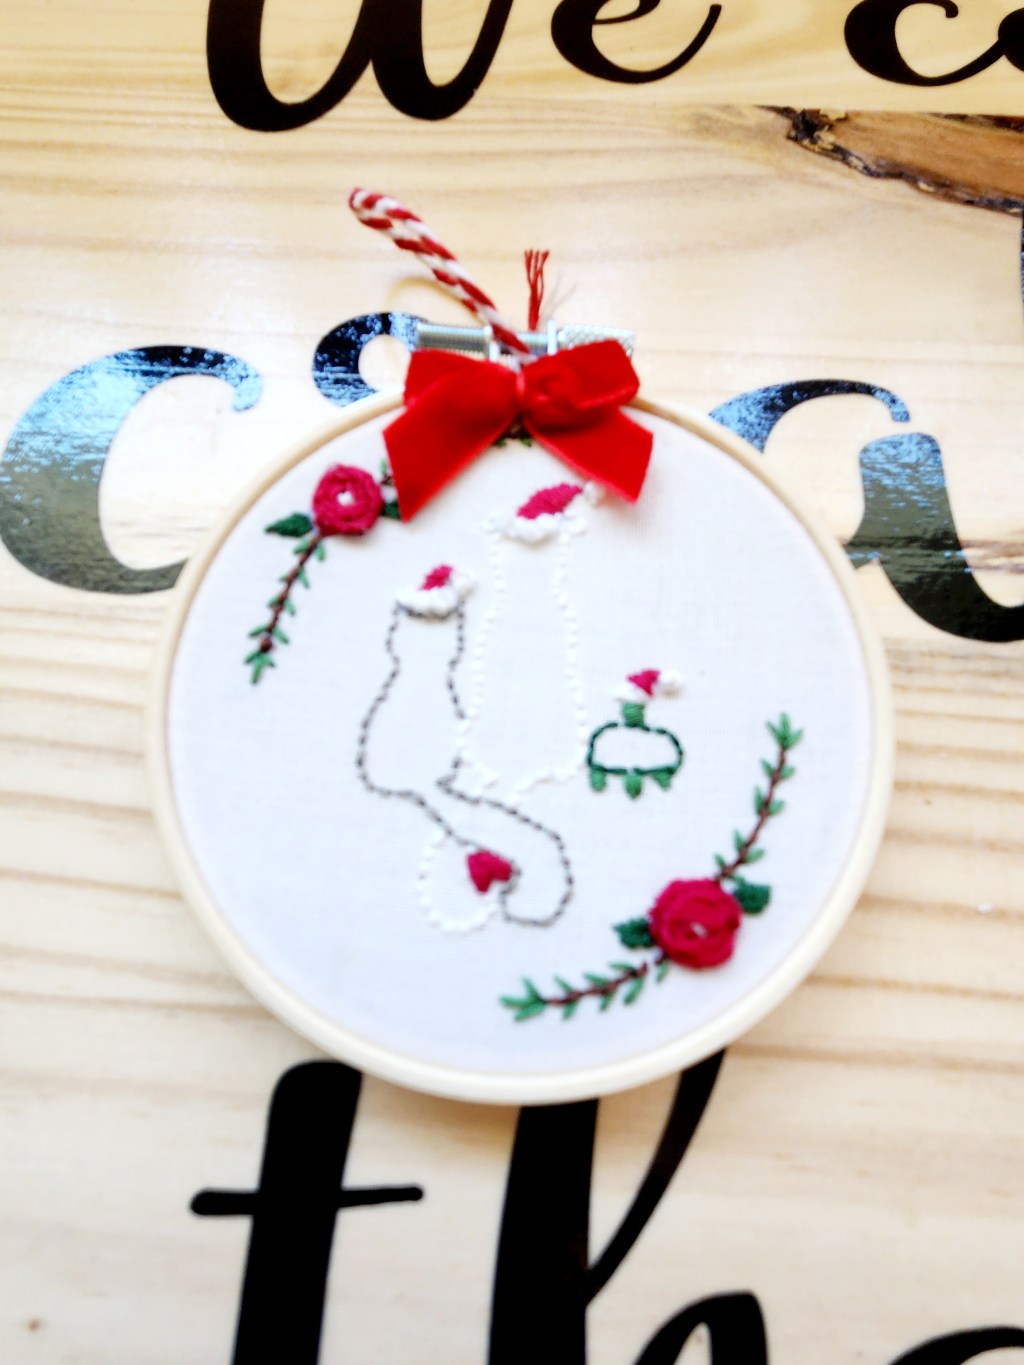
Step 11: Add your ornament hanger. We used some decorative cotton string we had from a previous craft project. You could use any ribbon you’d like. You could also use a metal ornament hanger or even some jute string. It depends on the look your going for.
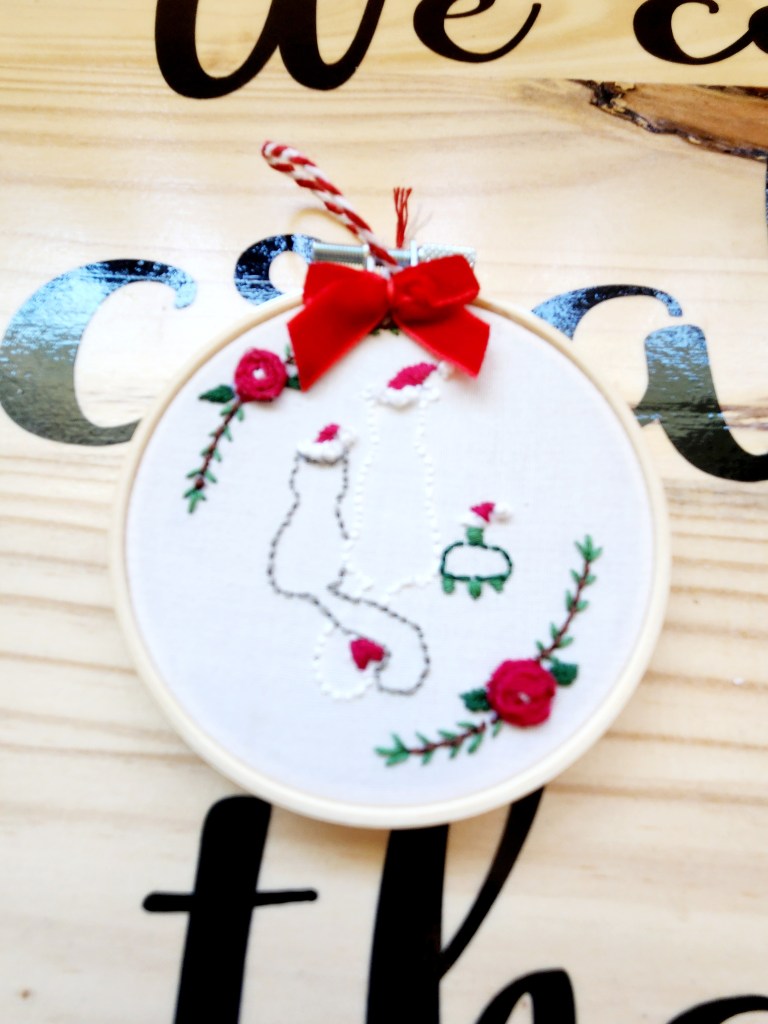
Step 12: This step is completely optional but were extra! We added some cute little velvet red bows to the front of our ornaments using a small amount of hot glue. We just thought it added an extra level of Christmas cheer!
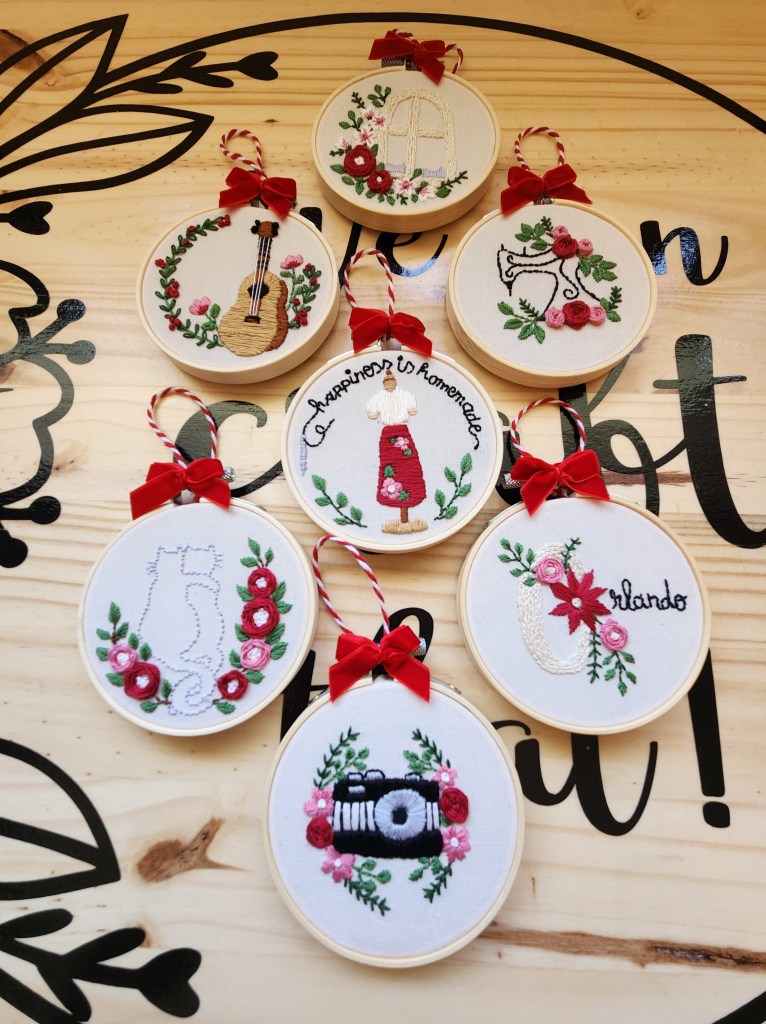
These embroidered Christmas ornaments are so fun to make! We wanted to make 1,000 of them but we do have other projects to work on. They come together pretty quickly and are so stinking adorable! Whether you like the rustic charm of a Christmas cabin or the glitz and glam of a winter wonderland these can be made to fit anyone’s holiday style.


Leave a reply to Christmas Tree in a Box – We Can Craft That Cancel reply