
Hut, hut, hike! That’s what the football players say right? If it isn’t obvious we know very little about football. But, we do have some experience using resin! This is a resin bookmark that was made to accompany a San Francisco 49ers book pillow we made for a family member ( check it out on our blog under sewing)
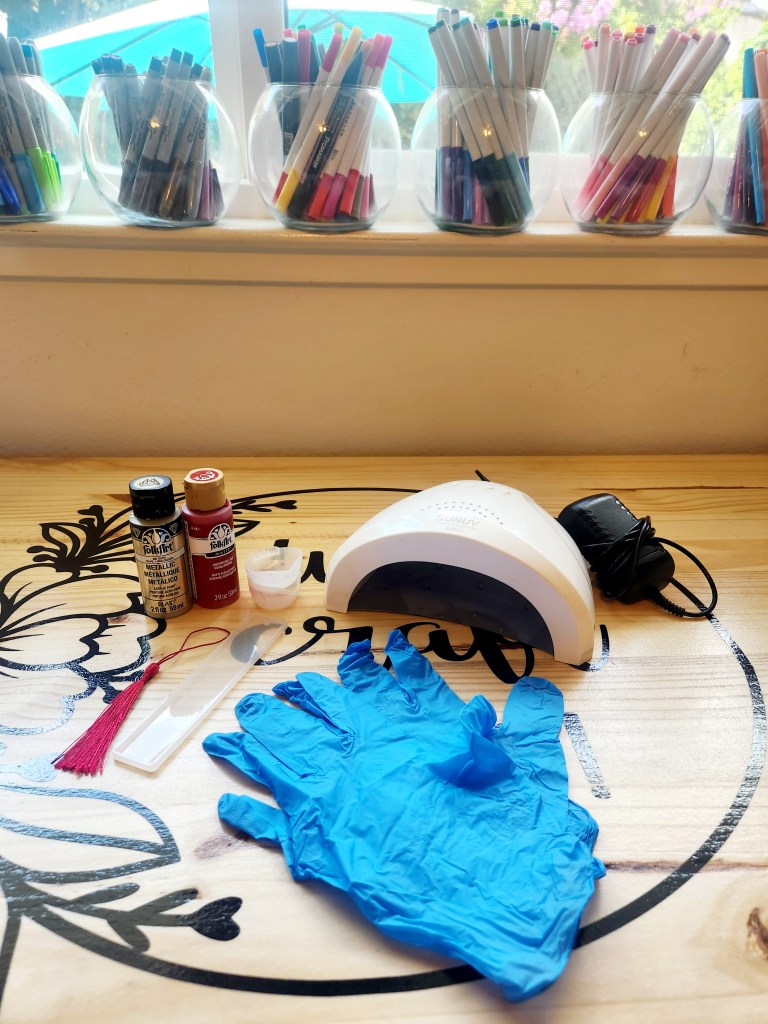
Step 1: Gather your supplies:
–UV resin ( ours was purchased on Amazon)
–UV light ( also purchased on Amazon)
-gloves
–Bookmark mold ( another Amazon purchase) it came with an assortment of decorative tassels
-Acrylic paints and/ or glitter
-Stickers ( optional)
This post contains affiliate links, which means we may earn a commission if you click through and make a purchase at no extra cost to you.

Step 2: Make sure you do all resin projects in a well ventilated area, the fumes kind of creep up on you. Make your colors by adding some resin to one of your mixing cups ( ours came with the resin) along with a tiny drop of acrylic paint. You need the smallest amount of paint so we used a toothpick to get some out of the paint tube. Mix them together with a toothpick or the mixing tool that came with your resin. You could also mix in some glitter to add a little bling to your bookmark. We didn’t want to on this particular one but we’ve done it to others and it looks adorable! We are using red and gold for this so we did one cup for each color.
Step 3: Pour your resin into your mold we wanted a swirled effect with the gold so we poured the red down first and swirled the gold in after. Using our mixing tool we moved the gold around until we liked the way it looked. The resin will not cure until it’s under the UV light so you have a little time to do this. If there are any bubbles in your resin you can carefully use a lighter to pop the bubbles by hovering the lighter over the resin.
Step 4: Drop in any mix-ins. We added in some tiny gold balls ( they are actually intended for nail art but they happen to work well for this). They sell lots of cute mix-ins for resin. We’ve even used sand from the beach and mini seashells which looks stinking adorable! Make sure your resin has reached all the corners of your mold by moving it around with your mixing tool.
Step 5: Cure your resin. Carefully move your resin mold full of resin under your UV light and press the 60 second button ( each UV resin is slightly different so follow the directions on your resin). Ours takes three rounds at 60 seconds on each side to cure. Sometimes we leave it in for an extra 60 seconds for good measure. It will be tacky if it isn’t cured all the way. Once the front is cured take it out of the mold and repeat the process on the back.

Step 6: If you think your bookmark is too thin or there is any unwanted texture you can add another layer of resin to your bookmark. There’s no need to put it back in the mold for this. Just use some clear resin and place it directly on the bookmark. Make sure you cover the entire surface with resin and don’t just spot treat or your bookmark won’t be even. You can also lightly sand any rough edges.
Step 7: Add your tassel ( ours came with the bookmark mold).
Step 8: Add any other details. We chose to add some 49ers stickers to the front of the bookmark to make it match the book pillow. But, you could add anything you’d like. Perhaps the persons name or initials?

Now your resin bookmark is finished! This project is relatively simple once you get the hang out of resin. It’s a little intimidating at first but once you figure it out you’ll want to make resin everything! These make wonderful gifts for the lover of books in your life!


Leave a Reply