
Have a Pokémon lover in your life? We do too! This project is inspired by a little girl that loves Pokémon and her animals. It is shockingly easy to make these thanks to a website that practically does all the work for you, pokecardmaker.org. We aren’t affiliated with them at all. It is a free site and super easy to use. Once we found this we went a little crazy and made them up for random animals as well just for fun. These make a great gift for your young and young at heart Pokémon lovers. Lets make some personalized Pokemon cards!

Step 1: Gather your supplies:
- Images of the animals
- Printable sticker paper
- Photo paper
- Laminate for stickers
- Scissors
- Ink jet Printer ( We each have the same Epson Ecotank printer. We highly recommend getting one if you do printing on a regular basis. The higher upfront cost pays for itself with how cheap the ink is and it last forever with a great quality prints.)
- Printer paper
- Glue stick or double sided tape
- Cricut ( Not needed)
This post contains affiliate links, which means we may earn a commission if you click through and make a purchase at no extra cost to you.

Step 2: Design your Pokemon cards. That’s sort of the point of personalized Pokemon cards. We really encourage using the pokecardmaker.org website but you can totally do it on your own if you are good with editing software. We removed the background from some pictures to add a new background that made more sense for the scene. For the rest of the information needed we just looked up common Pokemon abilities / stats and made it up from there.
Step 3: Find an image of the back of a Pokemon card or make your own. We want to make sure these look real in the end.
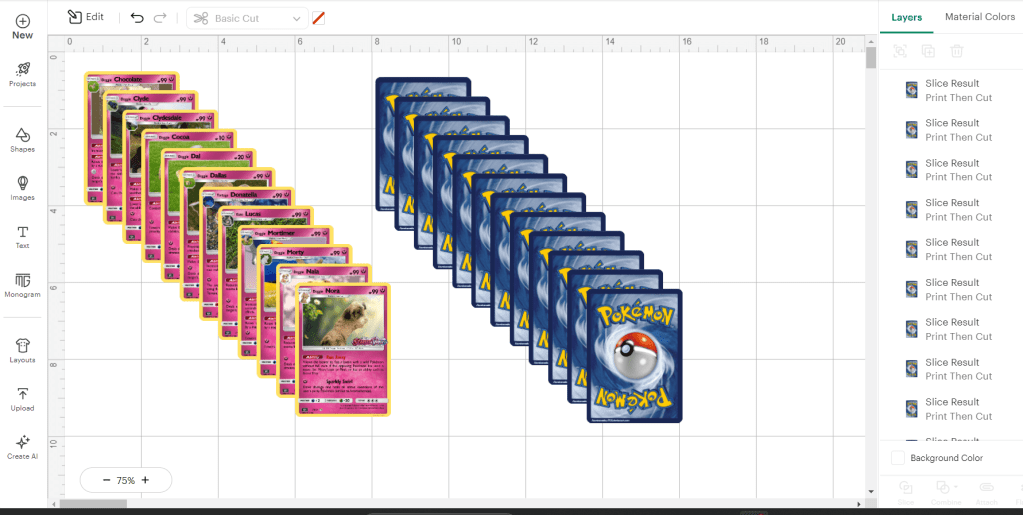
Step 4: Next, we used the cricut to do the cutting and sizing but its not at all necessary. Upload the images to format them to the correct size. This can also be done in a word program. The size of a Pokemon card is 2.5 x 3.5 inches.
Step 5: We are going to print the fronts on the photo paper and an equal number of backs on the sticker paper. The optional step here is to make it more durable and UV resistant but using a clear sticker laminate over the printed images. The cards have a remarkably similar weight to the regular cards if you use the laminate.

Step 6: Next up cut out the fronts and back of the cards. Again this can be done by hand but the Cricut made it much easier and more accurate.


Step 7: Attach the backs to the fronts and you have a super cute bunch of pokemon cards.
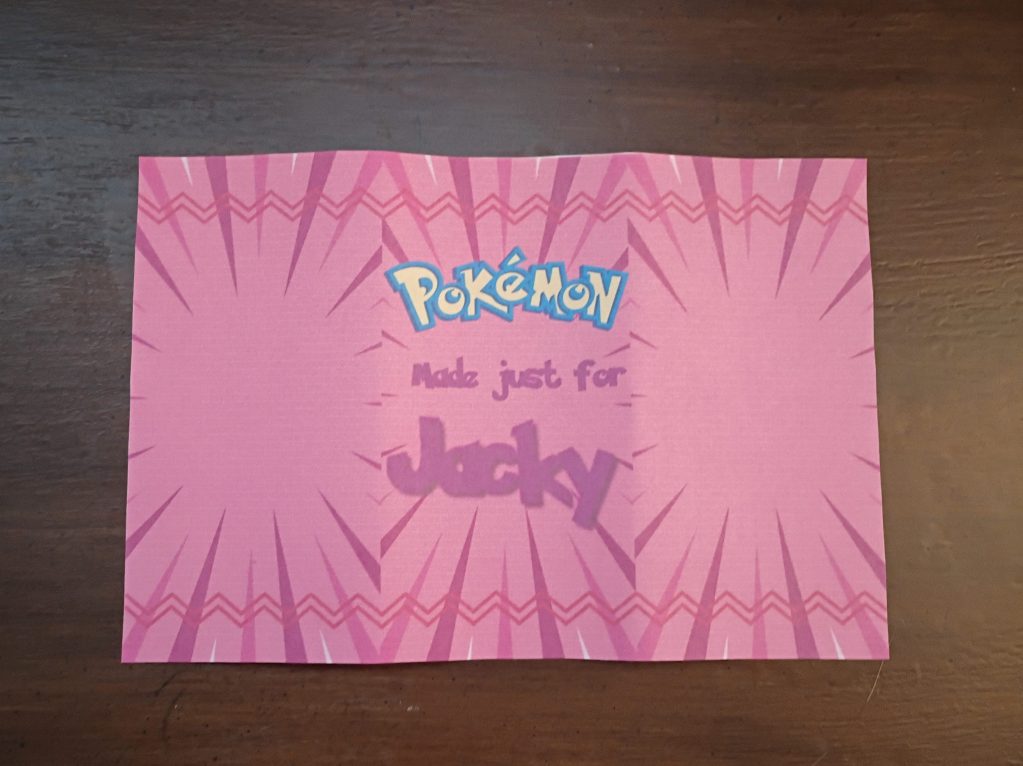
Step 8: To make the wrapper for them just go to a program like canva and design a image of what you want the wrap to look like all the way around. Make the front the exact middle though. There are free pokemon font generaters online so you can make personalized messages. We made the wrapper to be 7.5 x 5.25 inches. That should work for about 12 cards.
Step 9: Print the wrapper on just some plain paper or whatever you have around. Printer paper works well because it easier to rip open than something like cardstock.
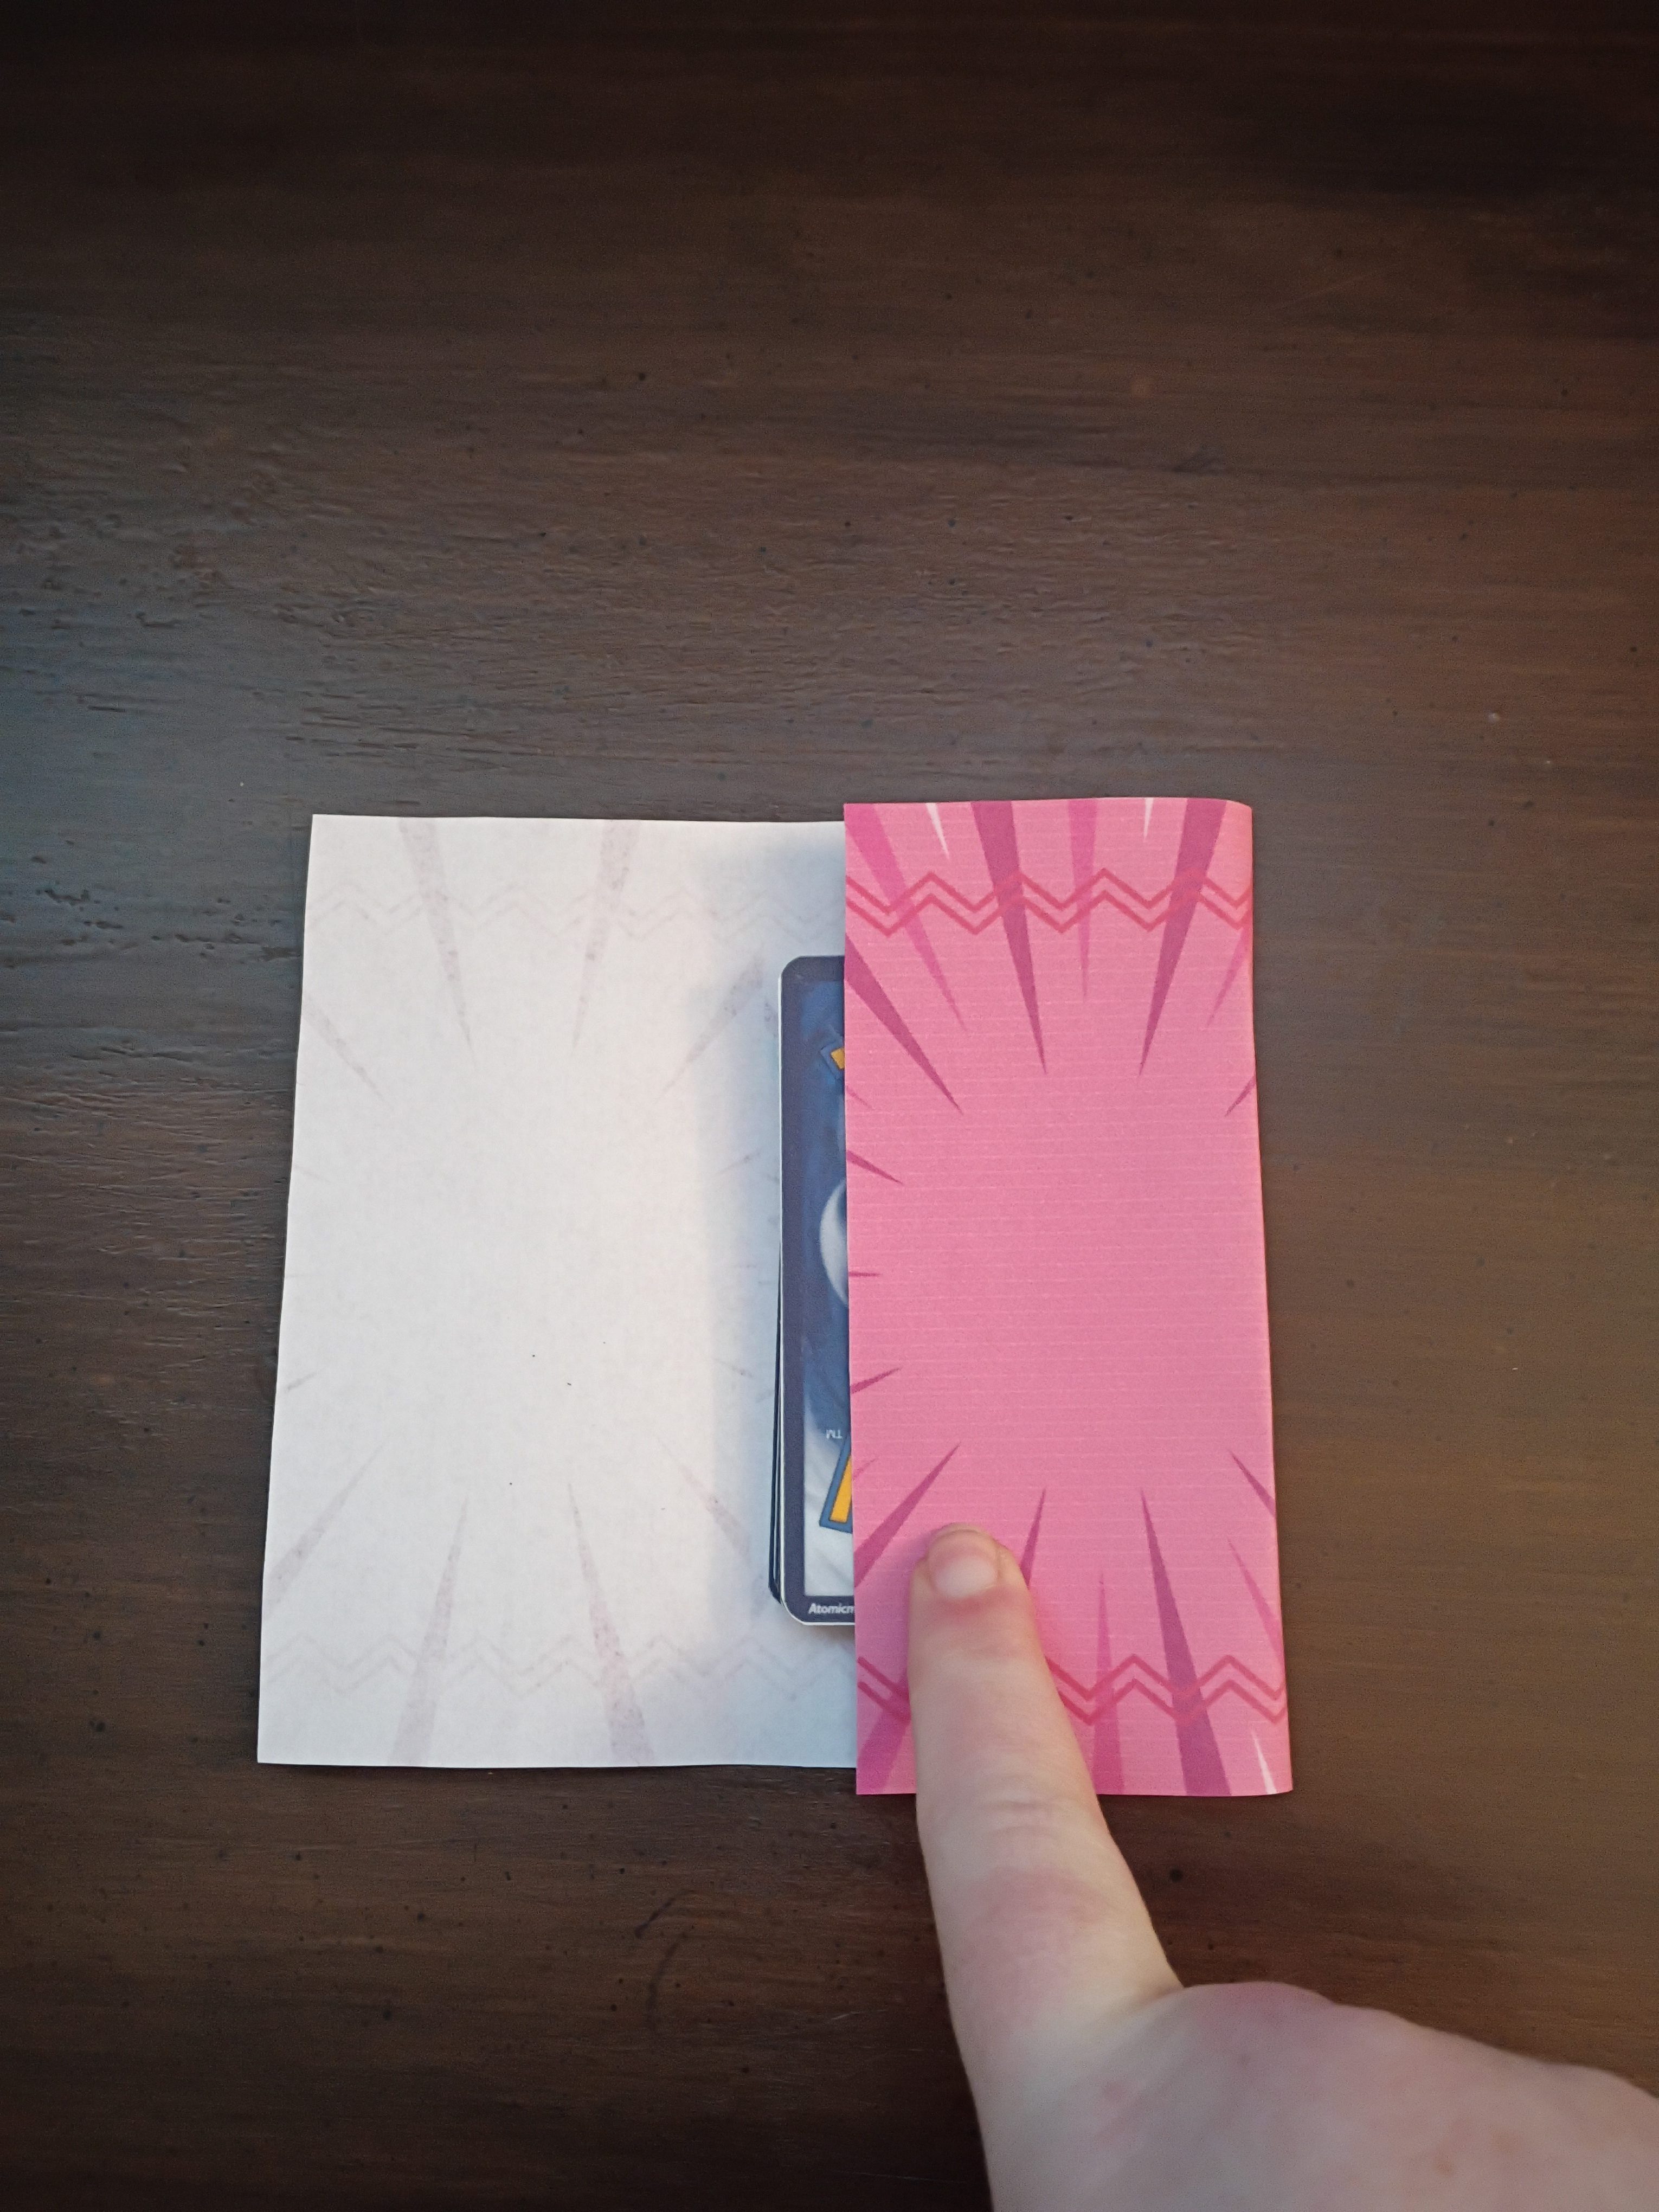
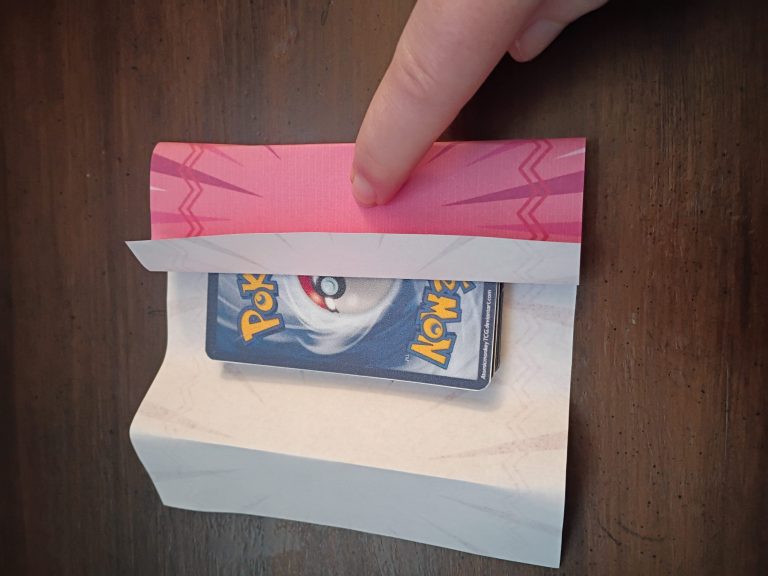
Step 10: Stack up your cards and place them in the middle of the face down wrap. Fold one side around to the back making sure to make a bit of a crease around the edge. Then fold that flap back just enough so that the edge is about in the middle of the card. Now fold the other side in and use your glue stick to seal it. Use you glue stick on either end of the packet and pinch them to seal them shut.

Step 11: Lastly we can trim down the excess paper on the back seam and if you want you can use scissors to make a little zigzag edge on each end of the wrapper to add to the authenticity.

After all that you now have an adorable pack of DIY “pokemon” cards. These are such a fun gift and making them is so fun too. Planning which animal gets the “Thick Fat” or “Quick Feet” attack was hilarious even for the non fans. Have fun making them all and leave us a comment on how it went making your very own personalized Pokemon cards! Happy Crafting!




Leave a Reply